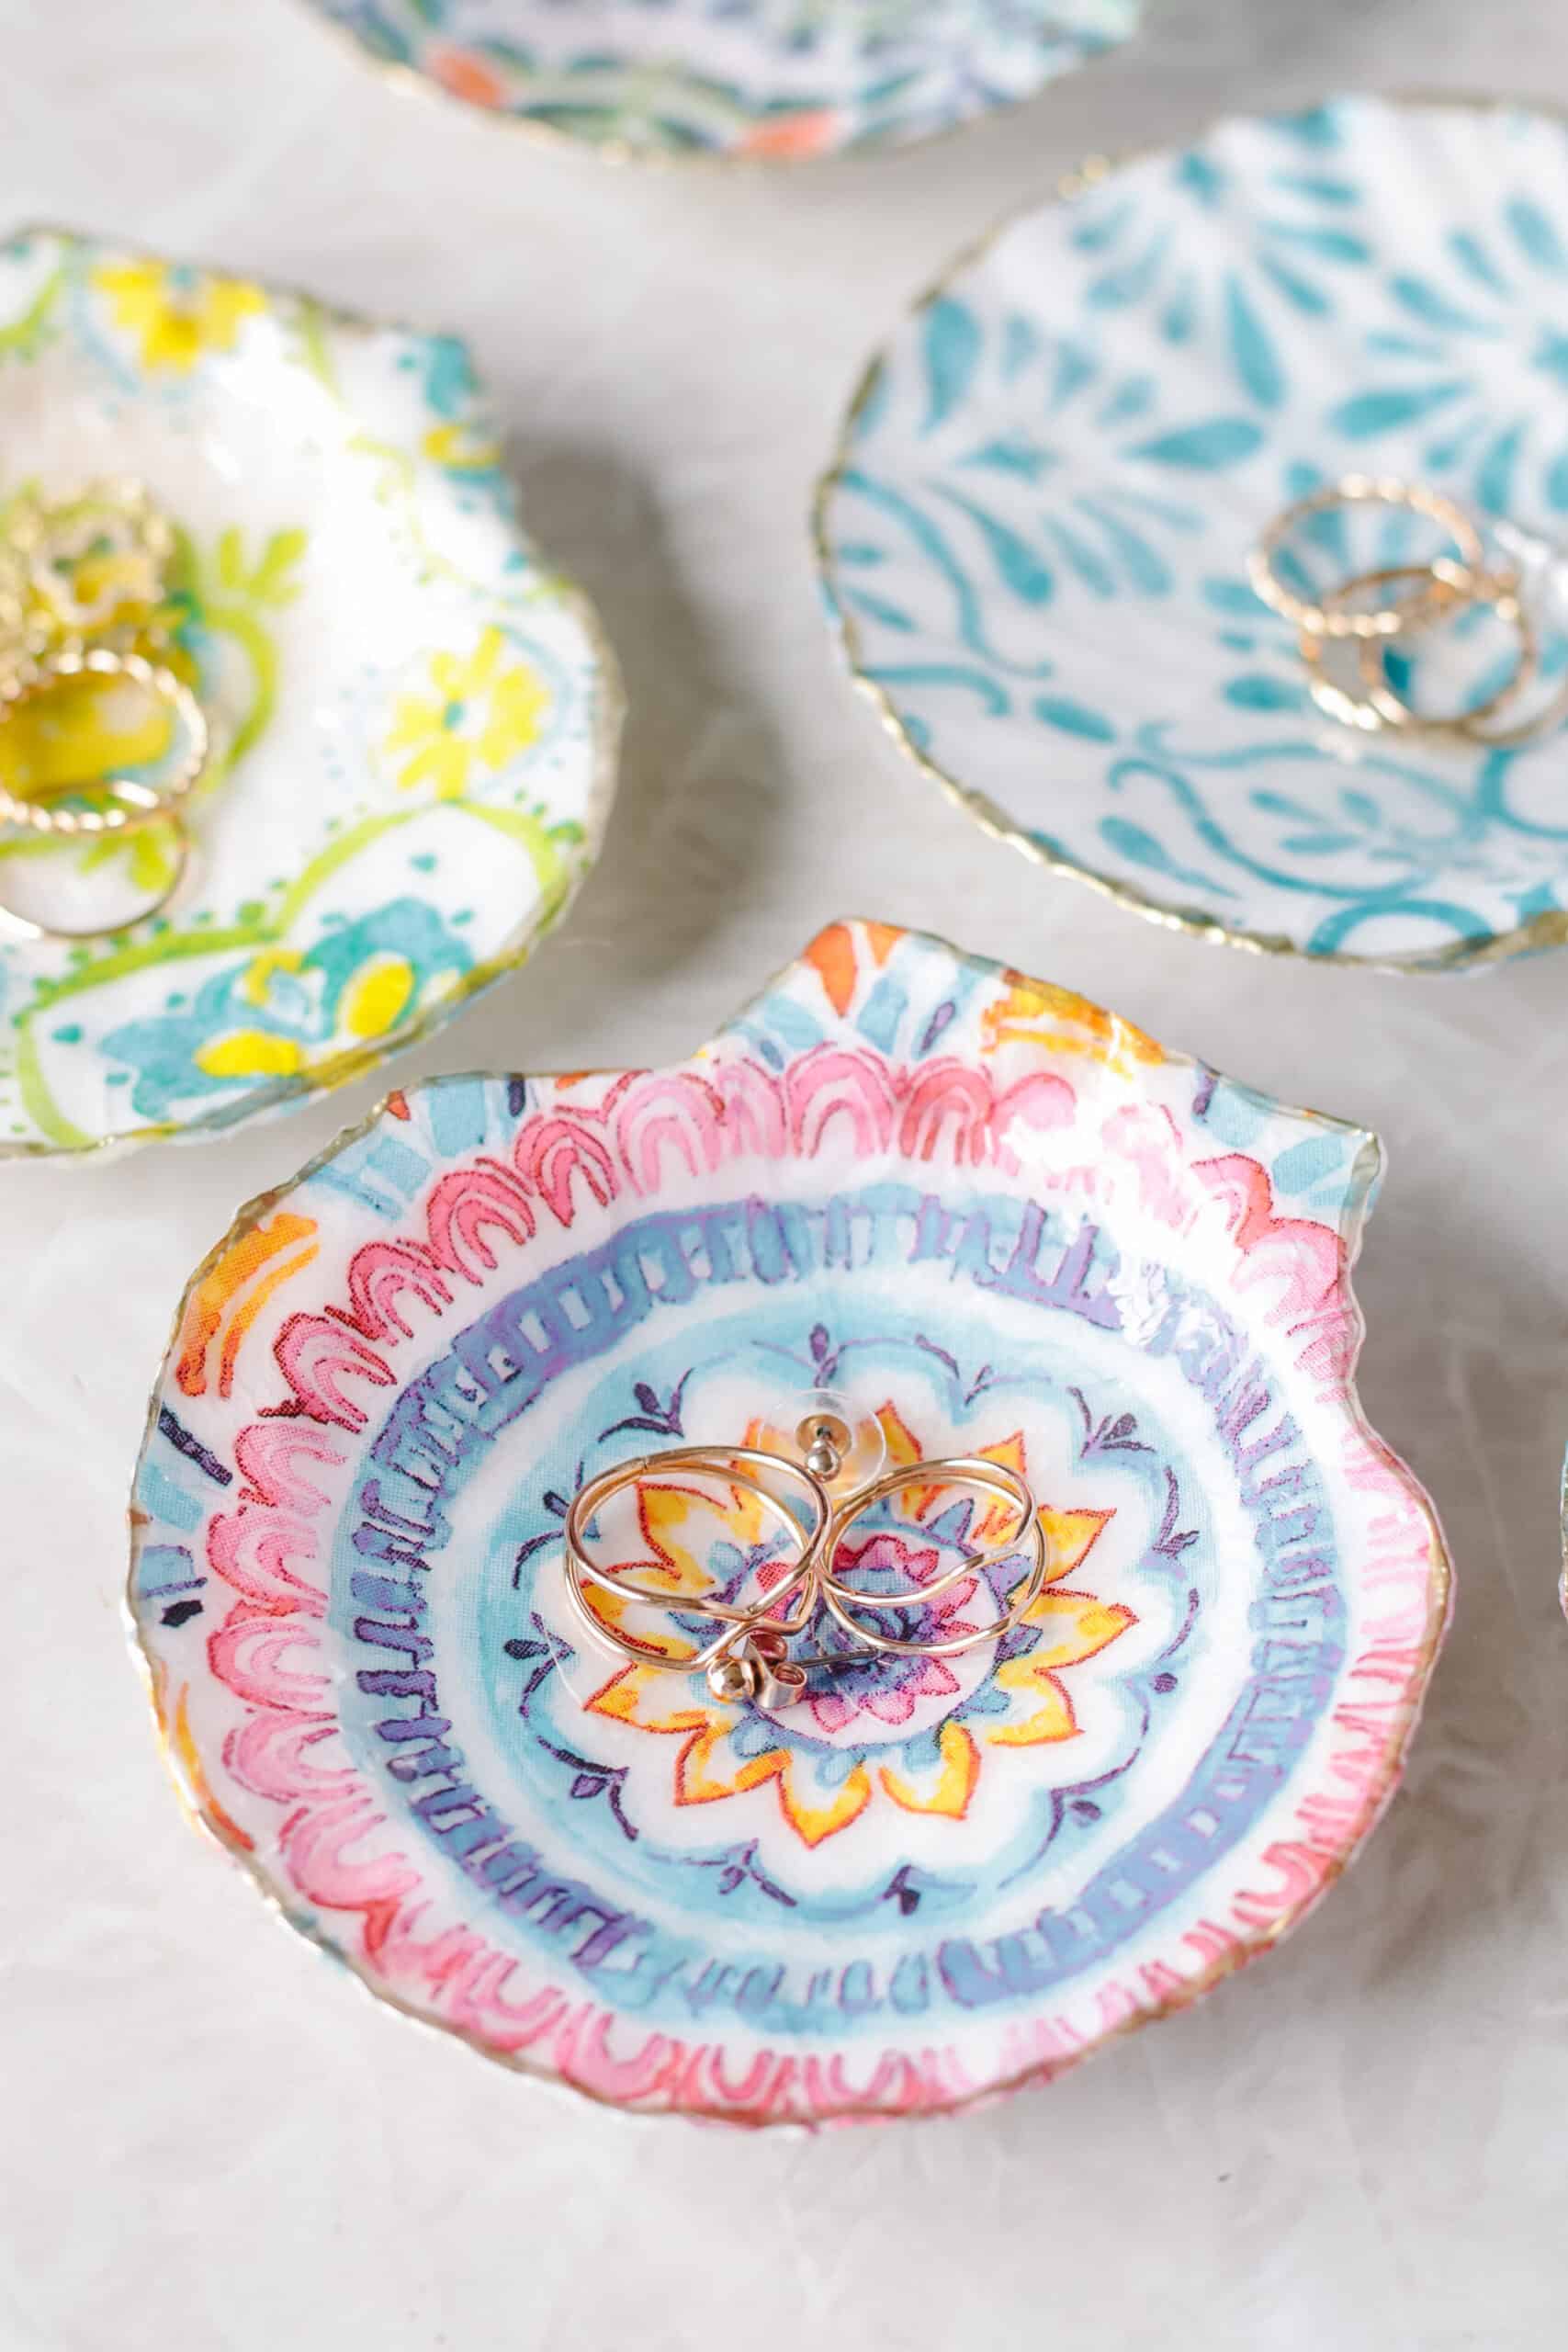
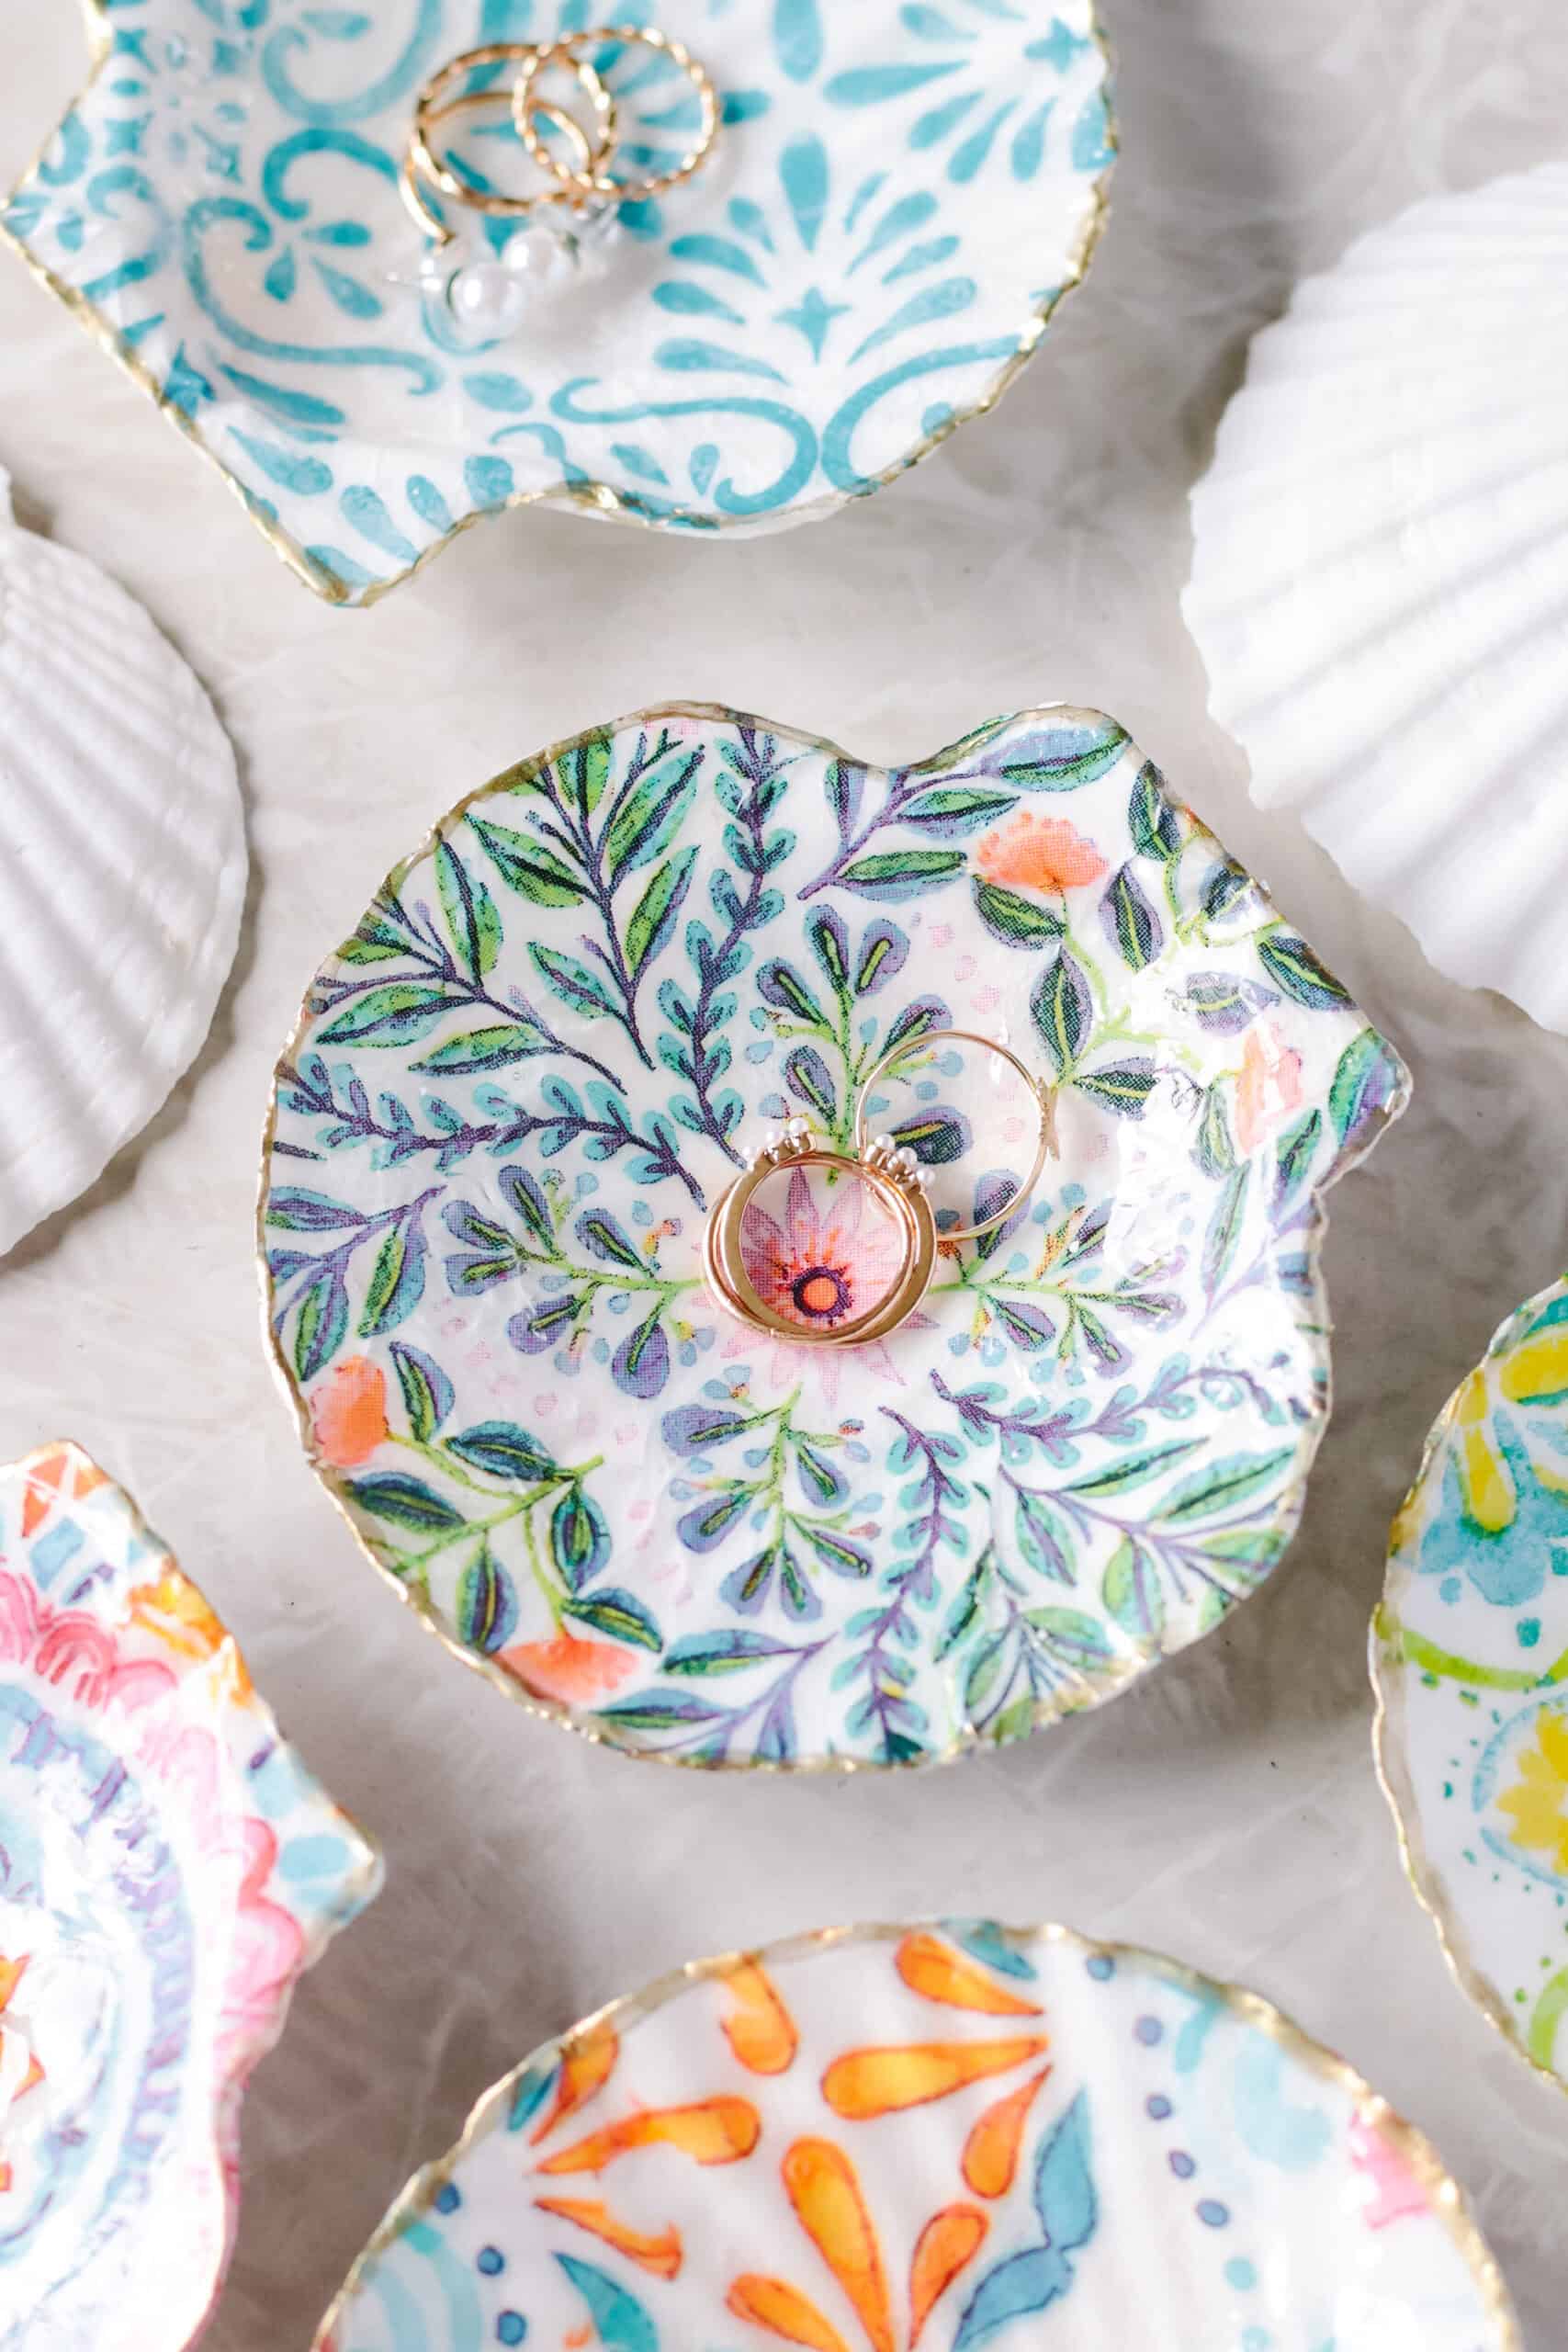
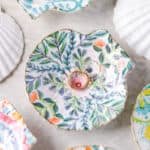
Learn how to make a DIY shell ring dish with easy napkin decoupage. This fun girls' night craft is perfect for creating a beautiful jewelry holder in minutes.
You might also like these rainbow macrame keychains, DIY beadable pens, or candles decorated with wax pens.
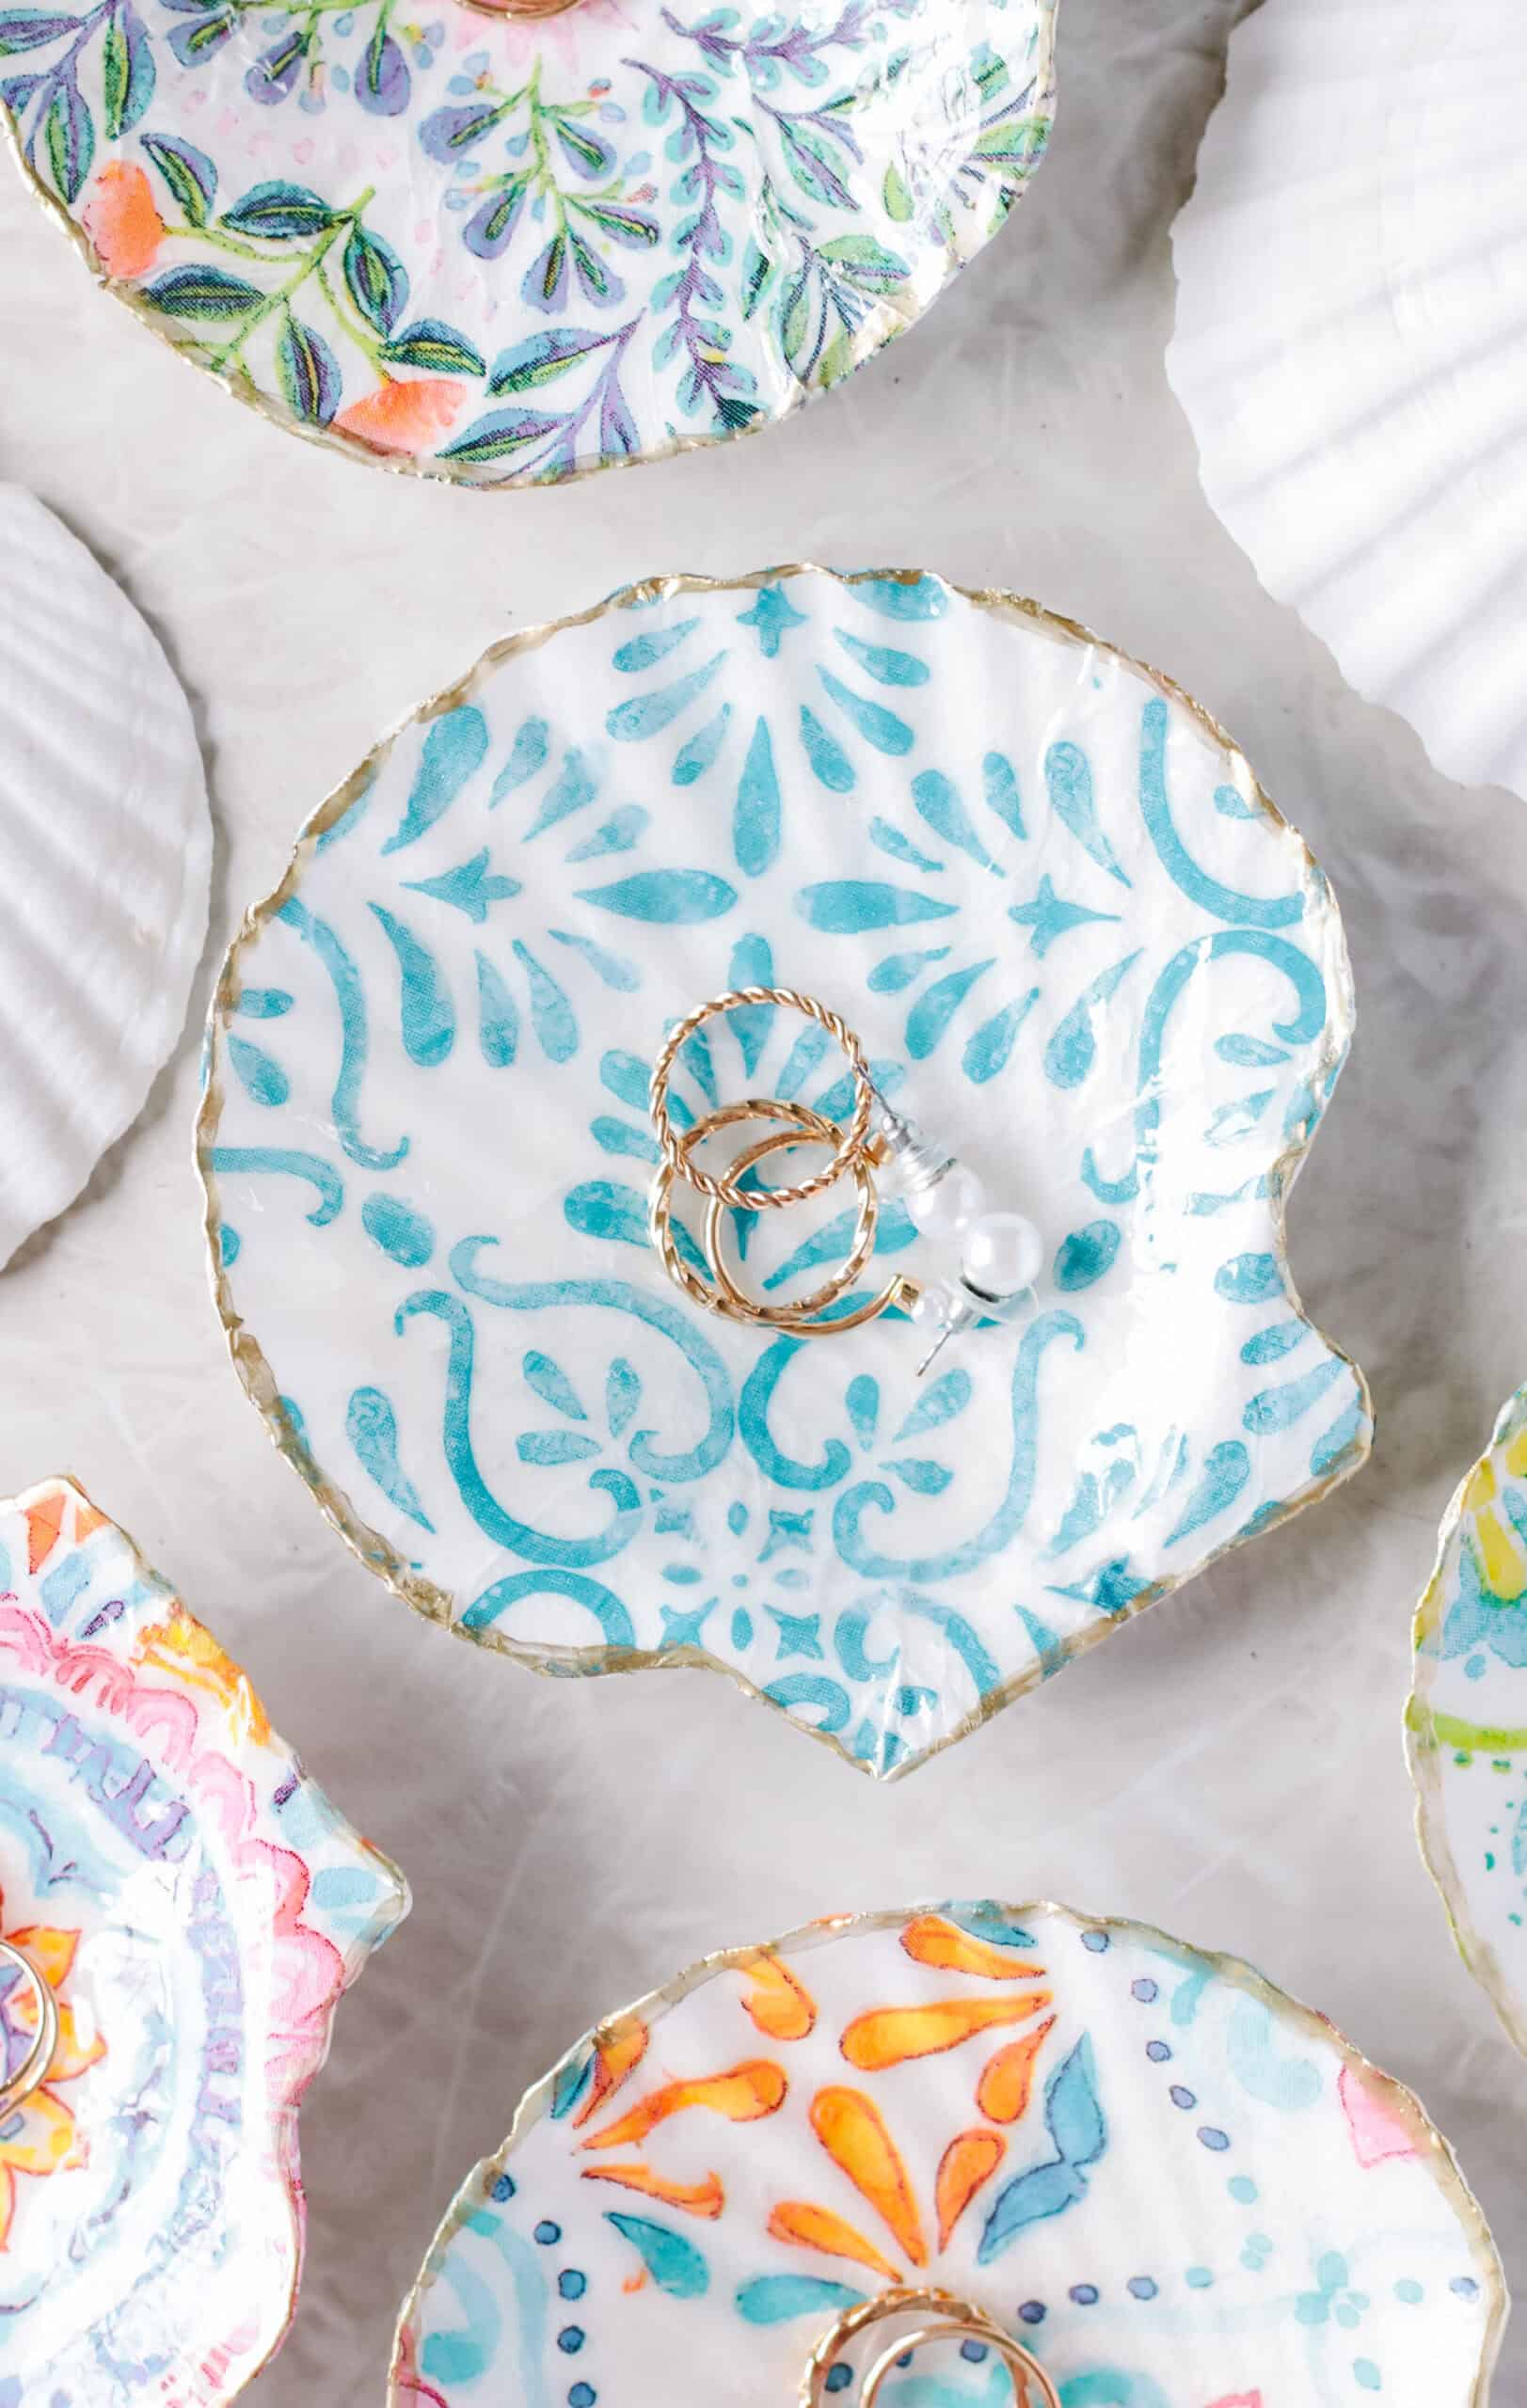
I'm teaching a craft class at our church summer camp for teen girls, and this is one of the projects that I am most excited about. These trinket dishes are fun to customize, using your favorite decorative napkins! I even include instructions for an optional UV resin coating that really gives them a wow-factor.
Why I Like This Craft
- Quick and easy to make. These shell dishes come together with just a few simple supplies and take just minutes to make.
- Perfect for a girls' night craft. Everyone can choose their own napkin design, making each shell ring dish unique and personal.
- Budget-friendly. Seashells, napkins, and decoupage medium are inexpensive, making this a fun craft that won't break the bank.
Jump to:
- Why I Like This Craft
- Tips and Tricks
- Tips for Optional Resin Coating
- Supplies
- How To Decoupage A Shell Trinket Dish
- Troubleshooting Tips (So Your Shell Ring Dish Turns Out Perfect Every Time)
- Tips for Making Shell Trinket Dishes With a Group
- Shell Napkin Decoupage FAQs
- More Crafts To Make
- DIY SHELL RING DISH: EASY NAPKIN DECOUPAGE TUTORIAL
- TIPS AND TRICKS
Tips and Tricks
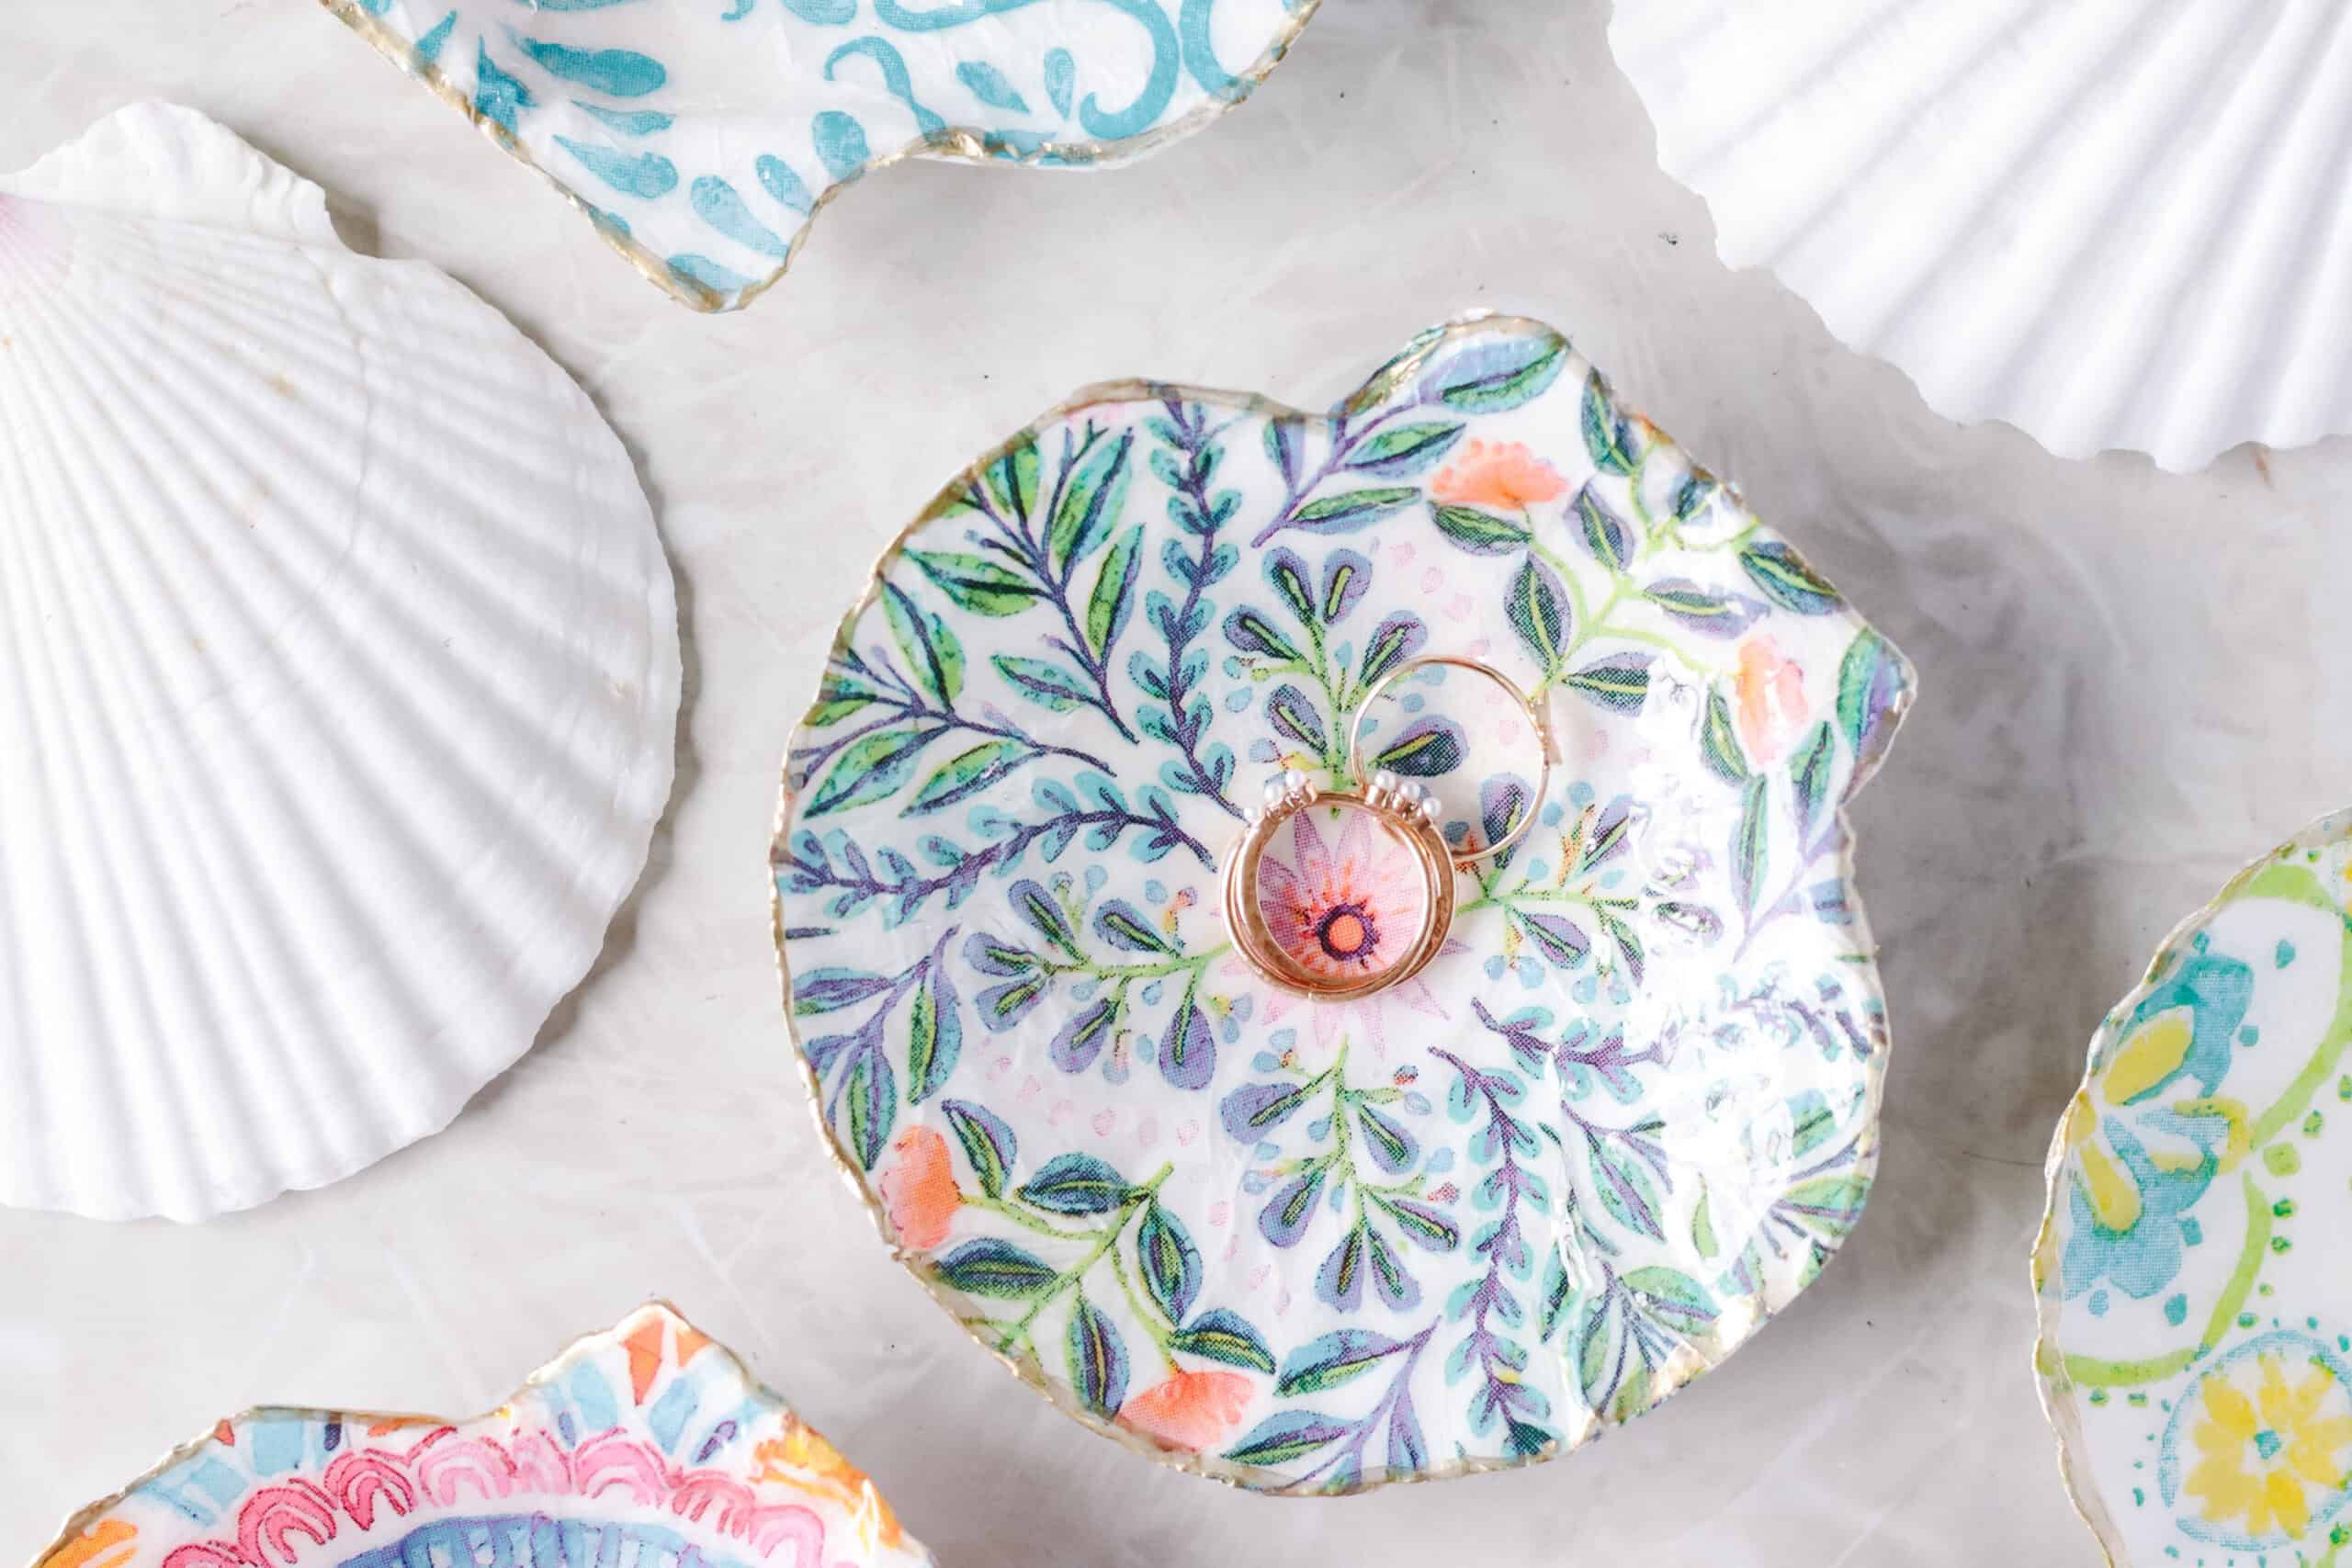
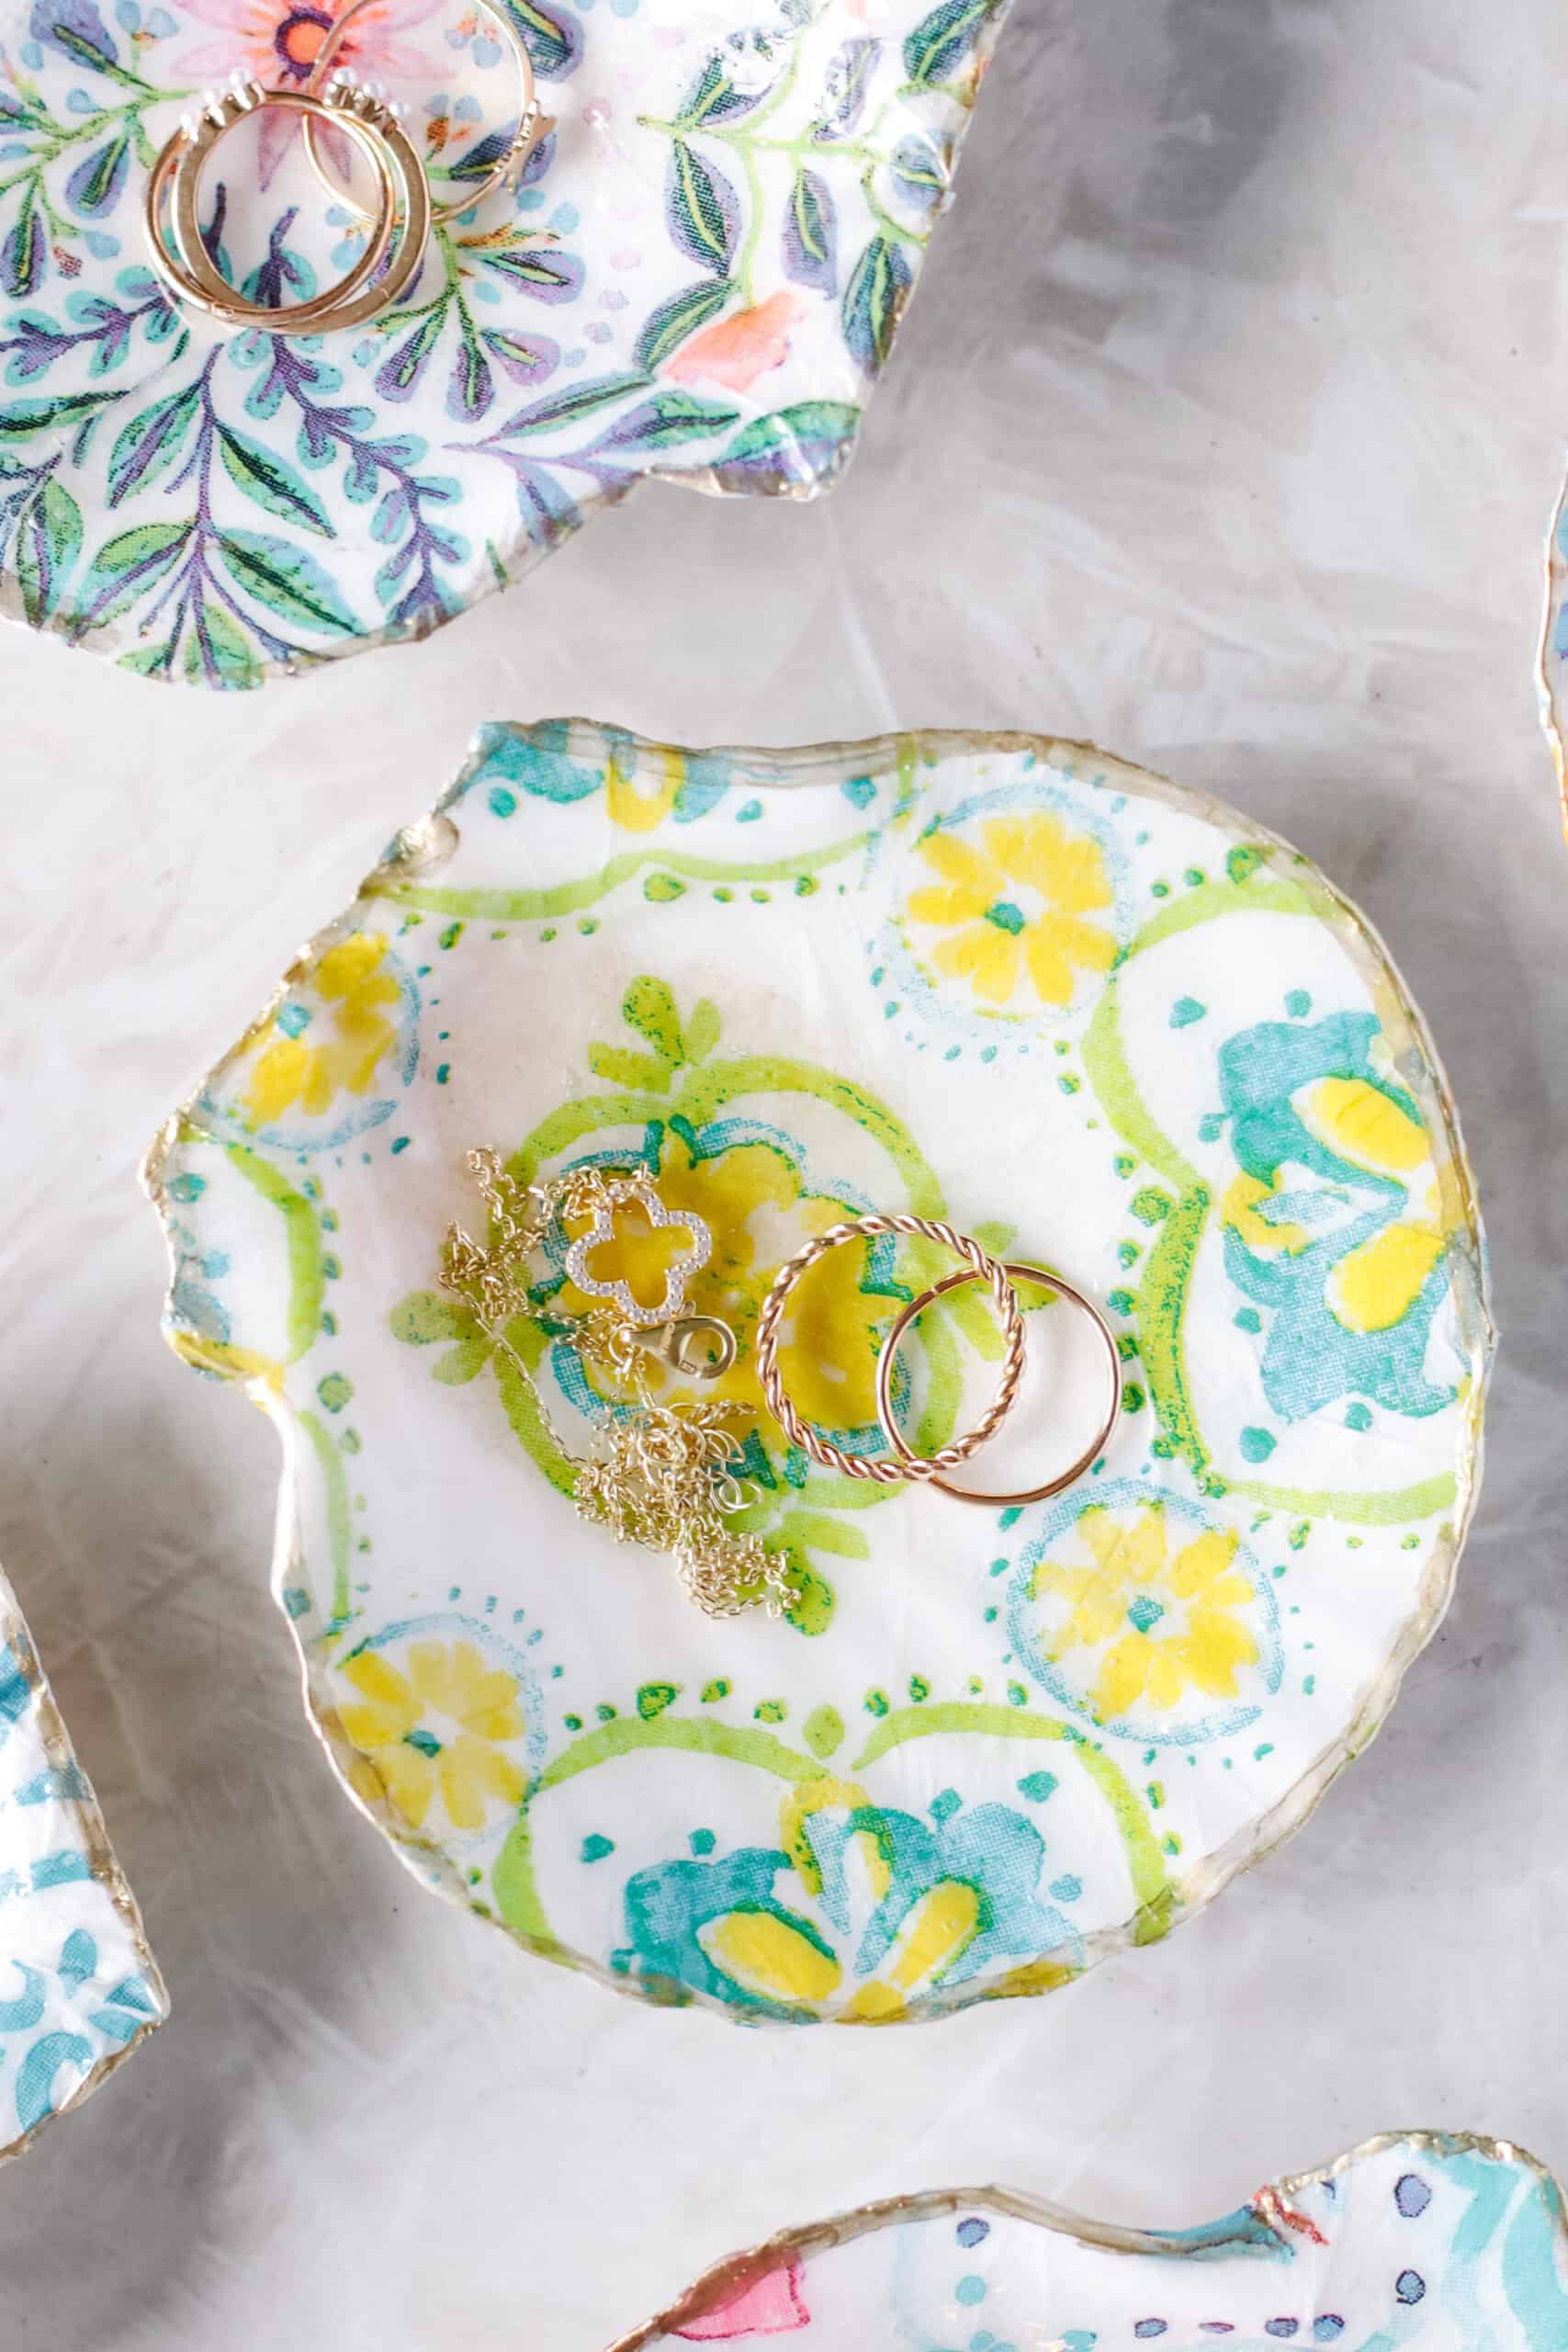
- Scallop shells. Oyster shells are a popular choice, but I prefer scallop shells. Their natural curve creates the perfect shape for holding rings and small jewelry items. Look for shells with smooth interiors and minimal chips or cracks. I bought mine on Amazon.
- Clean shells thoroughly before crafting. If using fresh shells, wash the shells with warm, soapy water and allow them to dry completely. If your shells have dark spots on the interior, adding a coat of white paint before decoupaging them is a good idea. I didn't find that necessary with the napkins that we used, but if using white napkins, the staining might show through without a coat of acrylic paint.
- Use only the top printed layer of the napkin. The napkins I used were 1-ply, but if using 2 or 3-ply decorative napkins, separate the printed layer from the backing layers before applying them to the shell.
- Apply Mod Podge in thin coats. A light coat underneath the napkin and another on top helps prevent wrinkles, tears, and excess buildup. Thin coats also dry faster and create a cleaner finish.
- Work from the center outward. Gently smooth the napkin from the center of the shell toward the edges to remove air bubbles and minimize wrinkles.
- Seal with multiple coats for durability. Two to three thin coats of Mod Podge will help protect the design and extend the life of your ring dish.
Tips for Optional Resin Coating
- For a glossy, glass-like finish, use UV resin. After the decoupage has completely dried, apply a thin layer of UV resin over the shell and cure it according to the manufacturer's instructions. This creates a smooth, durable surface with a professional-looking shine. It's an easy way to add a wow factor to the ring dish and hide wrinkles. The UV resin will harden in the sun or under a UV light.
- Avoid overfilling with resin. A thin layer is usually enough. Too much resin can pool along the shell's ridges and edges.
- Have adults apply the resin. UV resin is easy to use, but it is very sticky. I am going to have the teens at summer camp make their shell ring dishes and set them on a table to dry, and I will apply the resin for them. For best results, drizzle a small amount of resin over the inside of each shell, wear a disposable glove, and use your gloved finger to spread the resin evenly across the shell. A little bit goes a long way; you only need a thin coat.
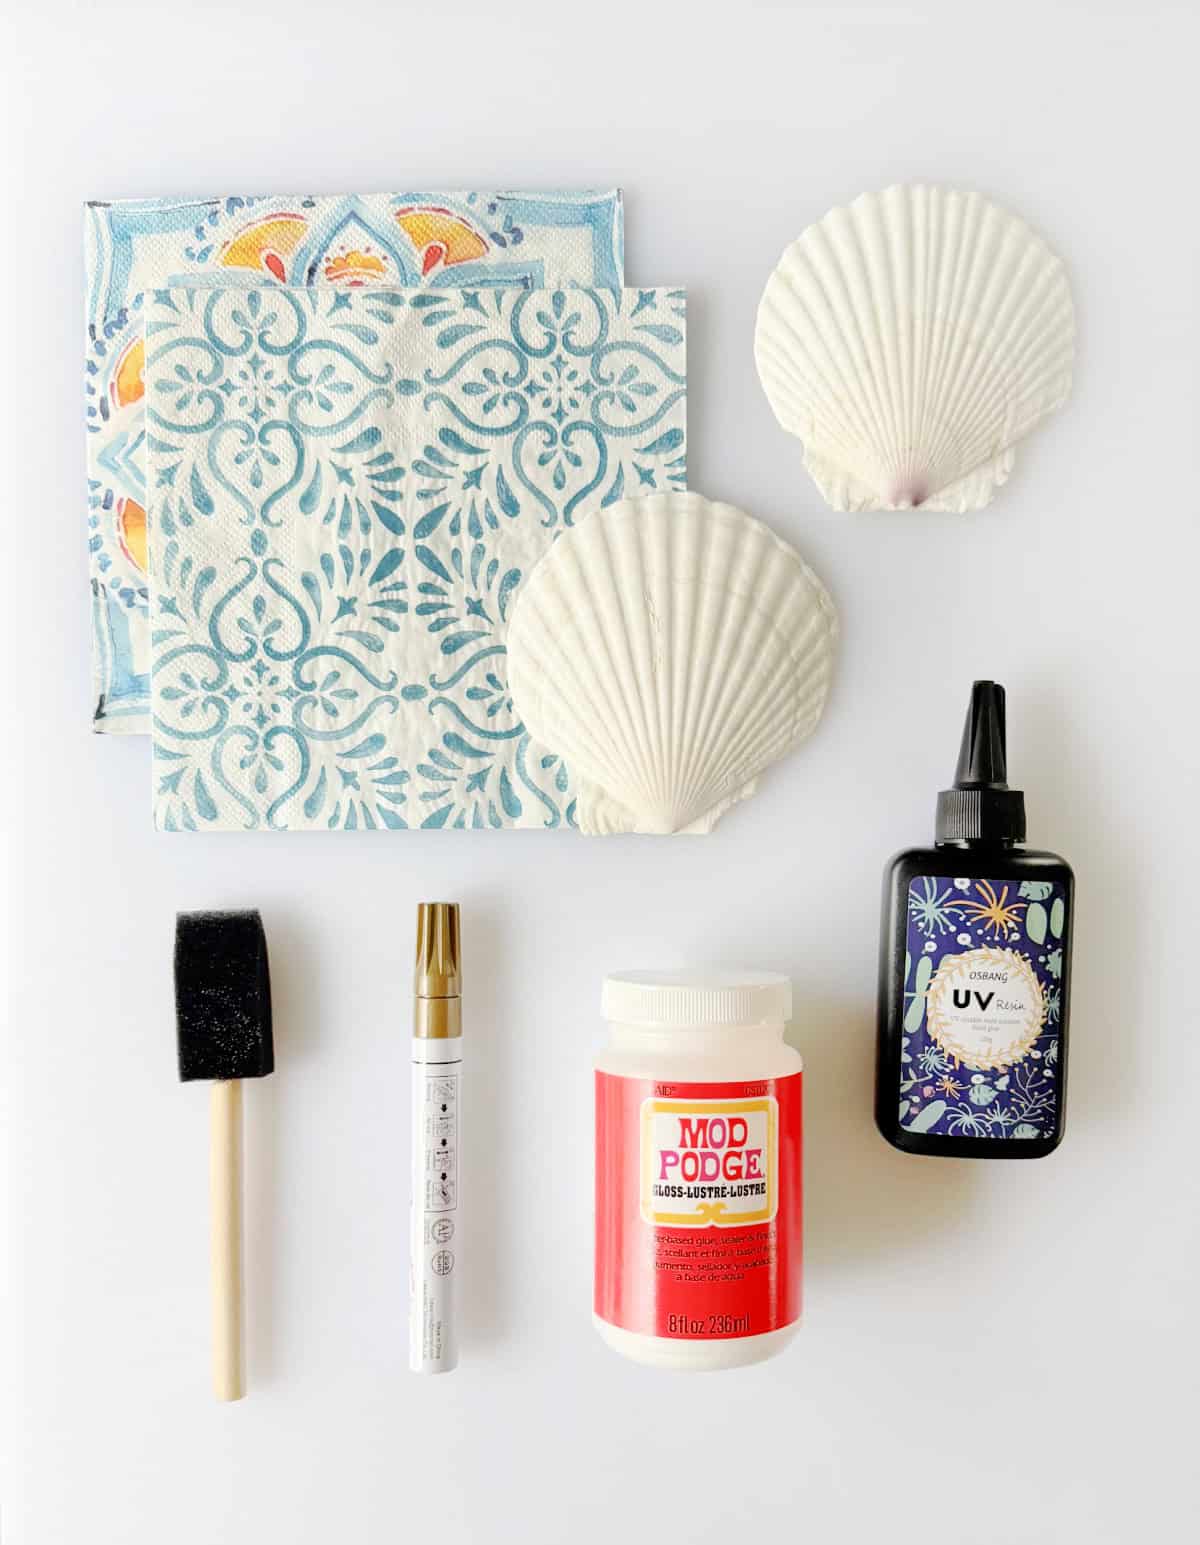
Supplies
- Shells: For best results, use 4-5" shells. Oyster shells are a popular choice, but I prefer scallop shells. Their natural curve creates the perfect shape for holding rings and small jewelry items. It is also easier to smooth the napkin out in a scallop shell vs. an oyster shell.
- Mod Podge: I used a gloss finish.
- Paint brush: A small sponge brush or a paint brush works well for adding thin coats of Mod Podge.
- Napkins: One napkin can typically be unfolded and cut into 4 sections, covering 4 shells. The napkins I used were 1-ply, but if using 2 or 3-ply decorative napkins, separate the printed layer from the backing layers before applying them to the shell.
- UV Resin: This is completely optional, but it really takes the shells up a notch. If you'd prefer to leave them as is, the Mod Podge will give them a glossy finish, but won't be quite as shiny and smooth. I have a UV light I use for gel nails that works great for setting the resin, but you can also place the shells on a cookie sheet and let the resin set in direct sunlight. There is no need to mix ingredients, and there isn't a long curing time.
- Disposable glove: Using gloves makes it easier to apply the resin without getting your fingers sticky.
- Gold paint pen: Use a paint pen to add a detailed edge on each shell (optional).
See the how-to card at the end of the post for full information on supplies and quantities.
How To Decoupage A Shell Trinket Dish
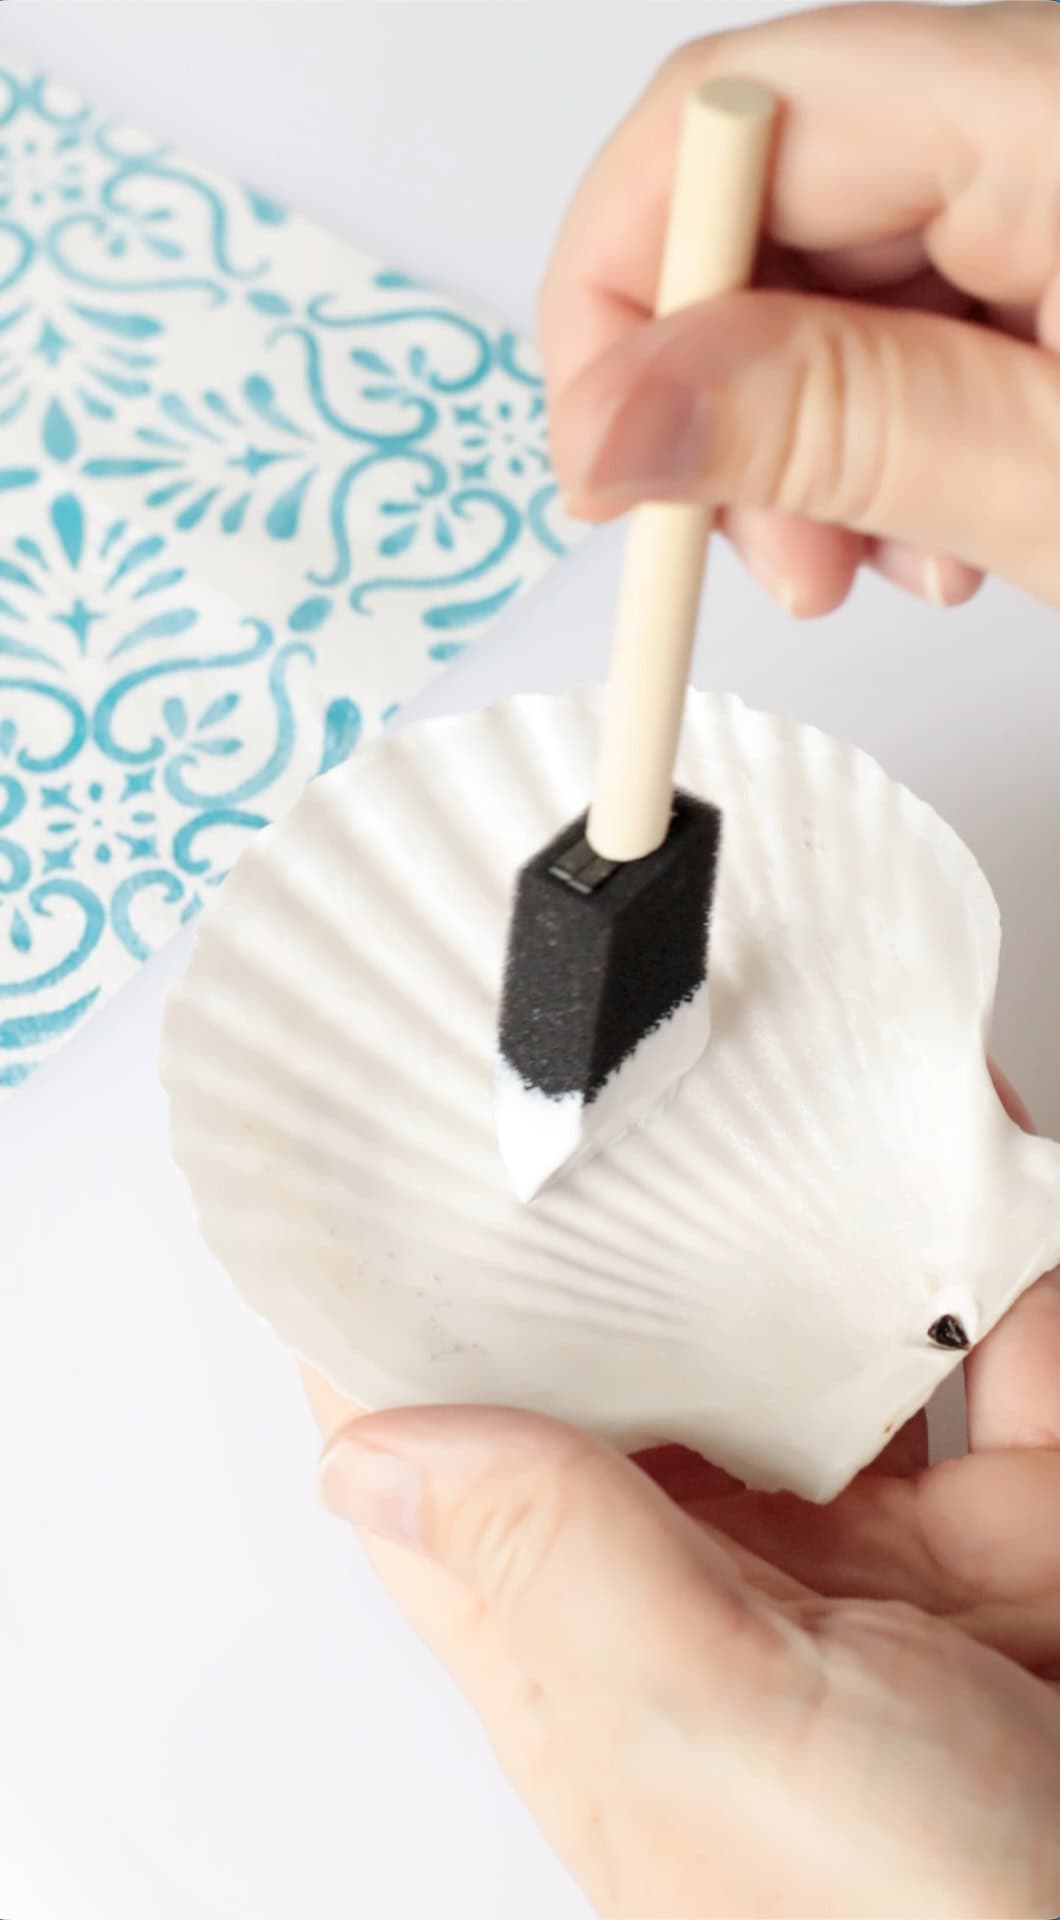
Step 1: Brush a thin layer of Mod Podge over the inside of the shell.
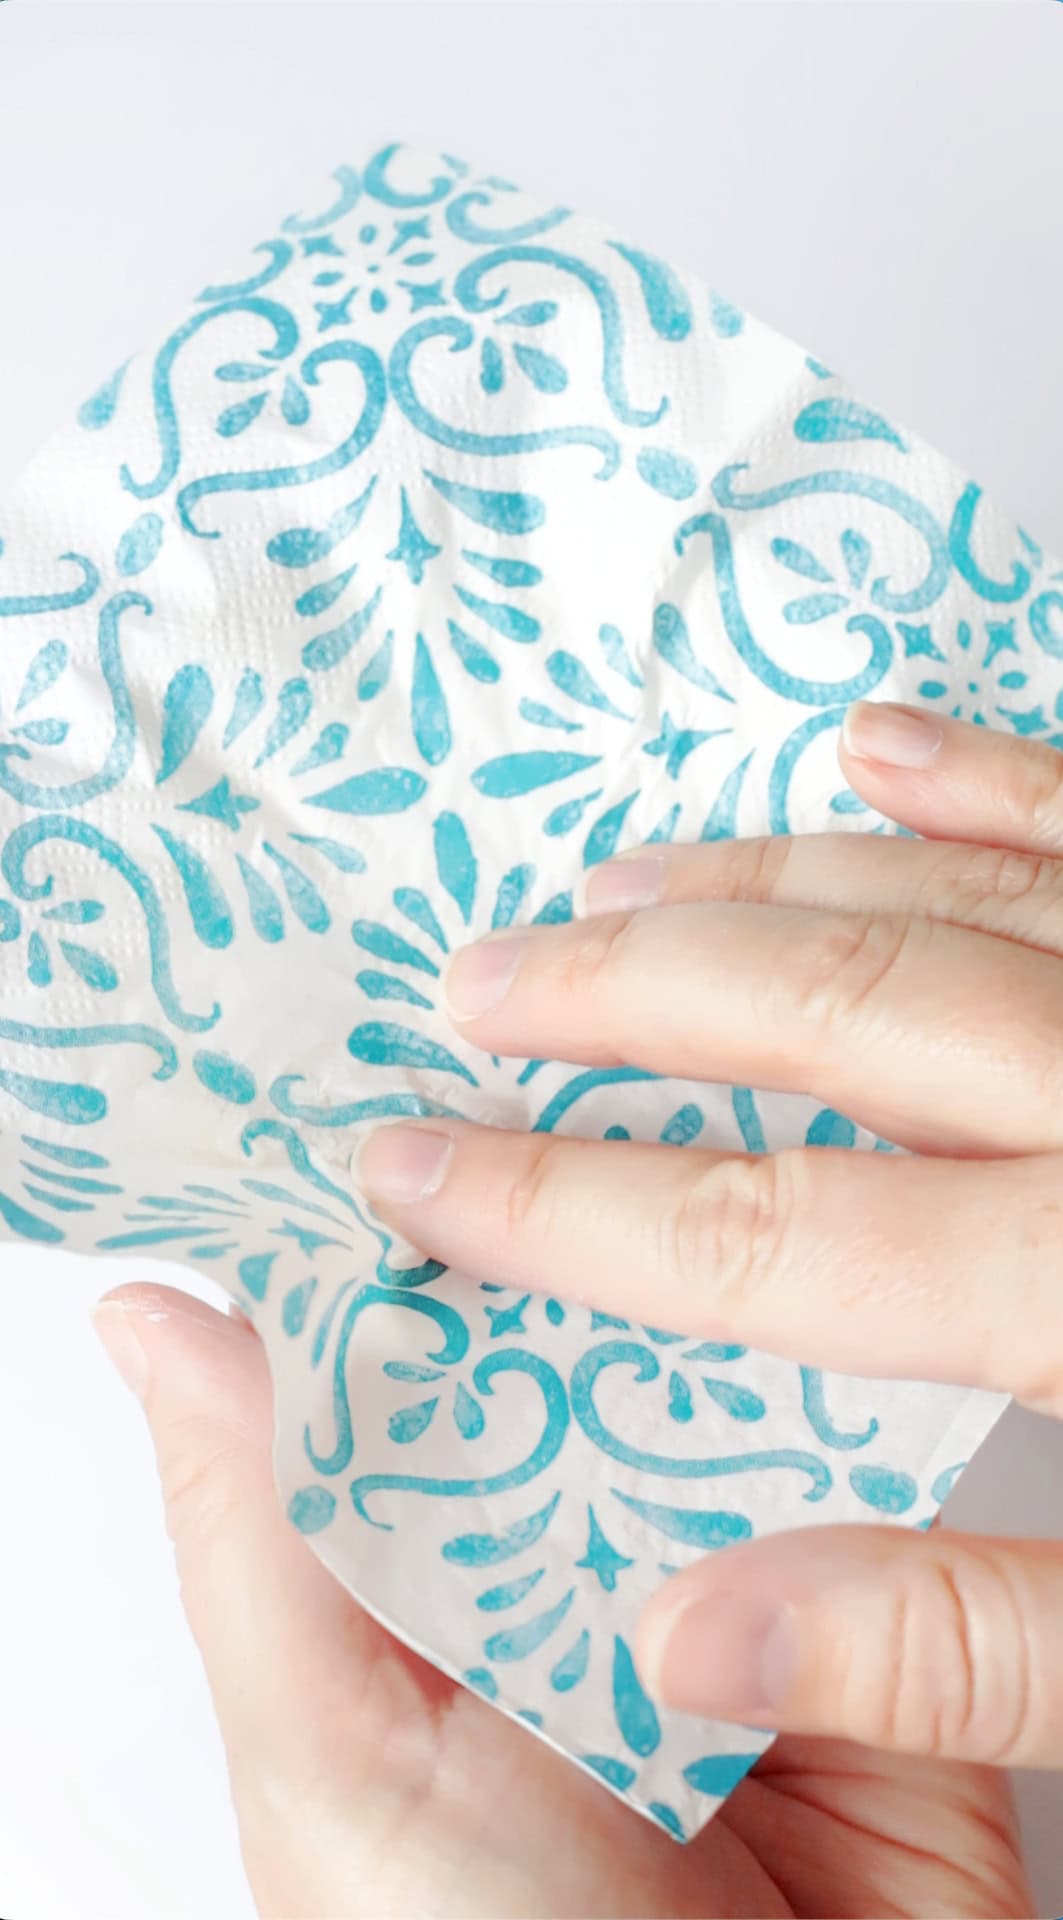
Step 2: Gently smooth the napkin from the center of the shell toward the edges to remove air bubbles and minimize wrinkles.
Note: If using 2 or 3-ply napkins, separate the decorative layer to use for this craft.
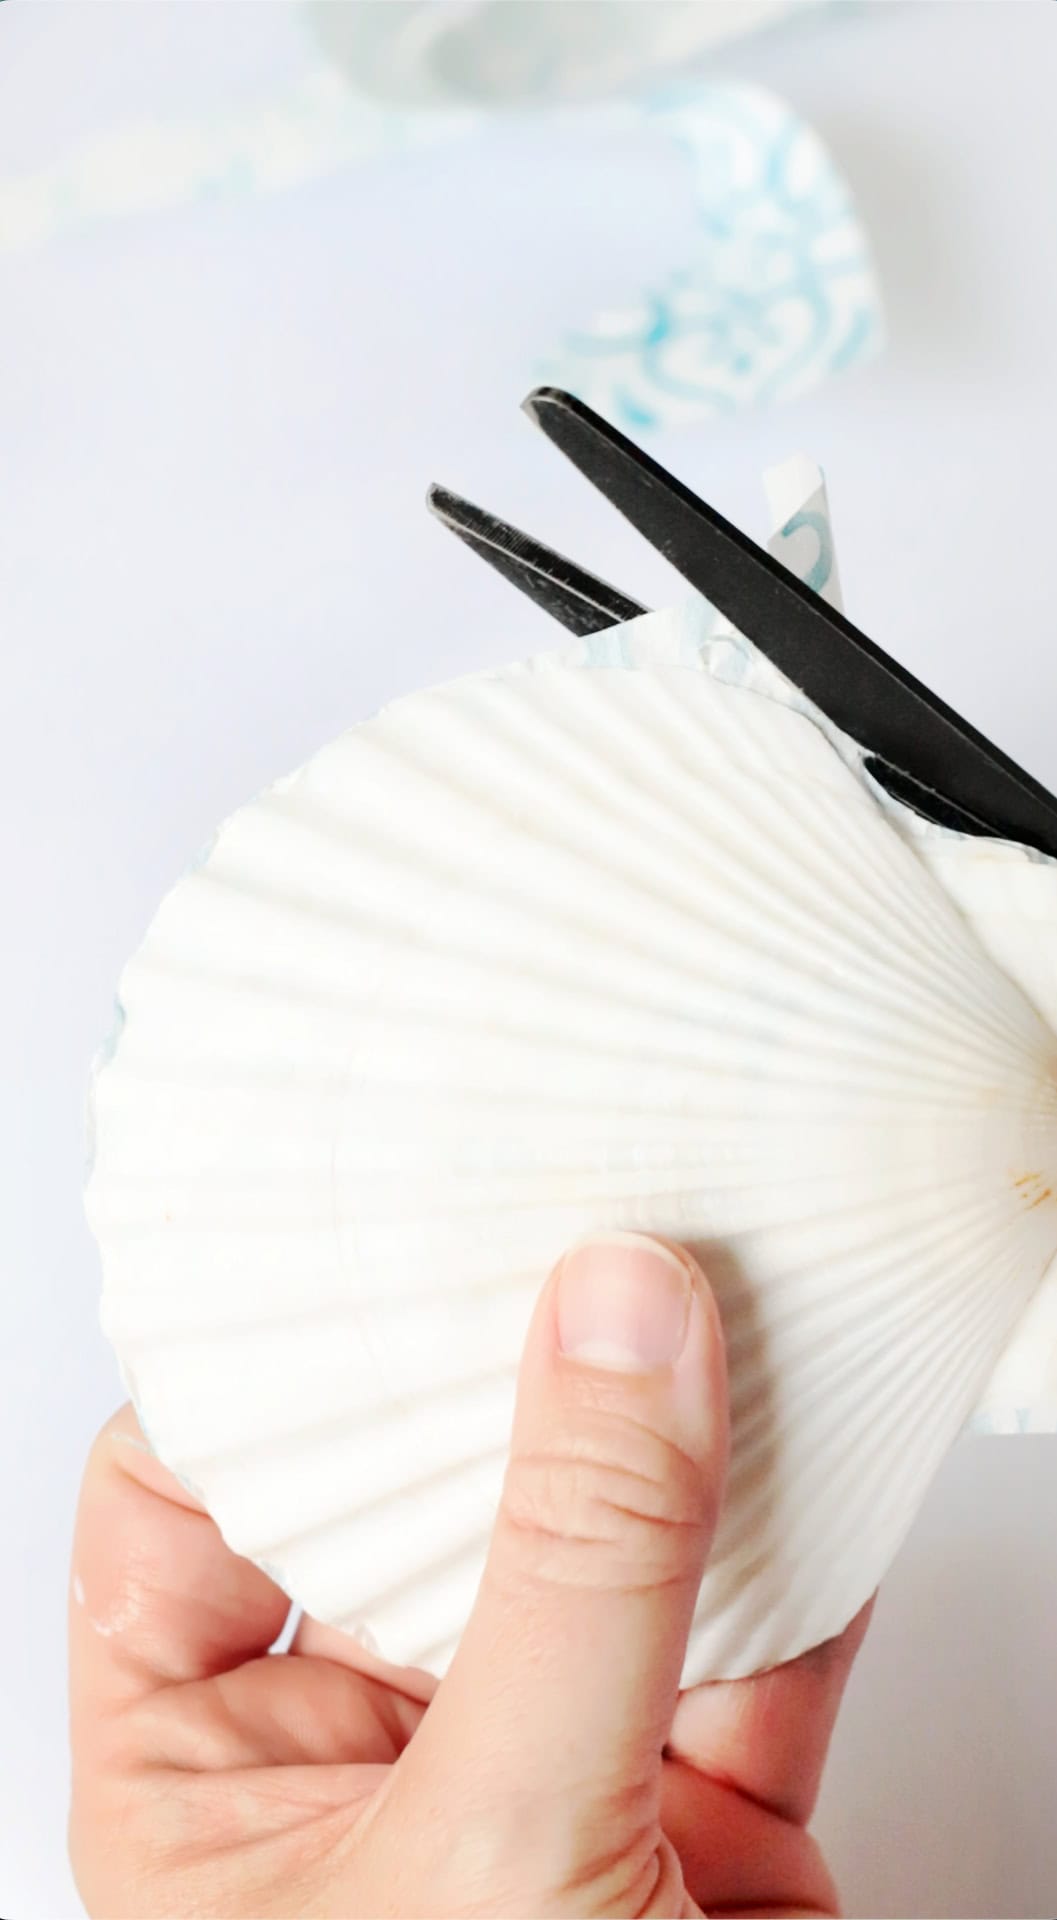
Step 3: Use scissors to trim the napkin close to the edge of the shell.
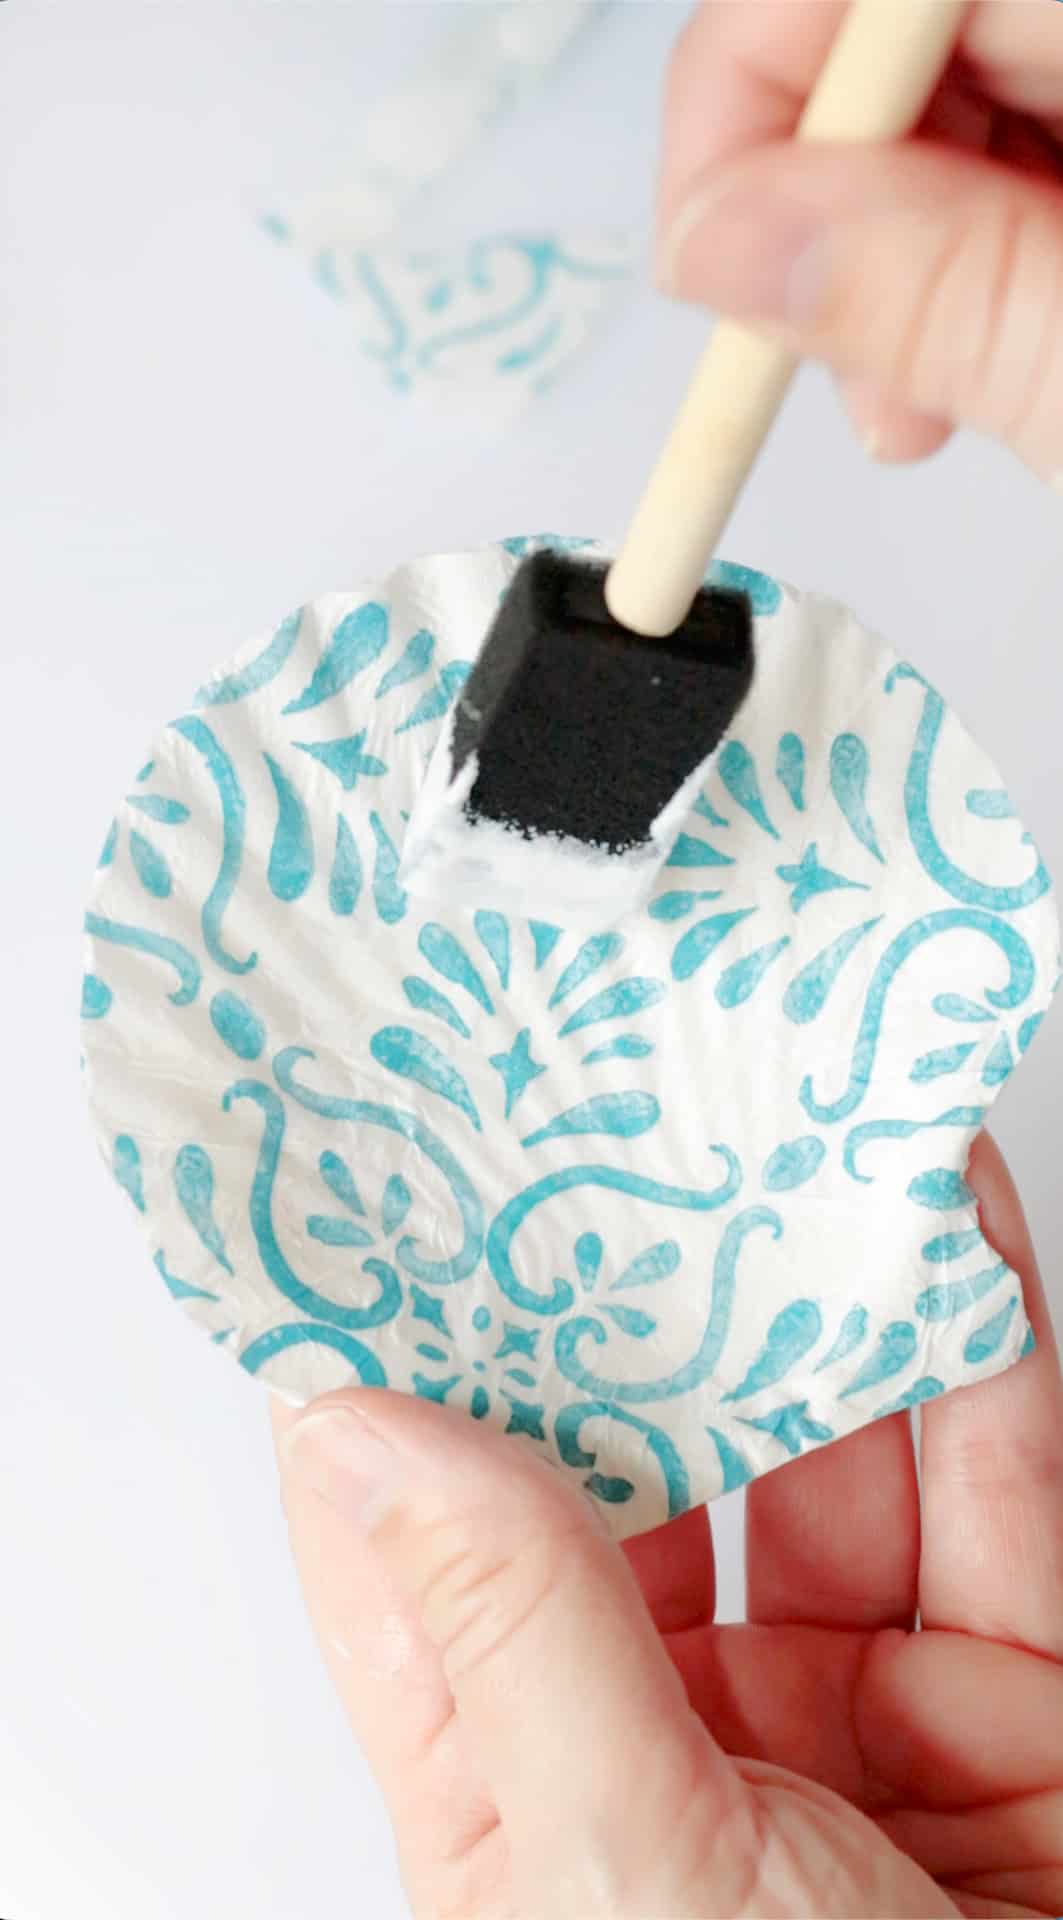
Step 4: Apply a thin top coat of Mod Podge. Let the shell dry.
Note: You can add a gold detail around the edge using a paint pen or gold leaf paint now or after you add the resin. I added mine after applying resin, but it really doesn't matter.
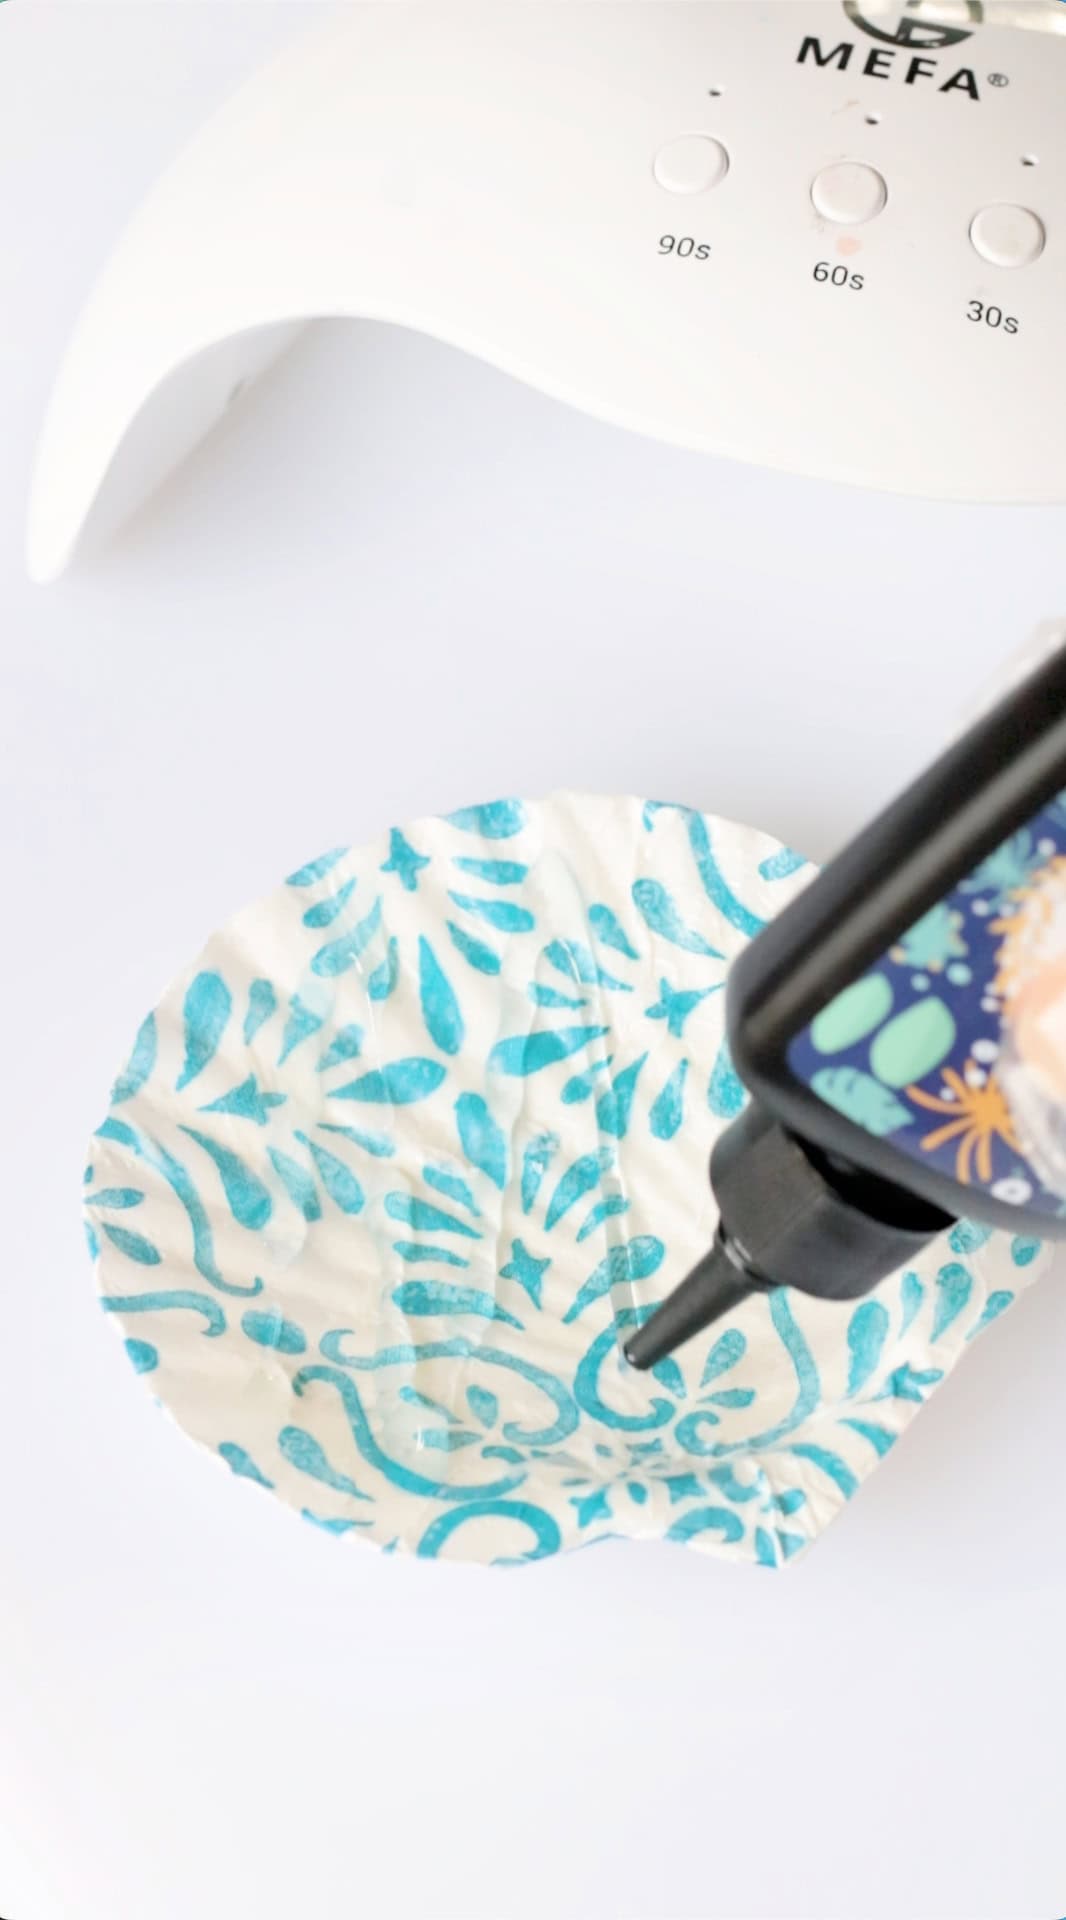
Step 5: Optional UV resin layer. Use disposable gloves and drizzle a small amount of resin inside the shell.

Step 6: Use your gloved finger to spread the resin evenly.
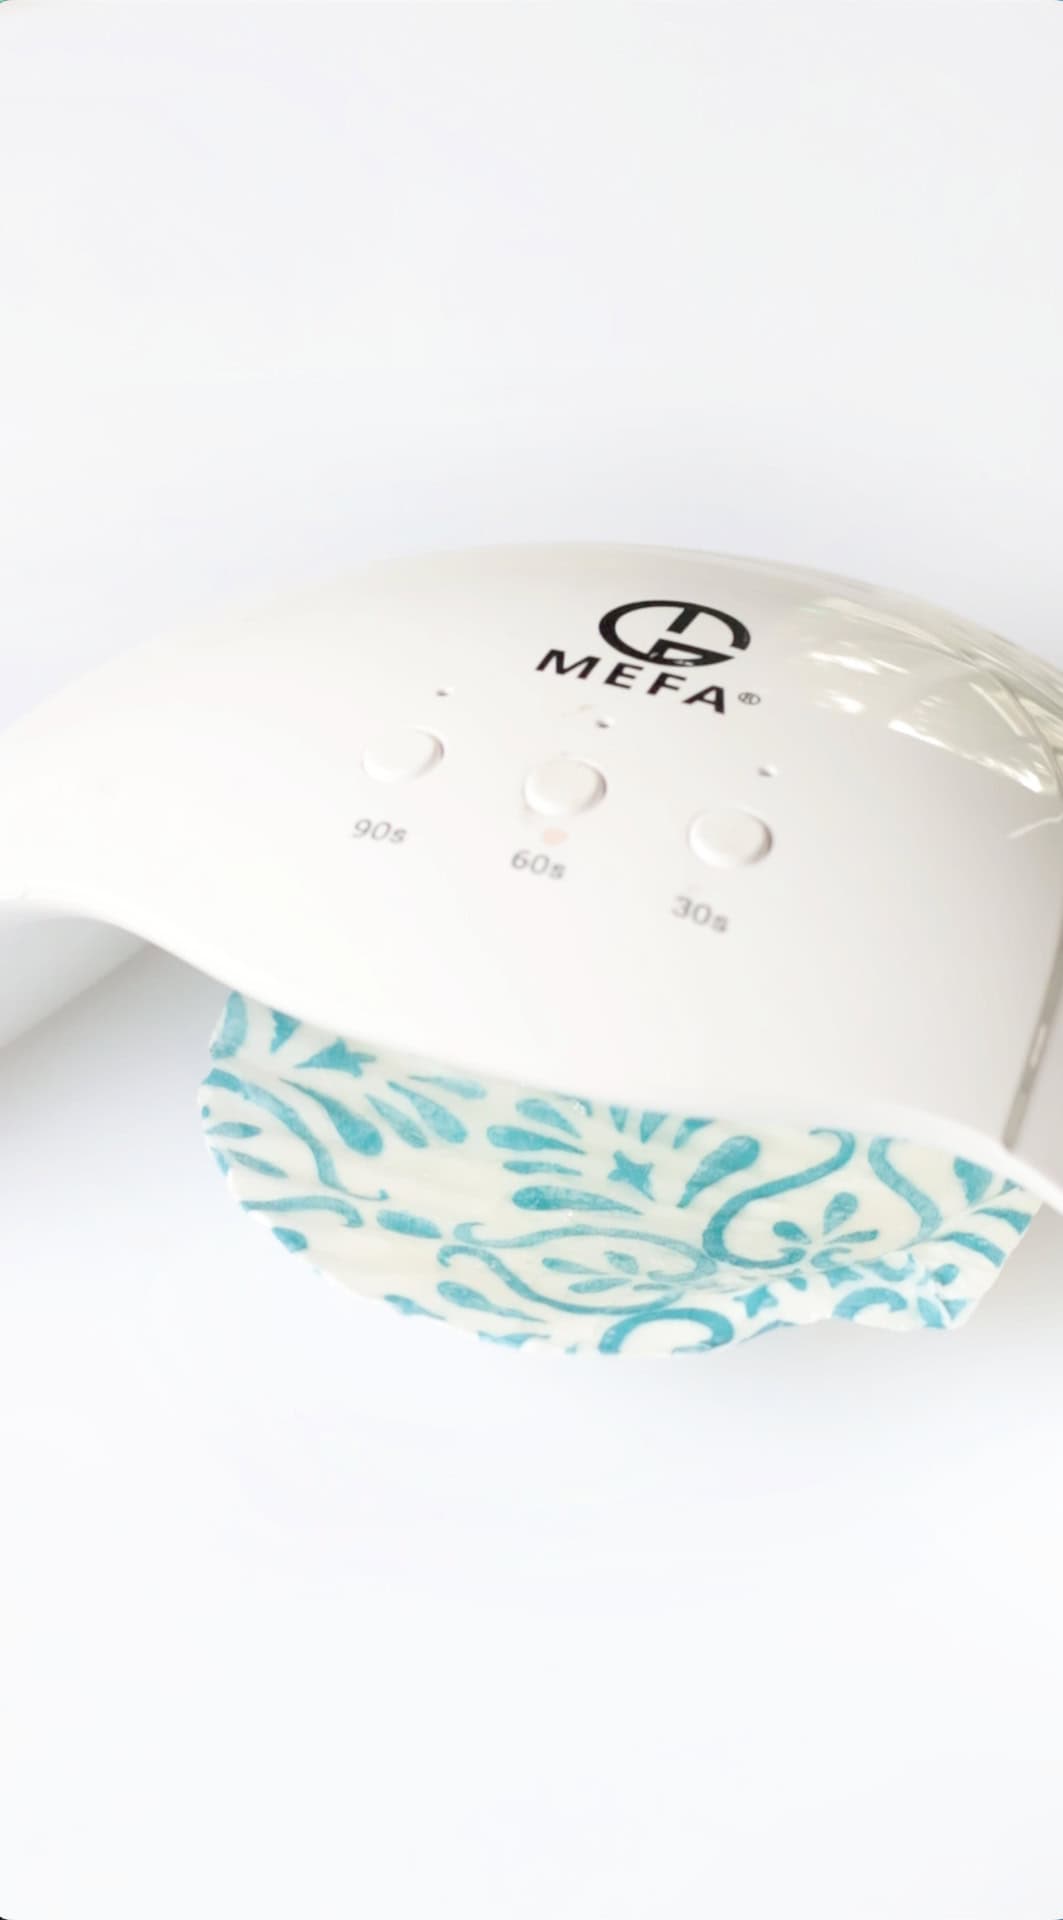
Step 7: Allow the resin to cure in direct sunlight or under a UV lamp.
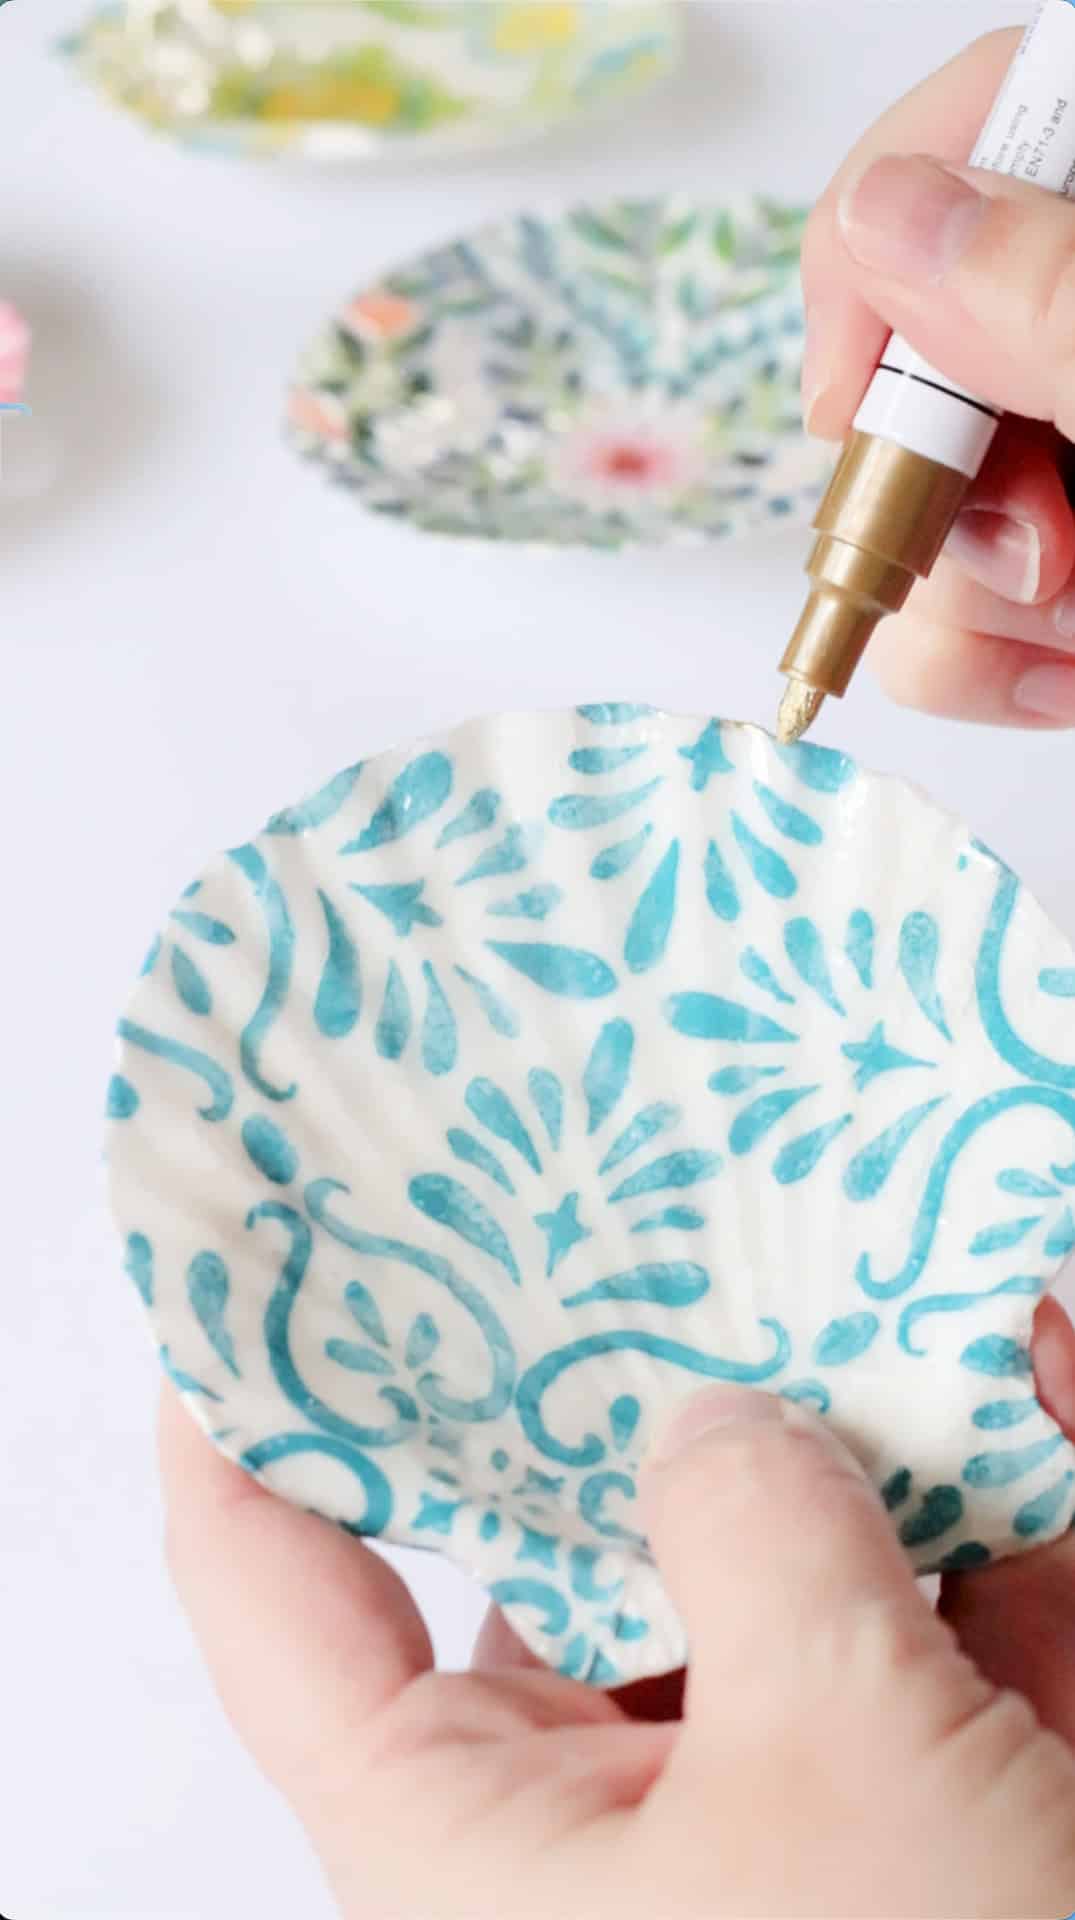
Step 8: Use a gold paint pen or small paint brush with gold leaf paint to add a decorative touch around the edge of each shell.
Troubleshooting Tips (So Your Shell Ring Dish Turns Out Perfect Every Time)
- Wrinkles in the napkin? Don’t panic. If you notice small wrinkles while applying, gently lift the napkin (while still wet) and smooth it back down with a soft brush or your fingertip. A light “tap and press” motion works better than dragging.
- Torn napkin fix. If the napkin tears, don’t start over. Simply place a small piece of the same napkin over the tear and seal it with a thin layer of Mod Podge—it blends in once dry.
- Too much Mod Podge? If it looks thick or milky, lightly brush out the excess while it’s still wet. Mod Podge always dries clear, so don’t worry if it looks messy at first.
- Cloudy or streaky finish. This usually means the coats were too thick. Add one or two thin final coats of Mod Podge to even everything out.
Tips for Making Shell Trinket Dishes With a Group
- Set up “craft stations” instead of one big, messy table.
Create small stations for each step: napkin selection, Mod Podge application, and drying space. This keeps everyone moving smoothly and prevents overcrowding. - Pre-prep your supplies.
Before guests arrive, pre-cut or tear napkin designs, and pour Mod Podge into small cups. - Keep it low-mess and beginner-friendly.
Provide wet wipes, paper towels, and small brushes or foam applicators. - Add a drying station.
Designate a safe area where finished shells can dry flat without being touched. - Time it for 20–30 minutes of active crafting.
Provide a table for drying shells before adding the resin coating.
Shell Napkin Decoupage FAQs
Scallop shells are ideal because their natural bowl shape makes them perfect for holding rings, earrings, and other small jewelry.
Mod Podge is recommended because it acts as both a glue and a sealant. Regular glue may not seal the napkin properly or provide a durable finish.
Use thin layers of Mod Podge and gently smooth the napkin outward from the center. Working slowly helps reduce bubbles and creases.
No, UV resin is optional. Mod Podge alone works well, but UV resin adds a glossy, durable, glass-like finish for extra protection.
Mod Podge typically dries to the touch in 15–30 minutes, but it’s best to allow several hours (or overnight) before handling or adding additional layers.
More Crafts To Make


MADE THIS CRAFT AND LOVED IT? 💛 Please leave a STAR rating and COMMENT below! Post it to Facebook or Pinterest to easily share with friends!
DIY SHELL RING DISH: EASY NAPKIN DECOUPAGE TUTORIAL
Equipment
- paint brush
- gold paint pen
Materials
- 4-5" scallop shell
- mod podge
- decorative napkin
- UV resin optional
- disposable gloves
Instructions
- Brush a thin layer of Mod Podge over the inside of the shell.
- Gently smooth the napkin from the center of the shell toward the edges to remove air bubbles and minimize wrinkles.Note: If using 2 or 3-ply napkins, separate the decorative layer to use for this craft.
- Use scissors to trim the napkin close to the edge of the shell.
- Apply a thin top coat of Mod Podge. Let the shell dry.Note: You can add a gold detail around the edge using a paint pen or gold leaf paint now or after you add the resin. I added mine after applying resin, but it really doesn't matter.
- Optional UV resin layer. Use disposable gloves and drizzle a small amount of resin inside the shell.
- Use your gloved finger to spread the resin evenly.
- Allow the resin to cure in direct sunlight or under a UV lamp.
- Use a gold paint pen to add a decorative touch around the edge of each shell.
Video
Notes
TIPS AND TRICKS
- Scallop shells. Oyster shells are a popular choice, but I prefer scallop shells. Their natural curve creates the perfect shape for holding rings and small jewelry items. Look for shells with smooth interiors and minimal chips or cracks. I bought mine on Amazon.
- Clean shells thoroughly before crafting. If using fresh shells, wash the shells with warm, soapy water and allow them to dry completely. If your shells have dark spots on the interior, adding a coat of white paint before decoupaging them is a good idea. I didn't find that necessary with the napkins that we used, but if using white napkins, the staining might show through without a coat of acrylic paint.
- Use only the top printed layer of the napkin. The napkins I used were 1-ply, but if using 2 or 3-ply decorative napkins, separate the printed layer from the backing layers before applying them to the shell.
- Apply Mod Podge in thin coats. A light coat underneath the napkin and another on top helps prevent wrinkles, tears, and excess buildup. Thin coats also dry faster and create a cleaner finish.
- Work from the center outward. Gently smooth the napkin from the center of the shell toward the edges to remove air bubbles and minimize wrinkles.
- Seal with multiple coats for durability. Two to three thin coats of Mod Podge will help protect the design and extend the life of your ring dish.


Leave a Reply