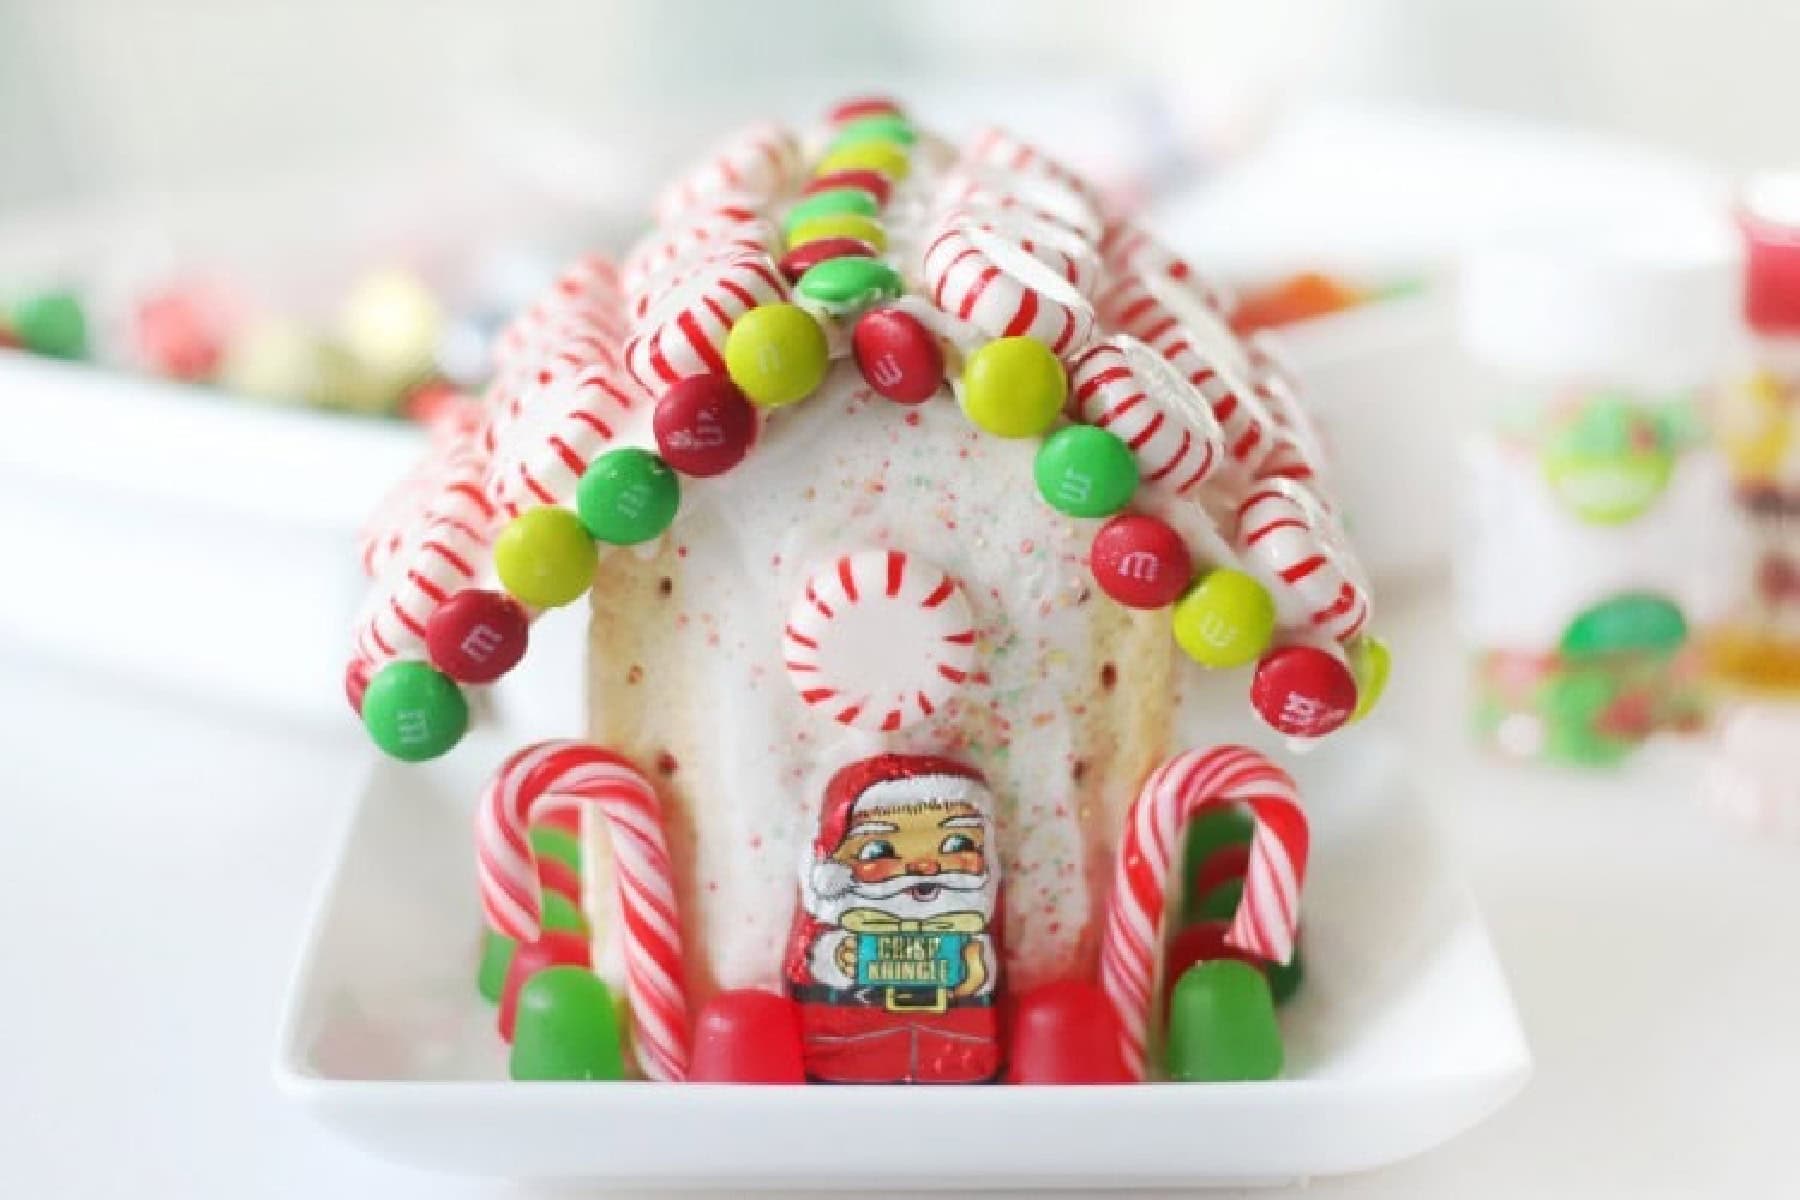
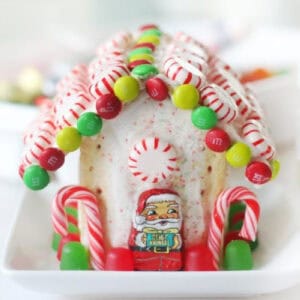
This Pop Tart gingerbread house is so fun to decorate and perfect for the holidays! Once you make a gingerbread house out of Pop Tarts you'll never go back to graham crackers again.
You might also like my graham cracker nativity scene, gingerbread cookie boxes or gingerbread teddy bear cookies!
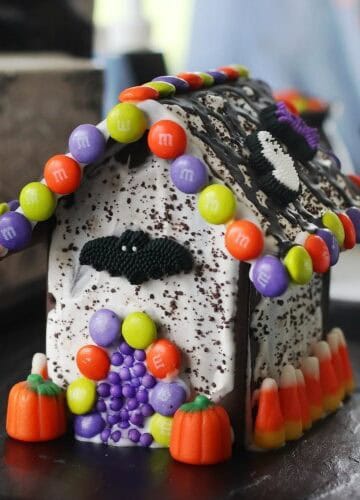
We all knew that when we made Pop Tart haunted houses earlier in the year, a holiday version would make its way to the site. Seriously, friends, once you switch to Pop Tarts, you'll never go back to graham crackers. I even made a Pop Tart nativity scene instead of a graham cracker one!
It all started when I couldn't find chocolate graham crackers at the store to make haunted gingerbread houses. My husband suggested using chocolate pop tarts. I was skeptical, but bought a box to humor him. They turned out awesome! With over 23 million views, this viral house has become a holiday tradition in many homes!
Why I Like This Recipe
- Easy to use. Toaster pastry (pop tarts) are sturdy, easy to work with and are already iced!
- Inexpensive. Making a pop tart house is cheaper than purchasing a boxed gingerbread house kit. I highly recommend using a generic store brand vs. name brand Pop Tarts. Not only are they more affordable, but they are thicker too.
- Fun for groups. My sister has a gingerbread decorating party every year with friends, and switched to pop tarts in 2020 when I first published this post. She said they worked well with such a large group! Nursing homes and libraries have also reached out to me and shared photos of pop tart houses that they made in a group setting.
📢 What Others Are Saying
Made these with four grandkids ages five and under and it worked. great. Adults built the house, then the kids decorated them. We used powdered sugar glue to make the house and canned icing for the decorations. They loved it. Thanks for posting.
Thanks for making our first attempt at Holiday House Decorating successful and fun!! The grandkids loved it!! It made it very doable for 3 and 4 year olds!
I made these tonight and we’re decorating them tomorrow. This recipe is so great and easy! The icing is simple and holds together really well! I didn’t have any houses fall apart! Also, no egg whites or meringue powder is a plus! Thank you for sharing!
Jump to:
🥣 Ingredients
- Pop Tarts: You'll need 6 pop tarts. I used strawberry because it already had red and green sprinkles on the frosting.
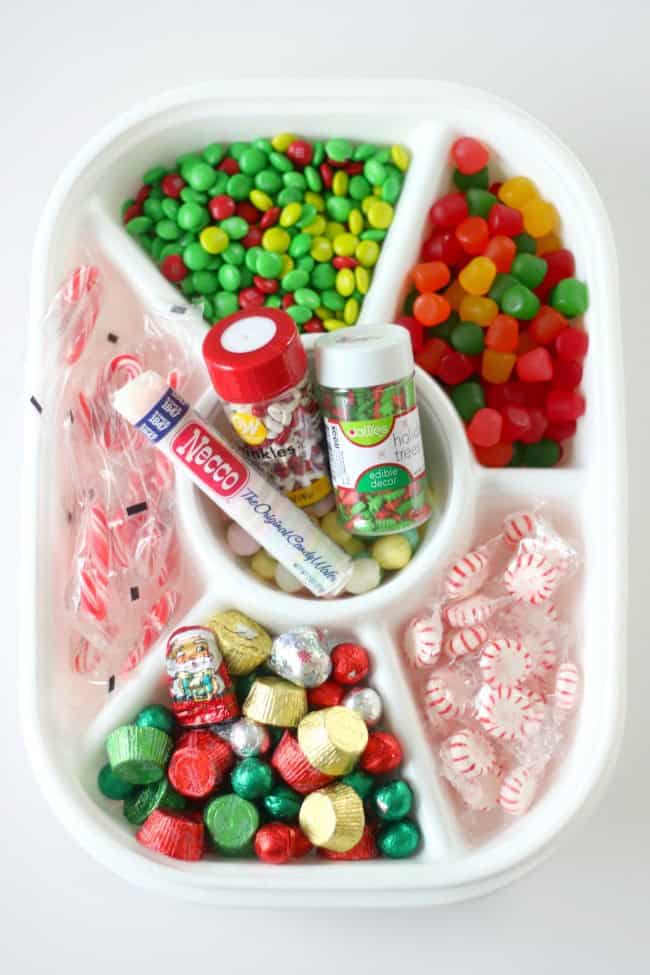
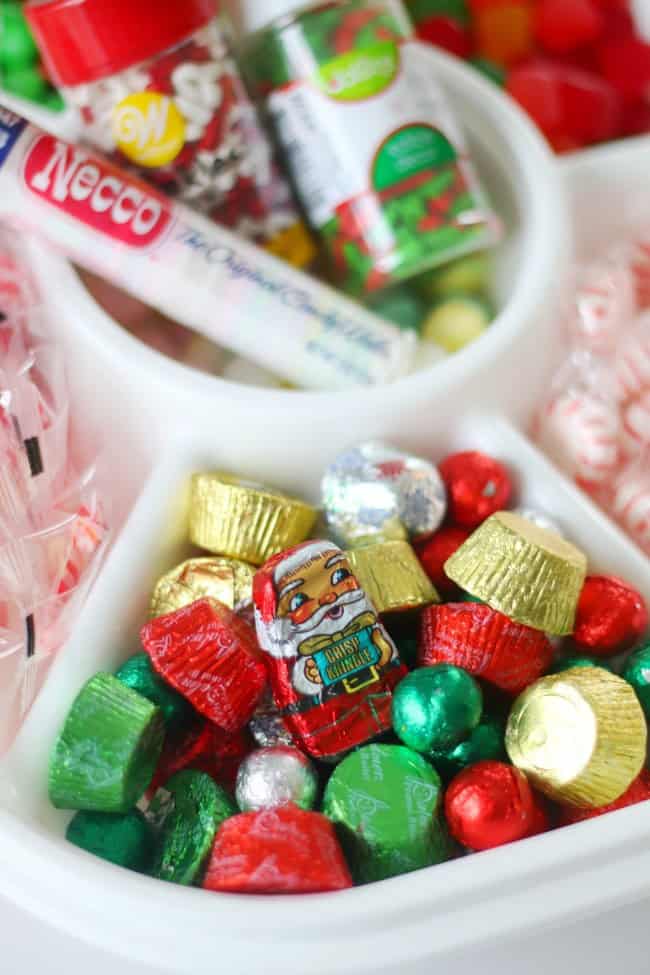
- Decorations: We all have our favorite holiday candies to use for gingerbread houses. My go-to candies are mints and chocolate candies in holiday shapes---like Santa, trees or snowmen.
- Royal icing: Royal icing works great on gingerbread houses. Here is a royal icing recipe from Wilton that uses meringue powder to create a sturdy icing. My recipe is simply a mixture of powdered sugar and water. It dries hard and works well. A good rule of thumb is to use ½ cup powdered sugar and 2-3 teaspoons of water. Mix sugar and water together until it reaches the consistency of craft glue. You don't want it to be too runny.
See the recipe card for full information on ingredients and quantities.
👩🍳 Tips and Tricks For Assembly
- ONLY USE A SERRATED KNIFE. A paring knife will not work. Gently saw as you cut, and you'll end up with nice clean lines.
- Hold in place. Add a bead of icing to the Pop-Tarts and use your hands to hold the 4 walls in place for a minute or two. After that, the icing is tacky and will hold on its own. Repeat for the roof, holding it in place for a minute or so before letting go.
- Let set. These houses are pretty sturdy once the royal icing has had a chance to set. This takes about 15-20 minutes, but waiting at least 30 minutes before decorating is recommended.
- Assemble in advance. For even sturdier houses, assemble them the day before you plan on decorating them to allow the pop tarts to dry out a bit. If you do this, you shouldn't have any issues with your house falling apart.
🏠 How To Make a Pop Tart House
Step 1: Place 6 pop tarts on a cutting board.
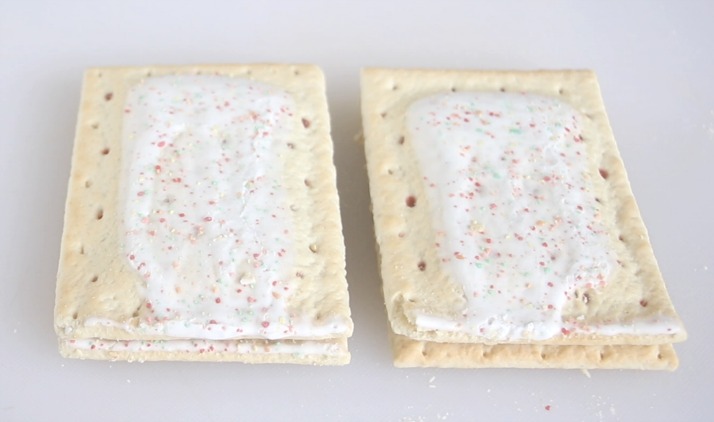
Step 2: You will be making cuts on 4 out of 6 of the pop tarts. The 2 that aren't cut are the roof pieces. You can set those 2 pop tarts to the side if you'd like.
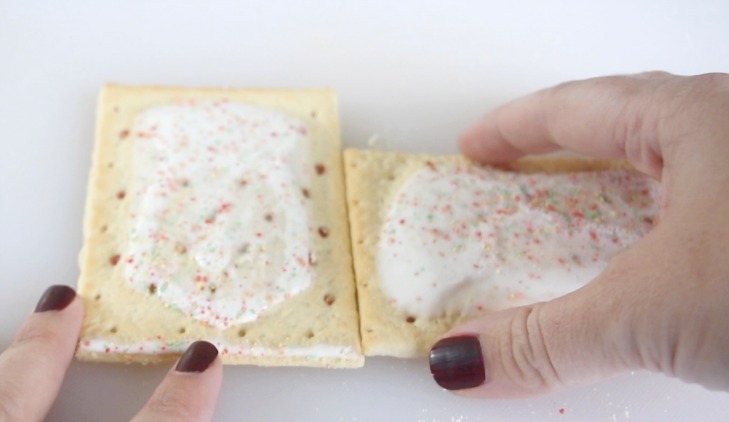
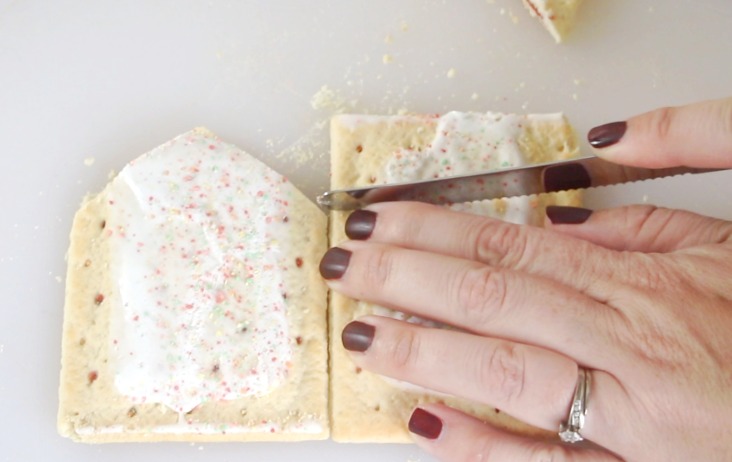
Step 3: Take 1 pop tart and place it on its side, right next to another pop tart.
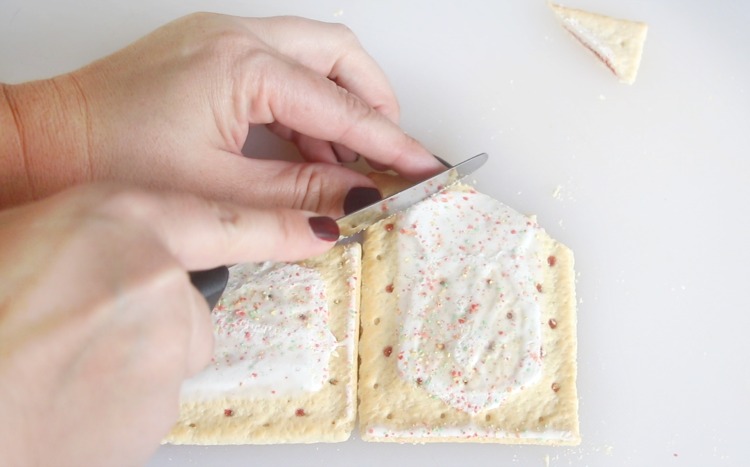
Step 4: Cut on a diagonal from the corner of the pop tart that is on its side, to the center of the middle pop tart. Repeat on the other side.
Step 5: You should now have a pop part that looks like a house. Repeat this step so that you have 2 house-shaped pop tarts.
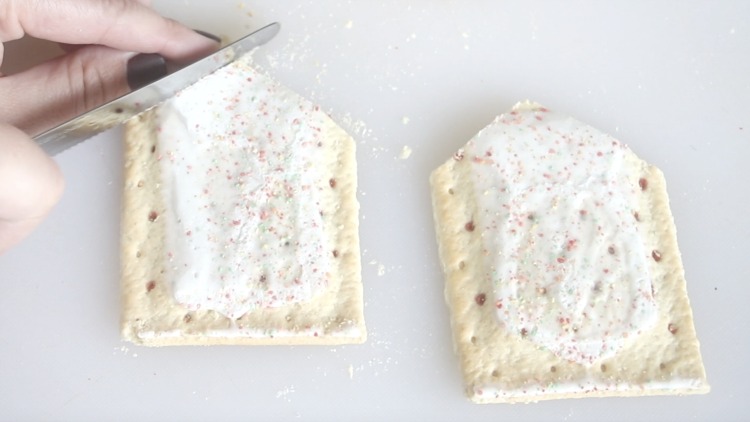
Step 6: Remember that pop tart that you turned on its side? Go ahead and stand it up again. Place it next to one of the house-shaped pop tarts, lining up the corners, and cut horizontally across. Repeat.
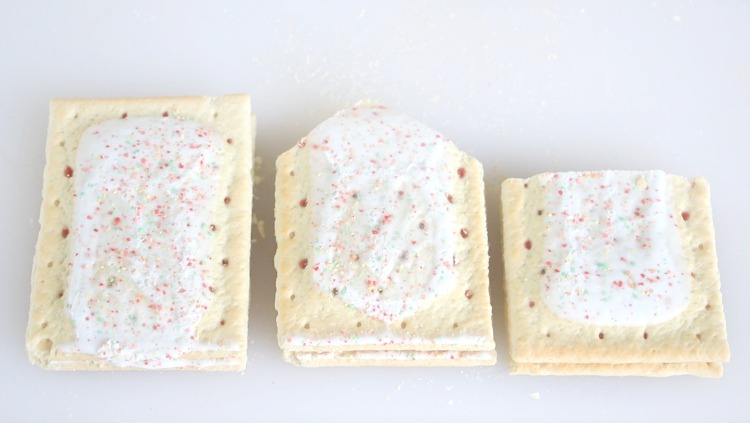
Step 7: You should now have two roof pieces (uncut), 2 house-shaped pieces, and 2 wall pieces.
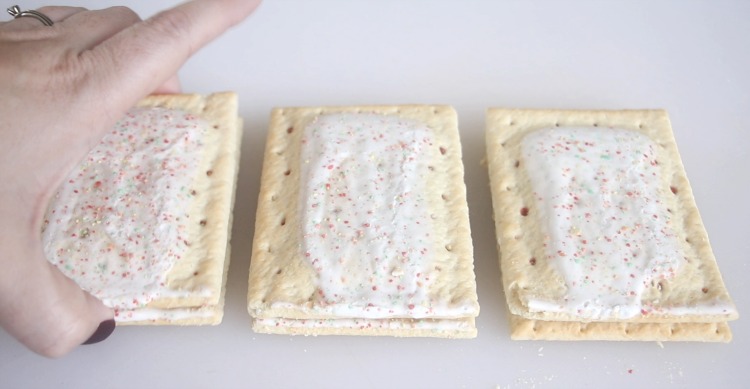
Combine powdered sugar and water to make a royal icing glue. Add water ½ teaspoon at a time until desired consistency is achieved (2 ½ teaspoons works well for me). Spoon icing into a Ziploc bag and cut the tip off.

Step 8: Glue the 4 walls together with icing and hold in place for a minute or so.
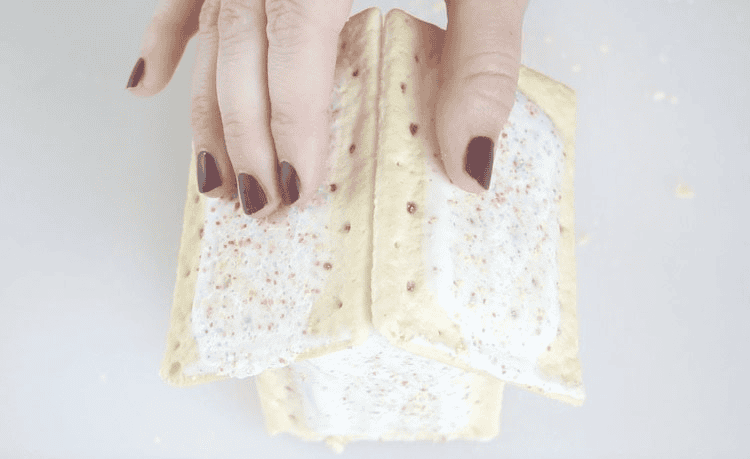
Step 9: Add the roof pieces and hold in place for a minute or so.
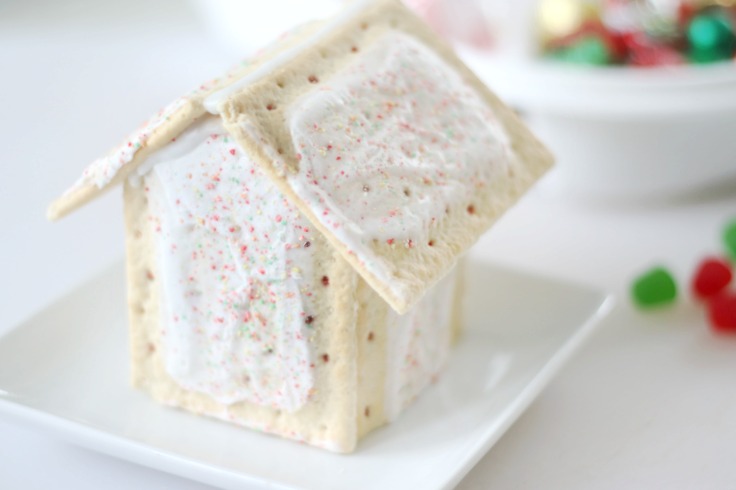
Step 10: Let houses stand AT LEAST 30 minutes before decorating. If making these with kids, assemble the houses the day before you want to decorate them to allow the pop tarts to harden a bit.
👩🍳 Tips and Tricks for Decorating
Make sure to watch our video to see how we assembled and decorated our house. It plays under the first image in the post as well as at the end of the post in the recipe card.
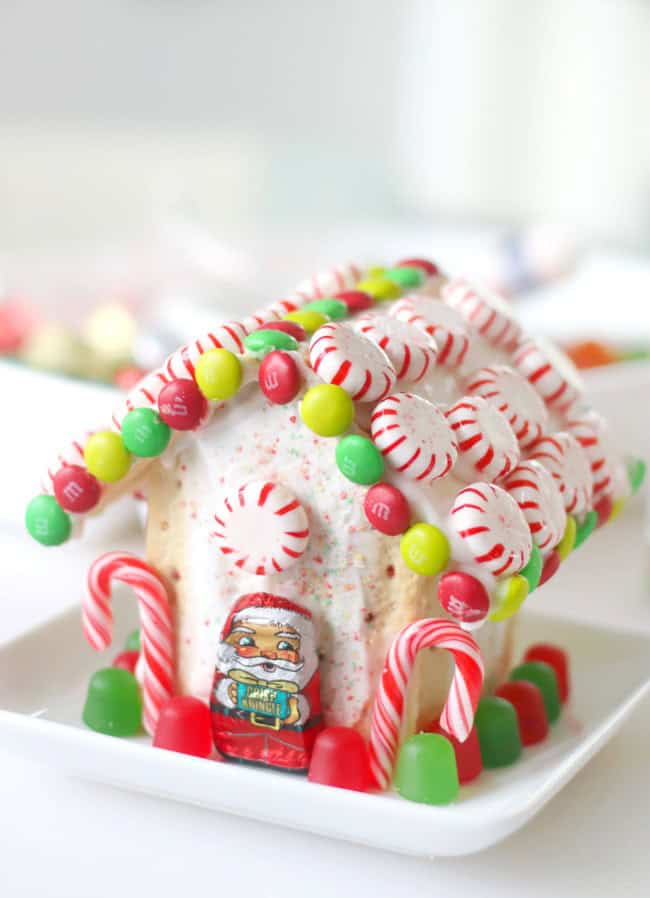
Obviously, lightweight candies like Necco wafers are easier to work with than M&Ms and starlight mints, but don't let that stop you. I'll share a few tips for working with heavier candy. That being said, if you are making these with a group of children, I'd go for lightweight candy and sprinkles to avoid little ones getting frustrated.
- To add heavier candies to the trim (see M&Ms in photo):
- Add a bead of royal icing to the house and let it sit for a couple of minutes before adding candy. This allows the icing to begin to get tacky. Add the candy, then adjust as necessary if you see any drooping. The icing will harden and hold everything after 10 minutes or so.
- To add heavy candies to the roof, you have two options:
- 1: Decorate the roof pieces before assembling the house and let them dry. Then assemble the house.
- 2: Use the tip above for heavier candies, adding a bead of icing, let it sit for a minute or two, then adding the candy and adjusting as necessary until it is firm.
- Decorating the walls:
- If you're only adding a couple of items (like I did) you can add them at the end. Easy.
- If you'd like to add a bit of decoration to the walls of your house you can do that BEFORE assembling the house. Let it set up and dry then build your house. This is an easy way to make sure gravity doesn't pull the candy down.
❓Pop Tart House FAQs
Pop Tarts are superior to graham crackers when assembling gingerbread houses for a variety of reasons:
They are bigger than graham crackers so you get a bigger house.
They are easier to cut than graham crackers and don't crumble as easily, but can still break if you aren't careful.
They come in so many colors and flavors.
They are sturdier than graham crackers and look more like a boxed gingerbread house kit.
They are frosted so it gives them a fun texture and decorative look.
One reader shared that they made these on Zoom with the 8-11 year olds at their church. She said they delivered boxes of pop tarts, candy, sprinkles and store-bought icing (plain ol' vanilla that you use for frosting cakes) to the kids and it worked out great! She said, "Everything stuck great, almost no wait time. Even the heavy candy went right on and stayed put."
So there is another option. Easy for kids, holds the heavy candies well. May not dry as hard as royal icing, but works great!
How long will your pop tart house last? Pop-Tarts are basically already stale, so you don’t need to worry about your gingerbread house going soft like graham crackers sometimes do. This house will last all season.
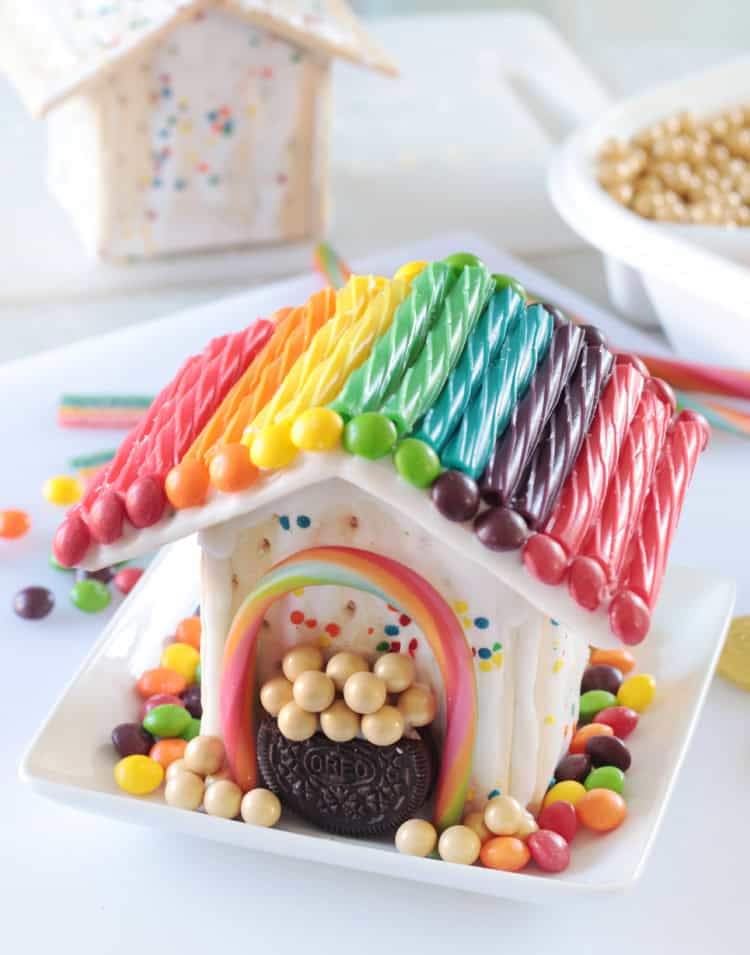
More Pop Tart Houses To Make

MADE THIS RECIPE AND LOVED IT? 💛 Please leave a STAR rating and COMMENT below! Post it to Facebook or Pinterest to easily share with friends!
Pop Tart Gingerbread House
Equipment
- serrated knife
- plastic sandwich bag
Ingredients
- 6 pop tarts
- ½ cup powdered sugar
- 2-3 teaspoons water
Instructions
- Place 6 pop tarts on the cutting board.

Roof
- You will be making cuts on 4 out of 6 of the pop tarts. The 2 that aren't cut are the roof pieces. You can set those 2 pop tarts to the side if you'd like.

Front and Back Walls
- Take 1 pop tart and place it on its side, right next to another pop tart.

- Cut on a diagonal from the corner of the pop tart that it on its side, to the center of the middle pop tart. Repeat on the other side.

- You should now have a pop tart that looks like a house. Repeat this step so that you have 2 house-shaped pop tarts.

Side Walls
- Remember that pop tart that you turned on its side? Go ahead and stand it up again. Place it next to one of the house-shaped pop tarts, lining up the corners, and cut horizontally across. Repeat.

- You should now have two roof pieces (un-cut), 2 house-shaped pieces, and 2 wall pieces.

- Combine powdered sugar and water to make a royal icing glue. Add water ½ teaspoon at a time until desired consistency is achieved (2 ½ teaspoons works well for me). Spoon icing into a Ziploc bag and cut the tip off. Glue the 4 walls together with icing and hold in place for a minute or so.

- Add the roof pieces and hold in place for a minute or so.

- Let houses stand AT LEAST 30 minutes before decorating. If making these with kids, assemble the houses the day before you want to decorate them to allow the pop tarts to harden a bit.

- Dip decorations into icing or pipe icing onto houses to decorate.


Notes
- Icing should be the consistency of craft glue.
- When cutting pop tarts, use a serrated knife and gently saw. Don't press down hard with the knife.
- To add heavier candies to the houses, like M&Ms, add a line of icing to the house and let the icing stand for a couple of minutes before placing the candy on it. This will allow the icing to dry a little and become tacky.
- You may need to hold the candy in place, or readjust the candy that starts to move as you wait for the icing to dry.
Nutrition

Mandy H. says
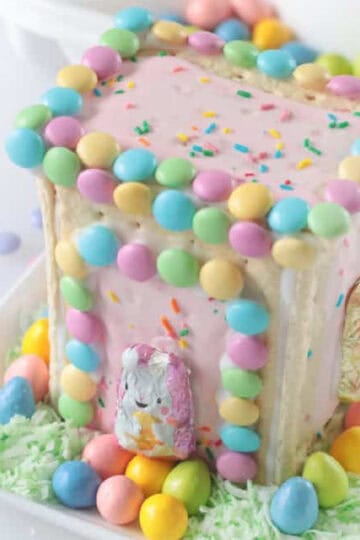
Excellent idea...perfect family fun! Thank you for your detailed directions. We made ours the week of Thanksgiving and they set out until Christmas. No crumbles or mold. My 7 year old wasn’t pleased that I threw our village away but I promised we’d make these again next year. (Even thinking about bunny houses at Easter!)
Jenny H says
My kids had a blast making these! We used hot glue to put them together and they stayed beautifully! We will definitely be doing these next Christmas. Thank you!
Jan says
Ingenious!! Kids loved it!
Victoria says
Worked great!
Paula says
This was such a fun activity to do with my daughter! We will be doing this again next Christmas!
Amy B says
These were very easy and fun to make! The video tutorial was excellent! I will use royal icing next year but the confectionery sugar worked well. The grandchildren loved decorating then. Thank you!!
Bri says
My kids loved making these together, they were super easy to assemble and tasted & looked better than traditional gingerbread houses we’ve done in past! Thanks for the wonderful idea!
Sue says
My grandchildren loved the pop tart houses. I put the houses together the night before so they would be ready to decorate the next day and stored them in the refrigerator. The first one I made I had a hard time getting the glue thick enough to stick together but, with patience they finally dried and the roof could be put on. I made the glue thicker for number 2, it worked a lot better.
We used canned frosting to stick the decorations to the outside of the house. This let my grands do the decorating “all by themselves”! I would recommend this fun and festive gingerbread house technique to all and plan to try again next year.
Makinzee says
We will make these everywhere. I loved the simplicity of buying from the store and then assembling even 5 minutes before we started decorating. I had 4 friends copy the idea also. Thanks for the suggestions.
Liz says
Brilliant. Never going back to graham crackers again!
Roxanna says
We made pop.tart gingerbread houses this year and used a royal icing recipe. It was so much easier to use the pop tarts then Graham crackers. I think something that might have helped more would have been to let the pop tarta sit out on a cookie sheet to harden for a few days before making the houses. Ours were a bit soft from being in the packages. This was a great idea and that k you for sharing it!
Denise says
We've done traditional gingerbread houses for the past 25+yrs but when I saw this, I HAD to do it! My grandkids AND adult kids had a blast! Less fuss, tons of fun for all!!!
Kim Tietz says
I teach kindergarten and am doing so remotely this year. For $70 I purchased all the supplies and made 26 ziplock baggy kits that families picked up on a distribution day, so my students and I could make candy houses together on our last Google Meet before Christmas break. So. So. So! Much easier with pop tarts. My students were so excited for the project they were waking parents at 6:30 for our 9:00 class. The directions were clearly written and the photos were helpful. The parents prepared their children for class by cutting the pop tarts as directed and surprisingly only one package of pop tarts were broken! Thank you for this great idea!
Brandy says
This just made my day. Virtual high fives to such an amazing teacher to do this for your class, and high fives all around for the parents who helped their kids cut the pop tarts and assemble the houses! So awesome!
Cherie Norris says
These were so much fun & tasted better than traditional gingerbread houses! We will definitely do these again next year. Thanks for the suggestions.
Sandra Smith says
We loved making these pop tart gingerbread houses! So easy and I made them the night before, so they were super sturdy for the kids to decorate the next day! I will definitely be making these next year too!