menu icon
go to homepage
  • Christmas
  • DIY
  • Recipes
  • About Me
  • Subscribe
    • Facebook
    • Instagram
    • Pinterest
  • subscribe
    search icon
    Homepage link
    • Christmas
    • DIY
    • Recipes
    • About Me
    • Subscribe
    • Facebook
    • Instagram
    • Pinterest
  • ×
    Home

    One Smart Cookie Teacher Printable

    August 16, 2011 By Brandy 24 Comments

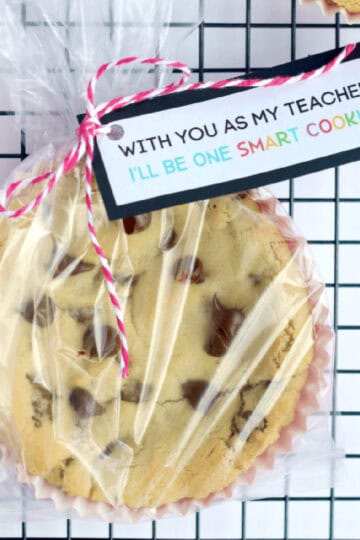
    Cookie packaged in cellophane bag with tag.

    "With You As My Teacher, I'll Be One Smart Cookie". Attach this printable tag to a deep dish chocolate chip cookie for a back-to-school teacher gift!

    My go-to back-to-school gifts for teachers bounce back between two things: this yummy cookie gift and this hand sanitizer gift for teachers. Both are simple to put together and always appreciated!

    Deep dish cookie wrapped in plastic with a printble tag.

    My boys are starting school in the next couple of days, and so I thought it would be nice to bring a little treat for their new teachers! Aaron actually has a "Meet & Greet" this afternoon with his teacher, so we made a batch of cookies and plan on bringing her one.  It's so fun to spoil my kid's teachers for all of the random holidays throughout the year.

    When a cute little boy walks up to you with a freshly baked chocolate chip cookie, it is bound to start the year off on a good note, right?

    One smart cookie printable tag attached to the cookie.

    Why I like This Gift Idea

    • Can be used for homemade cookies or store-bought cookies. If you are running short on time, you can add this cute tag to a package of Oreos, Pepperidge Farms cookies, or Girl Scout cookies! Those are always a hit. For homemade cookies, these deep-dish cookies are my go-to, but chocolate-coated Jacques Torres cookies would be my runner-up. Truly a show-stopping cookie.
    • Simple and inexpensive. Many teachers have shared that they prefer simple gifts. Things that don't collect dust. This cookie gift can be as inexpensive as you need, and if you want a more personal touch, have your child sign their name to the tag or create their own "One Smart Cookie" tag.

    What Others Are Saying

    This is such a cute idea and so thoughtful! ---Erin

    Adorable and simple enough for those novice, dare I say danger w/ a scissors crafters out there like moi.---Trish

    [feast_advanced_jump_to]

    Tips and Tricks

    1. Print on copy paper or cardstock paper. I like printing on copy paper, then attaching it to a black cardstock package for stability and a cute frame.
    2. Make the cookies a day in advance. For the freshest cookies, yet cookies that are stable and easy to package, bake the cookies the day before you need them. This allows you to easily package the cookies without the chocolate chips still being soft and smearing in the packaging.
    3. Warming instructions. If you decide to make my deep-dish cookies, be sure to let the teacher know that they are best served warm! Just heat in the microwave for 5-8 seconds and they'll be all warm and gooey!

    Ingredients and Supplies

    hand holding printable tag

    For the One Smart Cookie Tags

    • Copy paper or card stock
    • Glue stick
    • Free printable (click to download)
    • Hole punch
    • Twine

    For the Deep Dish Chocolate Chip Cookies

    • Butter: I bake exclusively with salted butter, but you can use unsalted butter if you'd like.
    • Brown sugar and white sugar: I always use a combination of brown and white sugar for softness and flavor.
    • Eggs
    • Vanilla extract: If you haven't tried making your own vanilla extract, I highly recommend trying it!
    • Baking soda, baking powder, and salt: For leavening and flavor.
    • All purpose flour
    • Chocolate chips: any variety you'd like. I like using semisweet chocolate chips or a combination of semisweet and milk chocolate chips.

    See the recipe card for full information on ingredients and quantities.

    How To Assemble One Smart Cookie Teacher Gifts

    Step 1: Download the printable One Smart Cookie tags.

    Step 2: Cut around the border, then glue onto a piece of black cardstock.

    Step 3: Punch a hole and string the tag onto your cookie package.
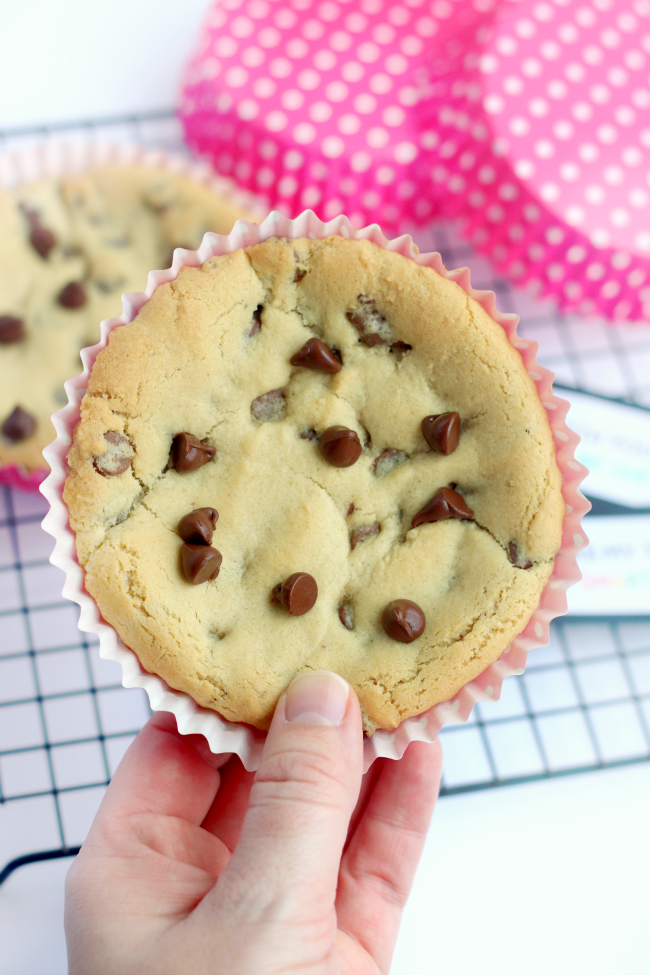
    hand holding deep dish chocolate chip cookie

    Top Tip

    I bake my deep-dish cookies in these baking cups. They are nice and sturdy and make the perfect dish to eat the hot cookie out of. I placed each cookie in a cellophane bag and tied the tag using baker's twine.

    Deep Dish Cookie FAQs

    How many deep dish cookies will one regular batch of cookies make?

    This recipe makes 10 deep-dish cookies. Each cookie is ½ cup of cookie dough, which is significantly more cookie dough than a classic chocolate chip cookie.

    Can you reheat deep-dish chocolate chip cookies?

    Yes, and I highly recommend doing so. Heat in the microwave for 5-8 seconds, and they'll be all warm and gooey!

    How do you make deep-dish cookies without a baking pan?

    I bake my deep-dish cookies in these baking cups. They are nice and sturdy and make the perfect dish to eat the hot cookie out of.

    More Teacher Gifts To Give

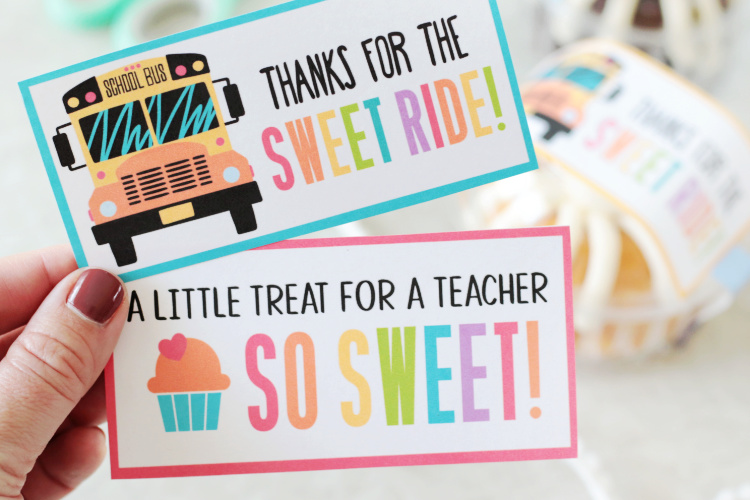
    • hand holding two colored teacher appreciation gift tags
      Bus Driver & Teacher Appreciation Printable Gift Tags
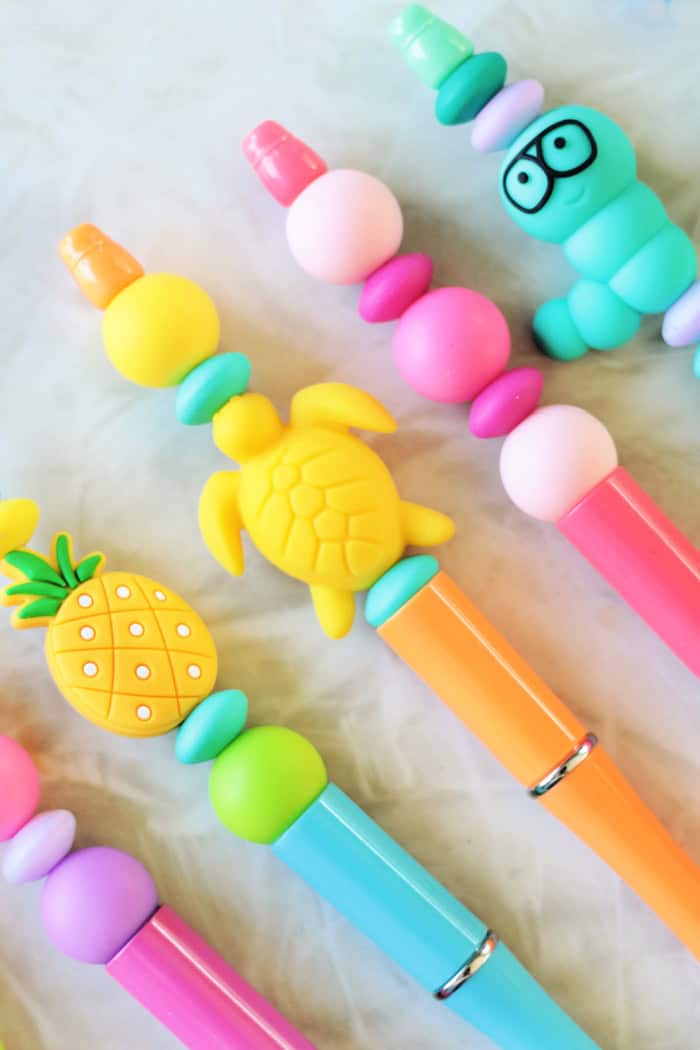
    • variety of beadable pens with silicone beads
      Beadable Pen Tutorial (Easy Gift Idea!)
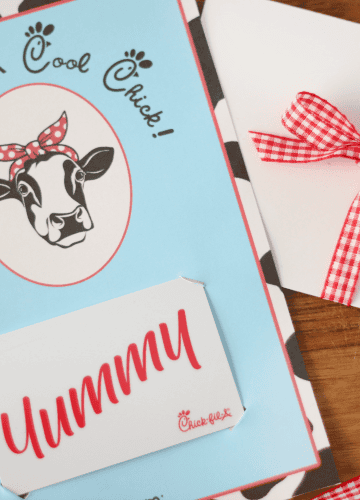
    • gift card attached to gift card holder
      Printable Chick-fil-A Gift Card Holder
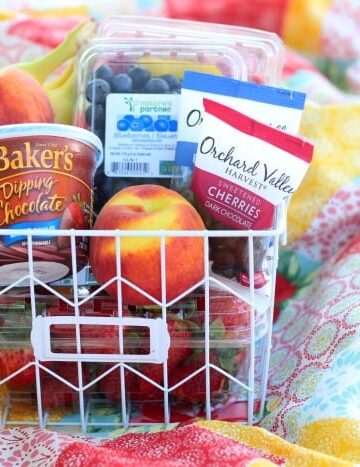
    • Chocolate Fruit Basket Gift Idea

    MADE THIS RECIPE AND LOVED IT? 💛 Please leave a STAR rating and COMMENT below! Post it to Facebook or Pinterest to easily share with friends!

    Cookie packaged in cellophane bag with tag.
    Print Pin
    5 from 2 votes

    One Smart Cookie Deep Dish Chocolate Chip Cookies

    "With You As My Teacher, I'll Be One Smart Cookie". Attach this printable tag to a deep dish chocolate chip cookie or package of cookies for a back-to-school teacher gift!
    Course Dessert
    Cuisine American
    Prep Time 10 minutes minutes
    Cook Time 13 minutes minutes
    Total Time 23 minutes minutes
    Servings 10
    Calories 700kcal
    Author Brandy Nelson

    Ingredients

    • 1 cup butter softened
    • 1 ¼ cup light brown sugar
    • 1 cup white sugar
    • 2 eggs
    • 1 Tbsp. vanilla extract
    • 1 tsp. baking soda
    • 1 ½ tsp. baking powder
    • ½ teaspoon kosher salt
    • 3 ½ cup all purpose flour
    • 2 ½ cup chocolate chips divided (milk chocolate or semisweet)
    • baking liners

    Instructions

    • Preheat oven to 375 degrees.
    • Cream the softened butter and sugar in a large bowl with an electric mixer or stand mixer.
    • Add eggs, one at a time. Mix.
    • Mix in vanilla.
    • Add dry ingredients to wet ingredients.
    • Stir in 2 c. chocolate chips.
    • Arrange 6 baking liners on each baking sheet.
    • Fill each liner with ½ c. cookie dough.
    • Press dough down to flatten. Sprinkle each cookie with a few extra chocolate chips.
    • Bake 13 minutes or until edges are golden.

    Video

    Notes

    Variations: add walnuts or pecans, or use a mixture of white chocolate chips and semisweet chocolate chips!
    One batch makes 10 deep-dish chocolate chip cookies. Like any cookie, they are best right out of the oven but will stay fresh for a few days if stored in an airtight container.
    How To Assemble One Smart Cookie Teacher Gifts
    Step 1: Cut around the border, then glue onto a piece of black cardstock.
    Step 2: Punch a hole and string the tag onto your cookie package.

    Nutrition

    Calories: 700kcal | Carbohydrates: 110g | Protein: 6g | Fat: 33g | Saturated Fat: 20g | Polyunsaturated Fat: 1g | Monounsaturated Fat: 5g | Trans Fat: 1g | Cholesterol: 82mg | Sodium: 497mg | Potassium: 232mg | Fiber: 1g | Sugar: 73g | Vitamin A: 615IU | Calcium: 116mg | Iron: 2mg


    Homemade Foaming Hand Soap

    July 21, 2011 By Brandy 23 Comments

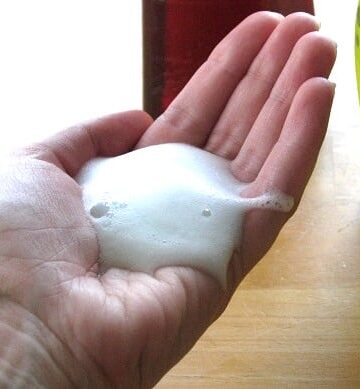
    hand with foaming hand soap on it

    hand stretched out with foaming hand soap on it
    Homemade Foaming Hand Soap. Who knew? Apparently a lot of people except for me because when I googled it, a bunch of links came up! Now that I know how easy it is to make I will never buy another $3 bottle of it again! How do manufacturers justify charging so much for a bottle of it when in actuality you are buying a fraction of the soap that a regular bottle of hand soap has and it is diluted down with water? They probably justify it because people are willing to pay for it! I was.
    Here's how you do it:
    Fill an empty FOAMING soap bottle with 1" clear hand or dish. It needs to be clear, not lotion/creamy based.
    I used DAWN for these bottles, but have used Ivory liquid dish soap as well. It makes my hands soft and both are antibacterial.

    Slowly add enough warm water to fill the bottle, leaving a small space at the top. Replace pump and gently rock back and forth to combine water/soap. Don't shake. Let sit for a minute, give it a couple of pumps and that is it!A large $3 bottle of your favorite scented antibacterial clear soap will make 10-15 bottles of foaming hand soap.

    I love foaming soap because it is easier to wash off of hands and uses so much less soap with each use, but is still as effective. My kids just think it's cool.

    PVC Framed Canopy Bed

    July 19, 2011 By Brandy 87 Comments

    pink pillow with cat print

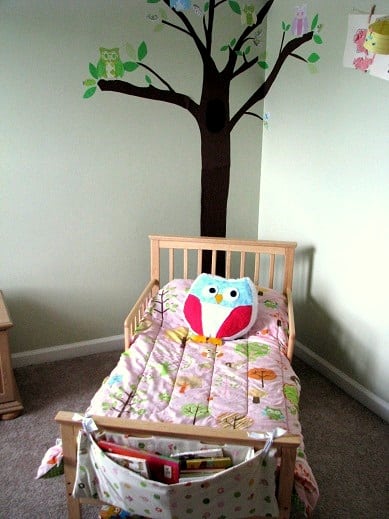
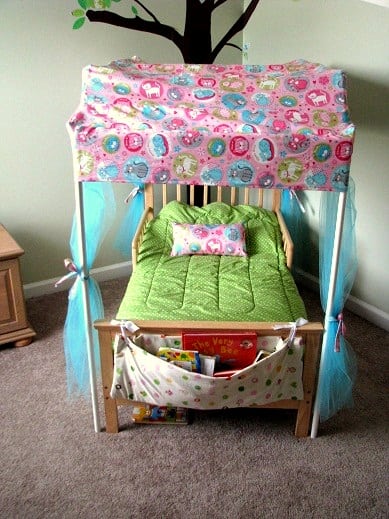
    wooden toddler bed with pink comforter
     While browsing Toys R Us & Babies R Us last weekend, we came across a cute Tinkerbell canopy bed that Kaylee just loved. She already had a nice toddler bed, so we didn't give it much though, or at least I didn't. Daddy had other plans...
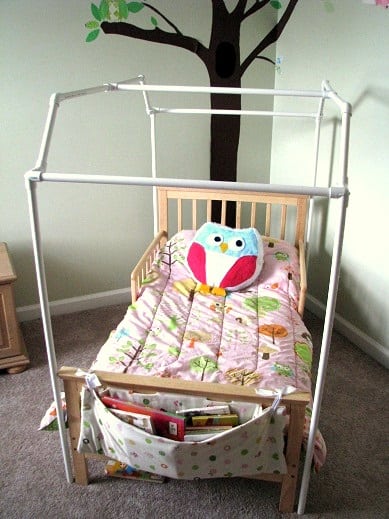
    pvc pipe frame around toddler bed
     Derrick thought that it would be pretty simple to make her a canopy for her existing bed from a PVC frame. He is the king at PVC pipe creations...
    child playing with homemade pvc pipe sprinkler
     Homemade Sprinklers
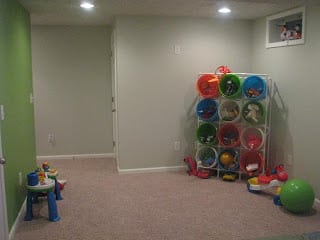
    pvc pipe toy storage
    Toy Bucket
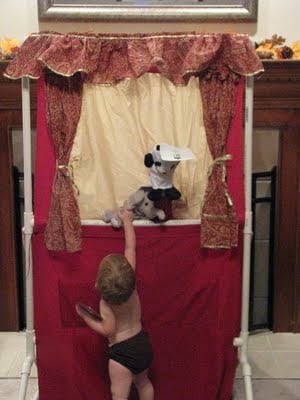
    pvc pipe puppet theater
    Doorway Puppet Theater Frame
    (Just to name a few 🙂
    And he was right. He was able to put this frame together in a matter of minutes and Kaylee was thrilled! She loved having just the frame, never mind having any sort of canopy attached. Kids are easy to please. I took her to the fabric store and she chose a couple of fabrics for the project. A pink kitty fabric and turquoise tulle.
    pvc canopy frame over toddler bed
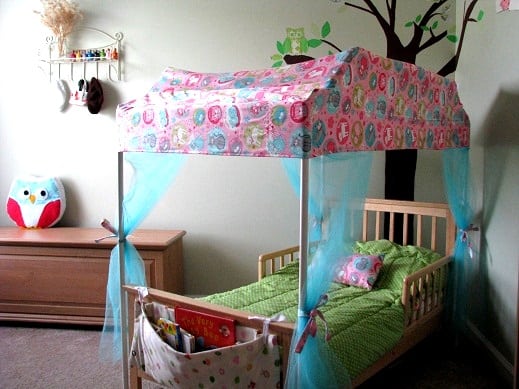
     After a couple of hours of stressing (I'd never done something like this before and did not have a pattern) and sewing, here is the finished product!
    fabric canopy cover over pvc frame
     It fits perfectly, thanks to a few minor adjustments and an extra seam through the center to tighten it up a bit in the end. I've already had some requests for a tutorial. If I had any idea what I was doing(when I was doing it), I might have written down some dimensions and instructions, but it was a first time project for me that would probably turn out differently if I did it again. Basically...
    toddler canopy bed
    You can see that both side panels are kind of a triangle shape. I followed the outline of the frame that Derrick made and added an ½" all the way around for seam allowances. I used a ⅜" seam and that gave it a little room for error. I used newspaper to make pattern pieces (taped it to the pipes) and then cut out the fabric shape. The top is one long piece that is the width of the pipes and stops where you see the crease on the front. That is a seperate piece so that it would fit the angle. It is also the width of the pipes, but only 4" or so in length. Then there is another piece directly on the front attached to the small 4" one.  I made it long enough so that it was flush in length with the side panels. So the sides are each 1 panel and the top is 1 large panel + 2 smaller ones on the front and another 2 smaller ones (the same size as the front) on the back. This probably doesn't make any sense. Just use your frame as a guide. I'm not sure what it would have looked like if I just did one piece for the top and didn't use seperate pieces for the angles, it might have been fine. I'm not an expert so I just did what I thought would work. Then I hemmed it all the way around and sewed the little curtains to the hem. Total fabric for the project 3 ½ yards pink + 4 yards tulle.
    ***
    I used extra fabric to make ties for the faux curtains and a throw pillow. This is the reverse side of her owl comforter in the first photos. It matched the new canopy perfectly!
    wooden toddler bed with canopy made out of pvc pipe
     She loves her kitty bed (although she calls it a Tink bed after seeing the Tinkerbell one at the store) and sleeps, not only in comfort, but in style!
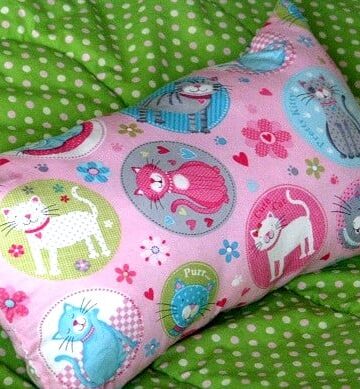
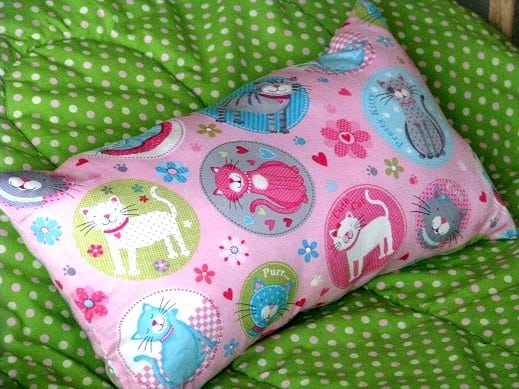
    pink pillow with cat print
    Here is a close-up on the fabric. It was found at Joann's in the juvenile apparel selection at 60% off last week. I picked up several prints since it is so bright and cheerful, and nice and sturdy! So much better than calico.
    Pin It

    Homemade Ice Cream Bowls!

    July 17, 2011 By Brandy 13 Comments

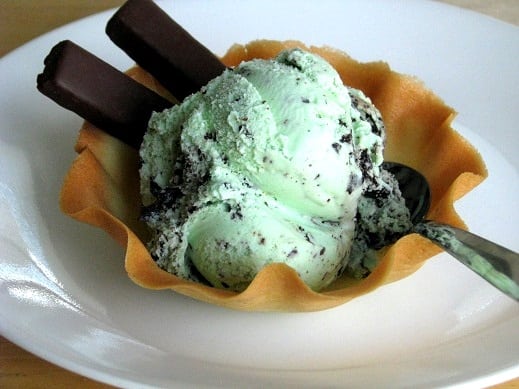
    homemade ice cream bowl with mint ice cream

    homemade ice cream bowl with ice cream and cookies
     The other night, Derrick asked me to make a batch of fortune cookie batter....for what? Ice cream bowls! I knew they would taste good, but I wasn't sure how they would hold up. The end result? Amazing!

    Fortune Cookie Ice Cream Bowls

    Ingredients

    • 2 egg whites
    • ½ cup flour (sifted)
    • ½ cup sugar
    • 2 tablespoons water
    • 1 teaspoon almond extract
    • ½ teaspoon vanilla extract
    Cooking Directions

    Set oven to 400 degrees F.

    Place egg whites in a bowl and beat with electric mixer on medium speed until very frothy, almost soft peaks. Add sifted flour, sugar, almond and vanilla then mix. Stir in 2 tablespoons of water to thin batter.

    Using a Silpat baking mat, parchment paper or baking pan (lightly sprayed with non stick cooking spray), place ¼ cup of batter on pan. Spread into a smooth circle 6-8" in diameter (depending on how large you want your bowl to be). Bake for about six minutes, or until the edges are lightly browned.

    When they come out of the oven, working quickly, form your cookie over the back of a small glass bowl. Place another upside-down bowl on top to keep the cookie in shape. Let cool about 60 seconds and remove the top bowl. Carefully move cookie from bottom bowl and let cool on a rack.

    ice cream bowl made from cookie batter on white plate
    When making fortune cookies. the edges get brown and the centers remain cream colored. To get an even color throughout the cookie, you can add a small dab of Wilton's concentrated food coloring (buttercup yellow). Derrick did that for the last half of the batch and they looked awesome.
    They were a hit!

    Patriotic Paper Star Wreath for Kids to Make

    June 16, 2011 By Brandy 15 Comments

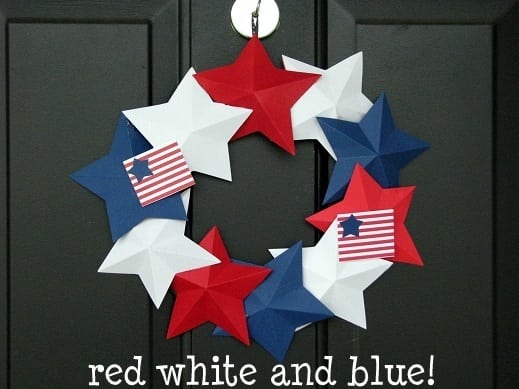
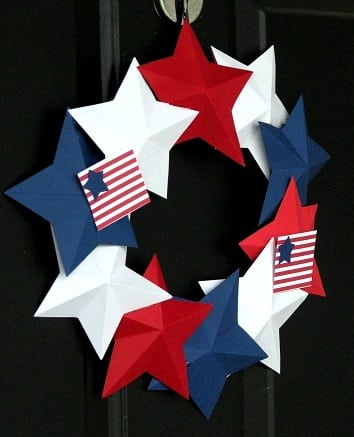
    star wreath hanging on front door

    If you have scrapbook paper in your craft stash and a hot glue gun you can make this super easy star wreath in less than an hour! This is a great craft to make with kids and can be customized for so many occasions.

    There are so many fun crafts for kids to make out of paper. Try our DIY pocket fans, talking dinosaur clothespins, or a pop up book!

    patriotic wreath on front door

    Aaron and I made a fun cardstock wreath for our front door last year. Nice and bright with summer colors and easy to customize for any season. I knew it would make a great kids craft and would be darling in red, white and blue. Ta-da! Here it is and I LOVE it!,


    paper wreath hanging on magnet wreath hanger
    I use my cricut to cut my star shapes, but a cricut is not necessary. You can simplm cut out stars and still make then 3 dimensional without a cricut.


    child pushing start button on paper cutting machine

    Here is how to make your own Patriotic Paper Star Wreath

    Using your scissors/cutting tool/machine, cut out 12 {5″} stars. The number of stars you will need can vary, but for a 10″ wreath, 12 stars is a nice amount to start with. You can layer it more or less from there.

    {We use the Plantin Schoolbook cricut cartridge. We made them using the “roly poly” feature so that they would be wide. Sturdy cardstock works best for making these.}

    Now we’ll show you how to make your stars 3-D!

    child peeling star cut outs off of cutting mat

    Below is one all ready to be scored. The white cardstock is under the bright paper.

    scoring paper star points

    Score your star 5 times. Once for each point. Start at the point and score directly across to the center between the two bottom points. Rotate star and score again until each point has been scored.

    folding the star points on each scored line

    Fold each scored line and crease firmly.

    finished 3d paper star

    There is your 3-D star! Now finish up the rest of them and you’ll be ready to assemble your paper wreath or use them for any number of fun little projects.

    cardboard cut into a wreath base

    Cut out a 10″ ring for your wreath base using thin cardboard.

    paper stars placed around wreath base

    Hot glue the stars to the ring and eachother. Since they stick out, you can’t glue them flat, so just apply a small amount of glue to the points where the stars overlap eachother. Don’t skimp on the glue.

    ribbon folded in half and glued to the back of the wreath

    Attach a ribbon for hanging.

    red white and blue stars glued to wreath


    I love that it works for all of the patriotic holidays! My front door looks so bright and festive.

    Father's Day Treat Cans

    June 14, 2011 By Brandy 6 Comments

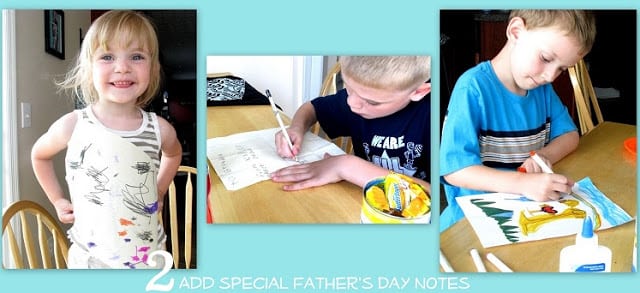
    kids making father's day cards

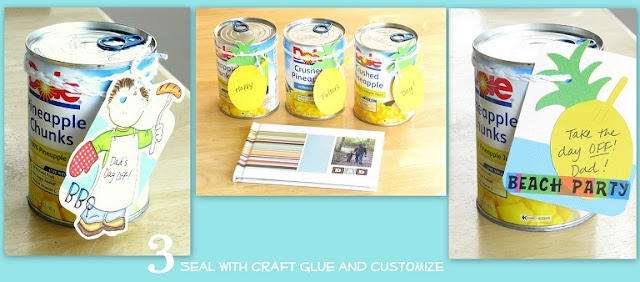
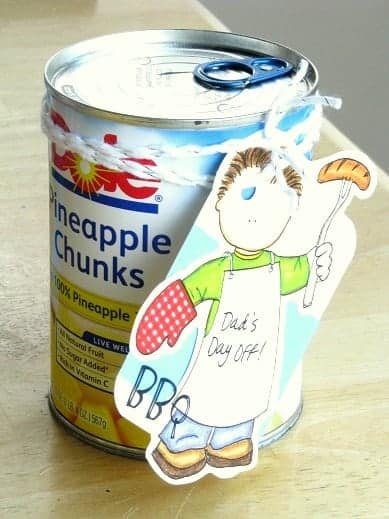
    pineapple can filled with treats for dad

    Our Father's Day Gifts this year are simple, kid friendly, and made with a lot of excitement and anticipation from the little ones.
    I purchased a safe lid can opener (the kind that cuts from the side and leaves an edge) and it did a GREAT job of cutting the bottoms of the cans.
    For this project, you need cans with flat bottoms (the bottom is grooved the same as the top) or else the can opener will not open them. So we went with fruit cans.

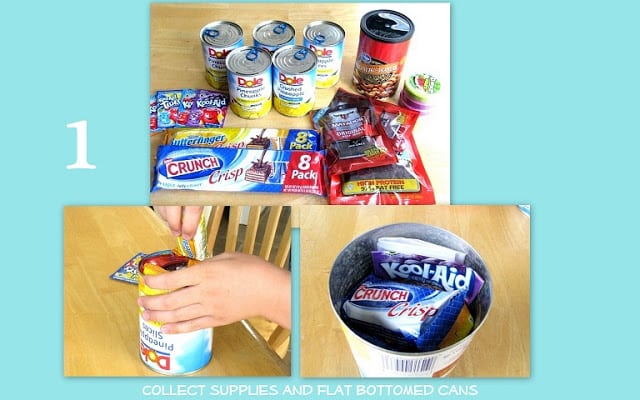
    5 pineapple cans and a variety of snacks

    We stocked up on a bunch of snacks: candy bars, jerky, mixed nuts, fruit mints, etc. and loaded up the cans.
    kids making father's day cards
     I asked the boys if they would like me to make some special labels for the cans, but they thought it would be funny to leave them as is. The little tricksters 🙂 They were both giddy with the thought of mailing their Grandpa's a can of pineapple and each giving one to Daddy for Father's Day and seeing the surprise on his face... and probably a bit of bewilderment. So we left our cans plain. Good 'ol pineapple. They each made a special note to add inside and we attached the bottom back onto the can with a bit of craft glue.
    finished treat cans filled with snacks
    metal can filled with treats and tied with ribbon and tag
    I added a couple of tags for the ones for Grandpa's and put the kids together as a trio for their Daddy. We also ordered him a photo book which they signed. It turned out darling. They are very excited for Sunday to come so that they can give Derrick their presents! Tomorrow we will be working on a couple more small gifts. They are each coming up with an "invention". Something that would make Daddy's life easier. Aaron picked up a toothbrush at the store and is planning on attaching a comb to the other side. A 2 in 1 brush/toothbrush. Dallin is coming up with some sort of microwave popcorn in a brown bag that is ALREADY seasoned.  No matter how these "inventions" turn out, Derrick will love them ♥

    A Mini Tool Box Craft For Dad: Father's Day Gift Idea

    June 12, 2011 By Brandy 8 Comments

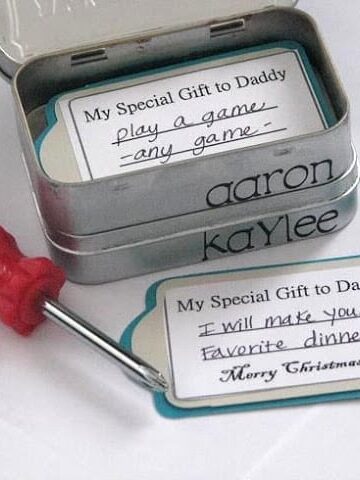
    open tool box with father's day coupons inside

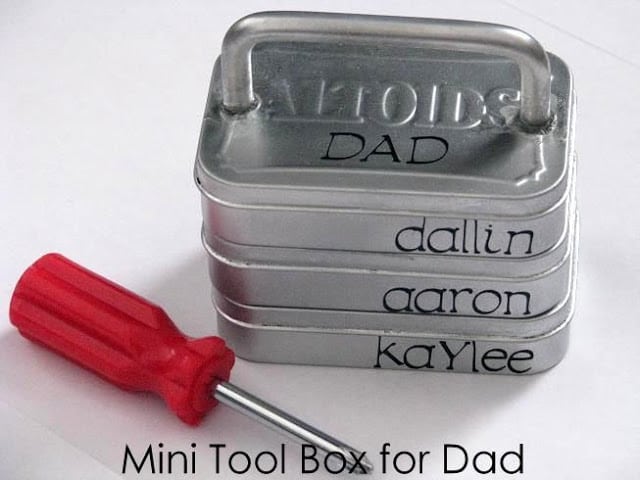
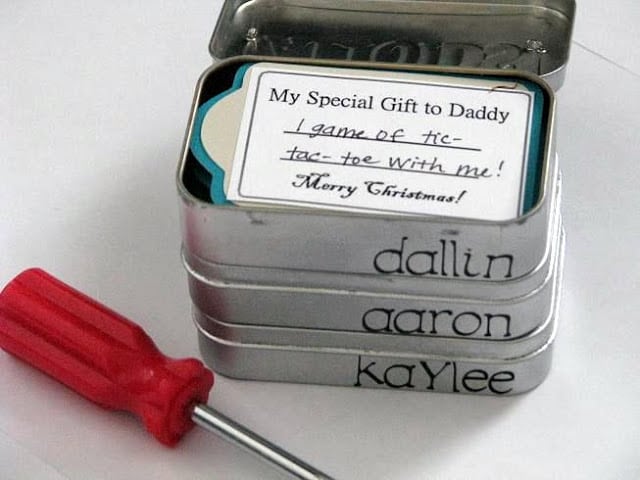
    Make dad a mini tool box craft filled with coupons! A darling Father's Day gift from the kids! Altoid containers are fun to use for so many projects. 3 are stacked together to create this mini tool box.
    mini tool box for dad made out of altoid tins
    Father's Day is just around the corner and I would love to share an idea that my children and I made Derrick. We actually made this as a Christmas gift last year, but it could be used for any occasion for the lover of tools in your home! And the Daddy over here has many boxes of tools, so this was perfect for him.
    I found my inspiration for this project by googling "creative gifts for dad" in google images and found a photo of a mini tool box on Alpha Mom! So I checked out her site and was in love! Here is our version of this fun tool box!

    Father's Day Gift: A Mini Tool Box Craft For Dad

    For this project, you will need:
    Empty Altoid Tins. At least one, but they are darling when stacked.
    Sand paper or wire brush
    Spray Primer
    Spray Paint
    Vinyl + Cricut or Silhouette (optional)
    Craft Wire
    Hammer & Nail or metal punch
    Mini Hardware Handle
    (Don't you just love Altoid tins? The project ideas for these cute little boxes are endless!)
    First things first. Cover your work surface outside with newspaper and make sure it is well ventilated. Sand each tin to create a rougher surface for your paint to stick to. Don't worry about doing anything to the inside of your tins, just the outside.
    Apply your spray on primer and let dry. Then apply several thin coats of the spray paint color of your choice, allowing time for each coat to dry in between layers.
    mini tool box craft lid open
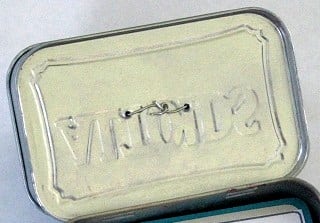
    Once dry, mark 2 dots on the bottom of the first tin, and the tops of each consecutive tin, and bottom of the middle tin. Using a hammer/nail or metal punch, carefully hammer two holes into each surface that you marked. Make sure that the holes line up with the tin underneath since you will be wiring the tins together. After the holes are punched, wire them together with your craft wire.
    mini tool box craft with coupons
    Once your tins are wired, apply vinyl (this is of course optional). And your handle. You could screw in you handle from the underside, but the one that I bought didn't work like that. The screws were too long (they allowed for depth since they are supposed to be screwed into a cupboard) so I used some epoxy and allowed it to dry 24 hours. It is merely a decorative touch, not meant to hold up to being carried around a lot.
    open tool box with printable coupons inside
    Then fill it with little goodies and you are set! We made these coupons for ours. I put them in their designated tins. On the back of each coupon is a picture that each child drew.
    If you liked this Father's Day gift idea you might also like...
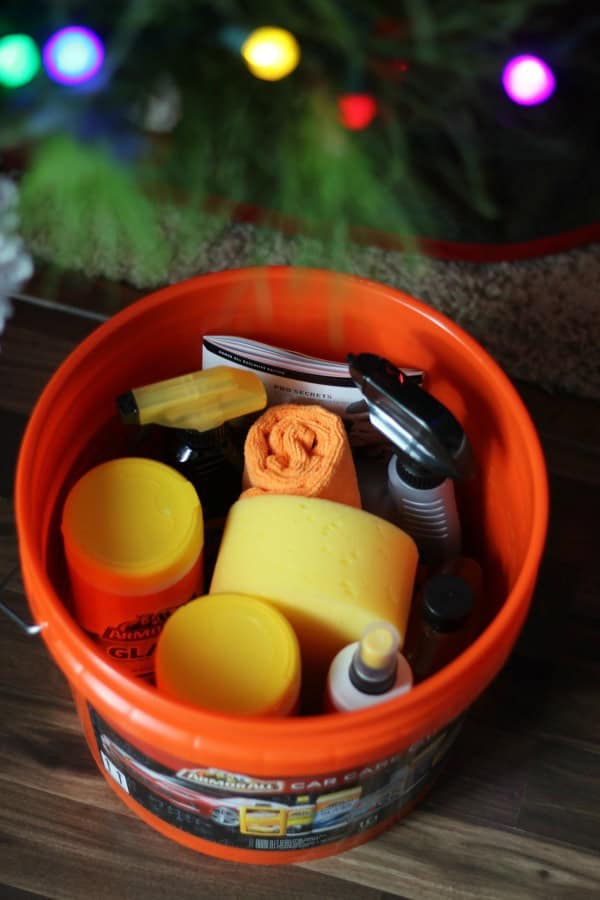
    car washing kit for dad
    Car Wash Kit for Dad

    Summer Tie Dye Party!

    June 10, 2011 By Brandy 13 Comments

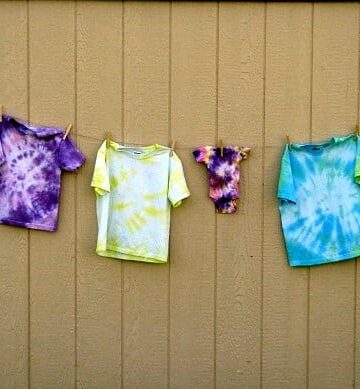
    tie dyed shirts hanging on clothesline

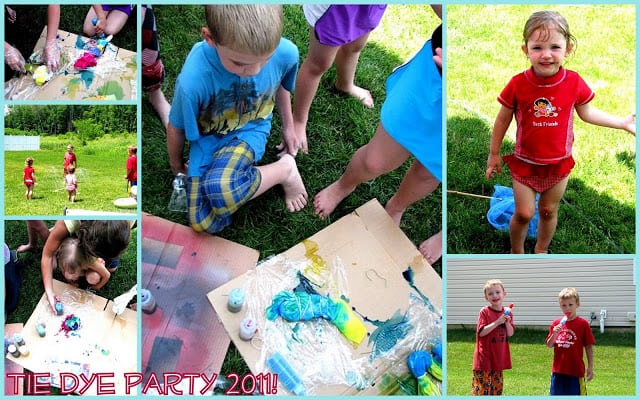
    We hosted a "Tie Dye" party in our back yard earlier this week and it was FUN! We invited a bunch of friends to come over with white shirts and dressed to get WET. The kids made shirts, played in the homemade sprinklers and wading pool, ate lunch and PLAYED. It was great! Kaylee kept coming up to me and saying, "Not done yet Mama!" and would then run back to the wading pool to play.
    The weather was in the mid 80s, not a cloud in the sky and very low humidity. Perfect!
    I supplied beverages for the moms, juice boxes for the kids, hot dogs and cookies. Everyone else brought a snack to share. We ended up with a great assortment of summer goodies. Popsicles, chocolate strawberries, popcorn, watermelon, cheese sticks, and yogurts. The kids were thrilled.
    plate of tie dyed sugar cookies
     These were fun to make. I made a batch of sugar cookies, piped around the edges, then filled the center with thinned down frosting. Then I dripped several different colors of frosting in the center and dragged a tooth pick through it to create the crazy designs.

    Here are the boy's shirts we made LAST year...

    2 boys wearing tie dyed shirts

    And our new ones this year...

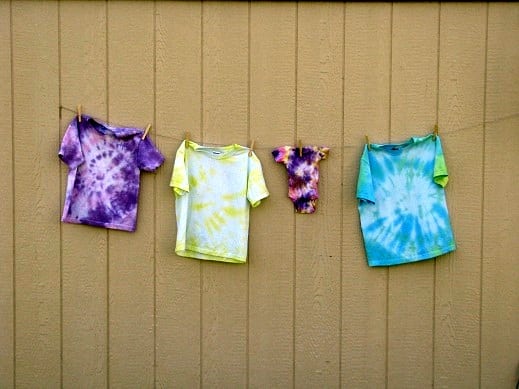
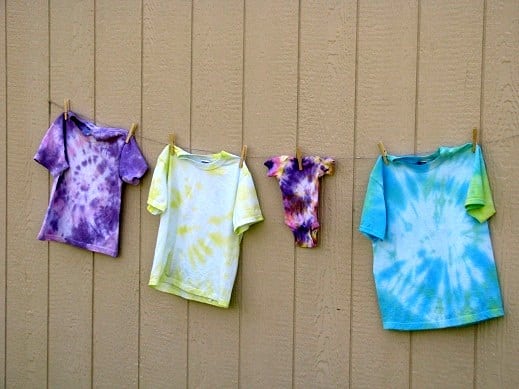
    tie dyed shirts hanging on clothes line
     These are how our shirts washed up. The kids loved them and they are so unique, but a word to the wise: DO NOT use tie dye from the year before. It isn't potent at all! I had a couple of bottles left in the basement and used those to refill the new ones after we used them up.  The purple one and the onesie had lots of pink that didn't end up sticking around after the wash. So I dyed them again letting it sit much longer and they still weren't as vivid as they should have been, but it helped.
     I purchased a kit at Michael's for 40% off and it was the best deal. All of the bottles, dye, gloves, and rubber bands that we needed for less than it would have cost to purchase the dyes separately. The instructions were great and the kids (about 15 of them) had a great time creating their custom summer tee. It was a lot of work, but worth it.
    tie dyed onesie
     The onesie is for baby sister who will be here in 4 months! The kids said that they are going to bring this to her to wear in the hospital. I think that will be hilarious.
    finished tie dyed shirts drying on clothesline
    They sported these hip creations all over the place the next day and it was pretty easy to spot where they were at all times 🙂

    Homemade Sprinklers

    June 7, 2011 By Brandy 8 Comments

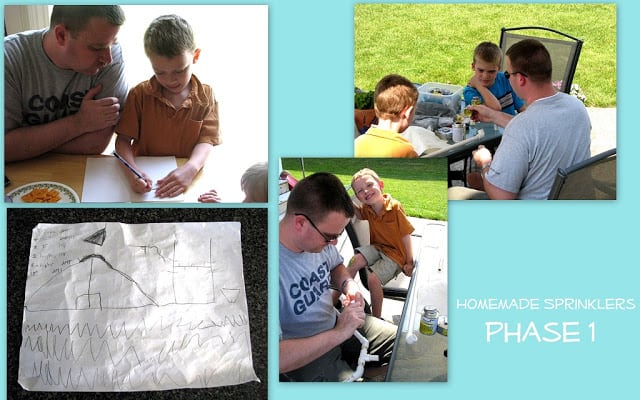
    collage of photos of children helping dad make PVC pipe sprinkler

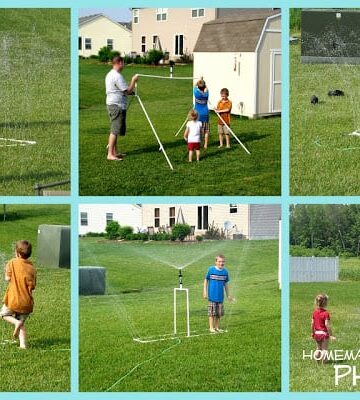
    On Saturday, Derrick decided that he was going to help the boys make their own sprinklers. I would never have thought to do such a thing! He sat down with them and they designed exactly what they wanted. The "blue prints" as the boys called them were pretty cute. I love how Aaron added all of the grass and water in his.
    Then we went to Lowe's. While Kaylee and I picked out hanging flower baskets, the boys browsed up and down the plumbing aisle, picking out PVC pipe fittings for their sprinklers.
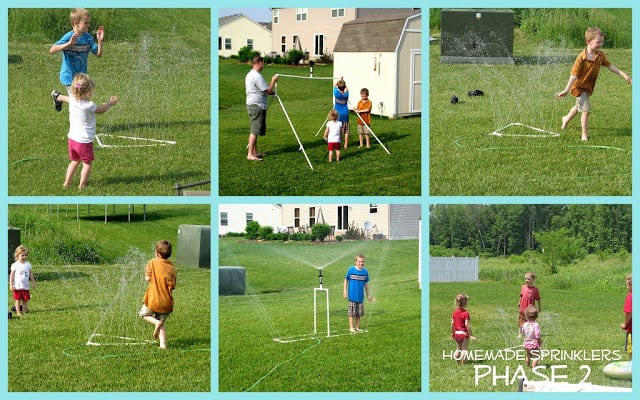
    They worked all evening gluing, drilling, and testing, until they came up with these...
    children playing with homemade PVC pipe sprinklers
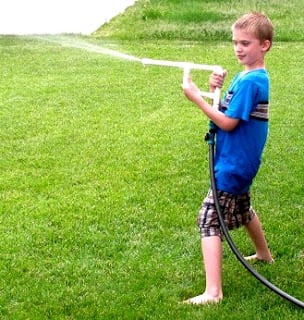
    SO AWESOME! They even attempted a HUGE family sized sprinkler, but it couldn't handle all of the water pressure and kept exploding, so that one will have to go back to the drawing board, but the PVC water gun was a success.
    child holding garden hose

    Was it cheaper to make sprinklers vs. buy one at the store? Probably not, but they had so much fun planning and working with Derrick that it was worth every cent.
    We hosted a summer party in our backyard for a bunch of friends this afternoon (more details on the party to follow in a couple of days) and the kids all had fun with the sprinklers!
     
    • « Previous Page
    • 1
    • …
    • 148
    • 149
    • 150
    • 151
    • 152
    • …
    • 155
    • Next Page »

    Welcome!

    I'm Brandy! I love to create and share my ideas through easy-to-follow recipes and tutorials.

    More about me

    As an Amazon Associate, I make a small commission on qualifying purchases.

    sew with me kids sewing book
    My Book

    Christmas Posts

    • Christmas stocking on mantle
      Cuffed Christmas Stocking Sewing Pattern
    • Pop tart gingerbread house decorated with candy and mints.
      Make a Pop Tart Gingerbread House
    • hands holding chocolate truffle wreath
      Candy Truffle Wreaths (Easy Gift Idea!)
    • White flannel pajama pants with black dogs on the front.
      Sew Your Own Pajama Pants Without a Pattern
    See more Christmas →

    Latest Posts

    • Chubby gingerbread man cookie with white icing and red candy buttons.
      Chubby Gingerbread Man Cookies
    • No bake chocolate silk pie in glass pie pan.
      Easy French Silk Pie (No Bake Crust)
    • Wire basket of crescent rolls.
      Homemade Crescent Rolls
    • Buttercream frosted ginger cookies with sprinkles.
      Frosted Ginger Cookies

    Footer

    ↑ Back to Top

    About

    • Privacy Policy
    • Accessibility Policy

    Newsletter

    • Sign Up! for emails and updates

    Contact

    • Contact

    As an Amazon Associate, I earn from qualifying purchases.

    Copyright © 2025 Gluesticks Blog

    Rate This Recipe

    Your vote:


    A rating is required
    A name is required
    An email is required