How To Make Your Own DIY Wall Decals
DIY Wall Decals Made From Scrapbook Paper
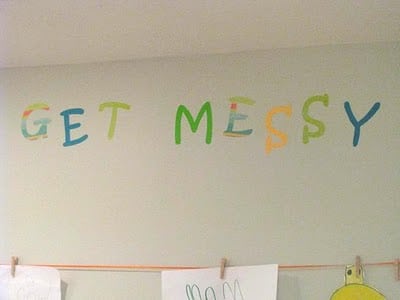
DIY wall decals made from scrapbook paper and contact paper. Peel and stick, removable, and perfect for kids rooms! Create any phrase or shapes you’d like!
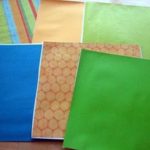
- Scrapbooking Paper
- Contact Paper
- Mod Podge (or spray adhesive)
- Foam Brush
-
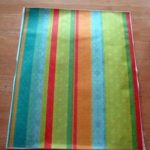
Brush a layer of mod podge onto the top of a piece of contact paper, then place a sheet of paper on top of that.

-
Press down firmly and get rid of the air bubbles. Place under a board or something heavy to keep it flat while drying.
-
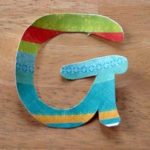
Once the sheets have dried, they are ready to be cut!
-
You can use a cricut or stencils to cut into desired shapes.
Note: I haven't tried spray adhesive, but would imagine that it would work just fine as an alternative method. Just spray and place a board over until set.
I noticed a few of my corners and edges coming off of the contact paper when I went to peel the backings off. I guess the mod podge wasn't thick enough in those areas. I just added a little tacky glue to fix the small spots and they were good to go.
Custom peel and stick letters that are nice and sturdy, easy to place onto a wall, reposition-able, and inexpensive!
And these aren't limited to lettering! The possibilities are endless especially with the huge variety of cricut cartridges. You can make all sorts of custom scenes for your wall.
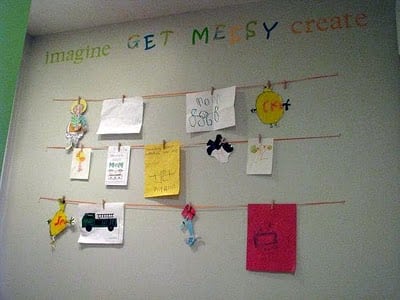
Our basement is brighter lit than most basements, but it is still hard to take a good picture down there. You get the idea.


Erin Shakespear says
Alright, now...someone needs to invent some way to add sound to these comments. Because then I'd only have to click a button, like say "Squeal of Delight".
This Rocks. 🙂
The Trappett collective says
I saw this and we just moved into a new house and I really think the kids rooms need some decor!! I bought the stuff today and am going to try it!! Thanks for helping me be frugal and a super cute mom, also I get to craft instead of look at bare walls, yuck! Also since this is our first house I think I am antsy to make any perminent changes to walls and this way I can play for little! Thanks
Christa says
Just used your technique to make 'wallies' wall art rather than the vinyl lettering. I had no problems. I used a magazine clipping that had a star wars design on it to create some wall art for my son's room. Great idea. Thanks for sharing.
Nancy Ward says
Hi!
Wanted you to know I posted a link to this tutorial today on my blog, PaperFriendly.
Nancy Ward
PaperFriendly
http://www.nancywardcrafts.com
Absolutely Kathy says
Great idea. question when you take the letters off the wall will they damage the wall? I live in an apartment and really want to decorate my daughters room, but have to keep in mind to not damage the walls. Thanks
the coldest little family says
This is a fantastic idea. I was so excited, that I got some mod podge and tried it. I ran into a snag though, and was hoping you could help me figure out what I did wrong, or what I could change to get it to work. I followed the steps you outlined, but the paper and mod podge peeled away from the contact paper. The surface of the contact paper was too slick for the mod podge to adhere to. I tried sanding the contact paper to give it more roughness to stick to, and it worked a bit better. It stuck in some places, but in others the mod podge just didn't stick to the contact paper. HELP! I just don't know what I should do differently to make your fabulous idea work for us. Thank you for your great ideas! We really enjoy your blog!
Sarah says
wow!!!! great idea!!!!
Amy Walker says
Very very cool! I might try this...was just thinking this morning of a verse I'd like to put on the nursery wall.
I'm your latest follower from Tip Junkie!
Amy @ http://www.thecheapandchoosy.blogspot.com
Sister Denney says
This is fabulous! I have been drooling over other people's vinyl everythings but this idea is great! I love stumbling across more and more fun LDS blogs too. "I am Momma, hear me roar" is another one I love. Can't wait to explore more of your blog 🙂
Its A Blog Party says
What a great idea! Very cute!
Thanks for linking up!
~Liz
Kat from California says
Thanks to Aisyah I found this idea. What a great idea! I want one of those cricut machines. want want want but stencils and microsoft word will work for now. I have tons of stencils. 🙂
Katharine aka http://katspurrfectboutique.blogspot.com
Aisyah Helga says
A great tutorial! I've linked this to my blog to share with my readers. Thanks for sharing! Love your blog!
Andrea says
I just discovered your blog and I LOVE it! This is brilliant!
Infarrantly Creative says
I love this! I am featuring you tonight.
Judy says
I love this! I'm going to try it this week-end!