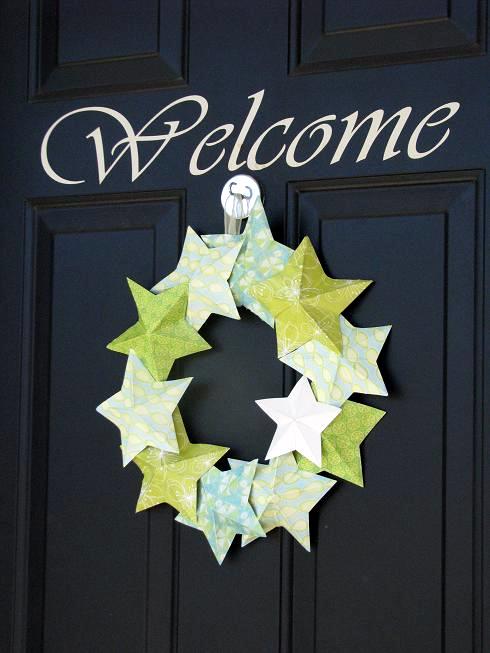
Can you believe that this wreath is made out of paper? I'll show you how to make you own 3-d barn stars to create a darling paper wreath for any holiday or occasion. EASY!
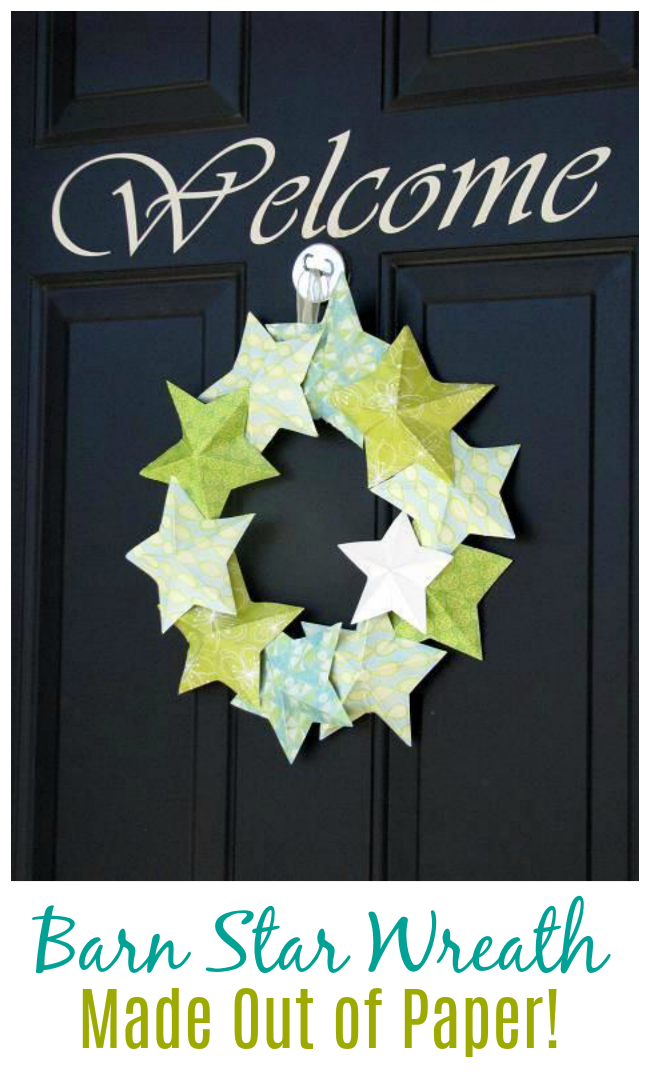
Aaron and I made this fun cardstock wreath for our front door. Nice and bright with summer colors and easy to customize for any season. How cute would it be in red, white and blue for the 4th of July, or made with fun Christmas paper?

Here is how to make your own Barn Star Paper Wreath
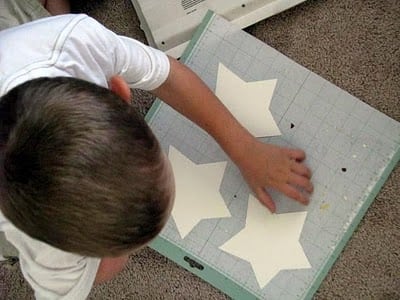
Using your scissors/cutting tool/machine, cut out 12 {5"} stars. The number of stars you will need can vary, but for a 10" wreath, 12 stars is a nice amount to start with. You can layer it more or less from there.
{We use the Plantin Schoolbook cricut cartridge. We made them using the "roly poly" feature so that they would be wide. Sturdy cardstock works best for making these.}
Now we'll show you how to make your stars 3-D!
Below is one all ready to be scored. The white cardstock is under the bright paper.
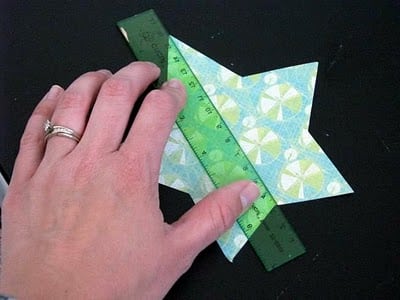
Score your star 5 times. Once for each point. Start at the point and score directly across to the center between the two bottom points. Rotate star and score again until each point has been scored.
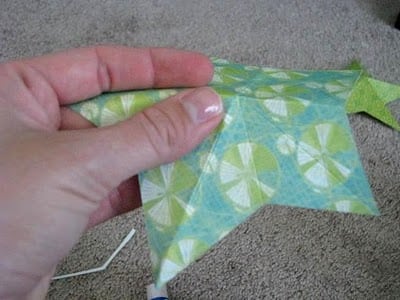
Fold each scored line and crease firmly.
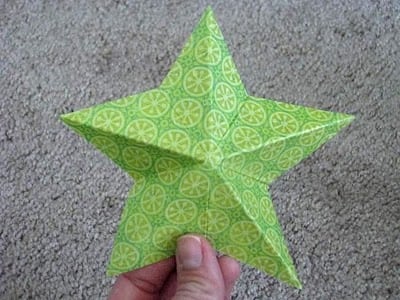
There is your 3-D star! Now finish up the rest of them and you'll be ready to assemble your paper wreath or use them for any number of fun little projects.
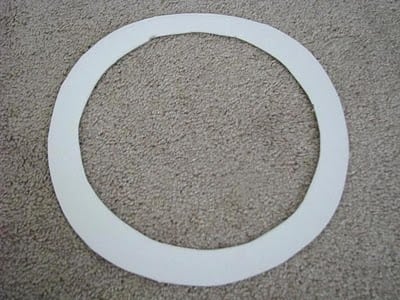
Cut out a 10" ring for your wreath base using thin cardboard.
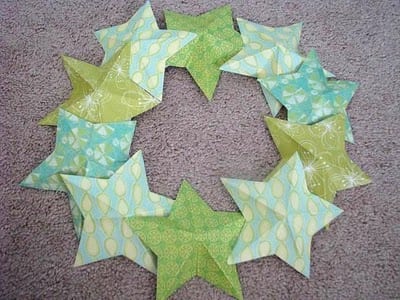
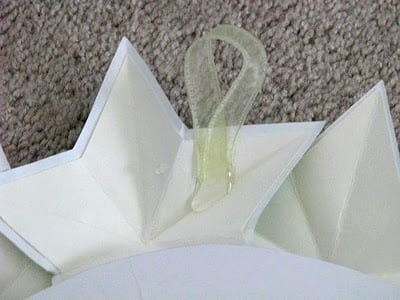
Hot glue the stars to the ring and eachother. Since they stick out, you can't glue them flat, so just apply a small amount of glue to the points where the stars overlap eachother. Don't skimp on the glue.
Attach a ribbon for hanging.


Kimberlee says
Very cute! What a fun project to do with children.
visiting from PonyTails and FishScales
Kristi says
I saw your feature over at Keeping It Simple. I love, love, love this wreath. I can't wait to try it myself. Thanks for posting!!!
Beth@The Stories of A to Z says
Adorable! Love this idea.
Nike@TheDirtyHalfDozen says
I'm going to do this over the weekend for my "Flat Out Free" challenge -- thank you!
Staci at Craftify It ! says
I'm going to feature this on Saturday! Come grab a "I've been featured" button at my blog if you'd like! I love this!
Kristy says
I love this! Great party idea too
Courtney says
oh that is so cute! I will have to make this one!
Its A Blog Party says
Sooooo cute!
Thanks for linking up!
~Liz
Jane says
Too cute!! I would have never guessed it was made from cardstock! 🙂
Dawn: The Inked Stamper says
This is just gorgeous! Love it! I'll have to make one, you've totally inspired me! I'm your 600th follower! Your blog is fantastic!
Rachel says
It looks so great and seems like it took not a lot of time. Those are my favorite projects
Creative Flair says
Love it! I am constantly changing my front door wreath for different occasions. Thanks for the idea.
Tara@JustDevineStyle says
What a great idea! I love the colors you chose for the wreath! Thanks for the tutorial!
Kaysi says
I love this!! That's awesome, great idea!
C.R.A.F.T. says
love this!! come on over and link up to MMM 🙂