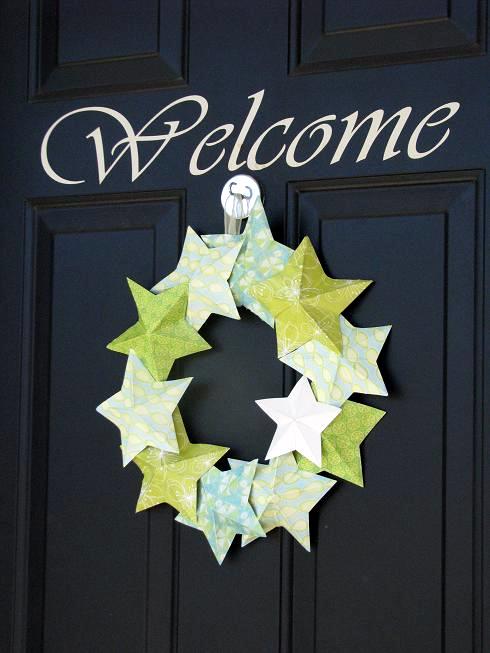
Can you believe that this wreath is made out of paper? I'll show you how to make you own 3-d barn stars to create a darling paper wreath for any holiday or occasion. EASY!
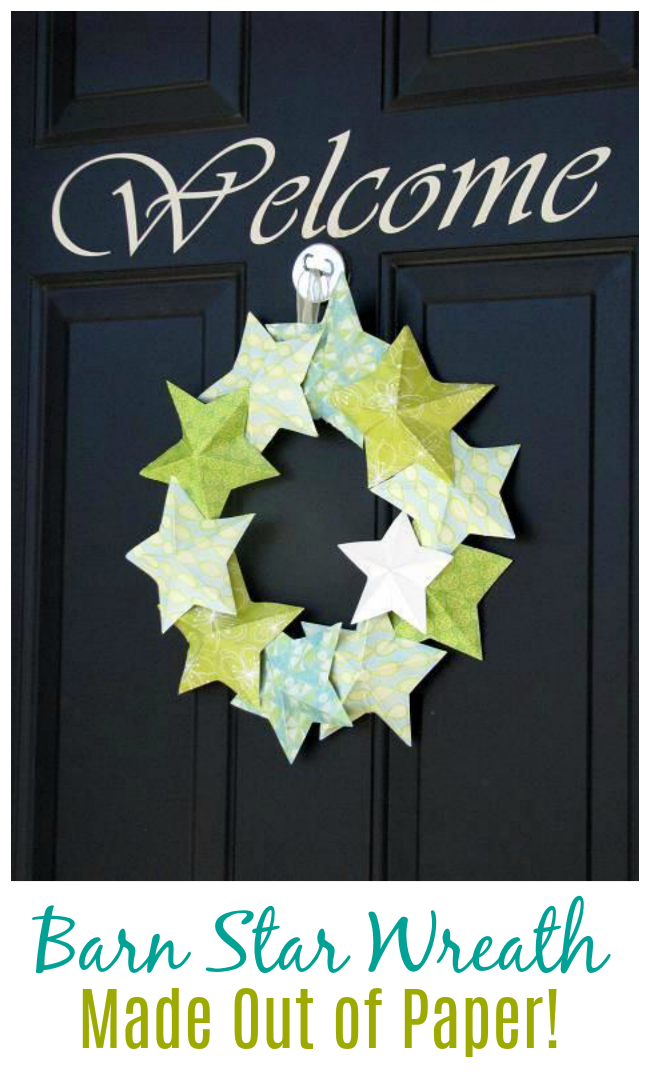
Aaron and I made this fun cardstock wreath for our front door. Nice and bright with summer colors and easy to customize for any season. How cute would it be in red, white and blue for the 4th of July, or made with fun Christmas paper?

Here is how to make your own Barn Star Paper Wreath
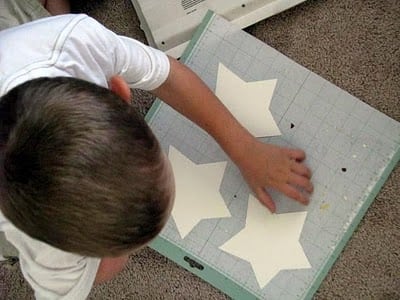
Using your scissors/cutting tool/machine, cut out 12 {5"} stars. The number of stars you will need can vary, but for a 10" wreath, 12 stars is a nice amount to start with. You can layer it more or less from there.
{We use the Plantin Schoolbook cricut cartridge. We made them using the "roly poly" feature so that they would be wide. Sturdy cardstock works best for making these.}
Now we'll show you how to make your stars 3-D!
Below is one all ready to be scored. The white cardstock is under the bright paper.
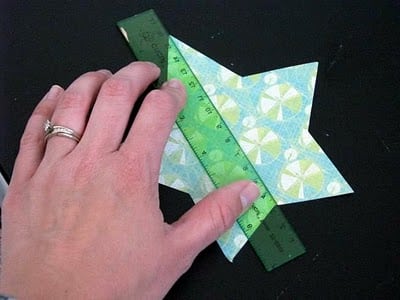
Score your star 5 times. Once for each point. Start at the point and score directly across to the center between the two bottom points. Rotate star and score again until each point has been scored.
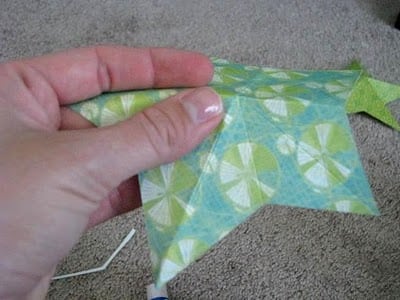
Fold each scored line and crease firmly.
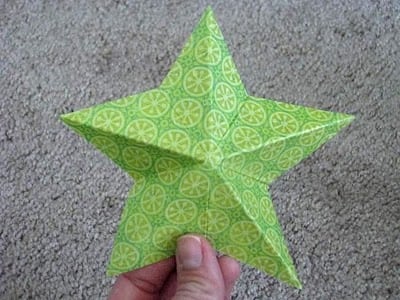
There is your 3-D star! Now finish up the rest of them and you'll be ready to assemble your paper wreath or use them for any number of fun little projects.
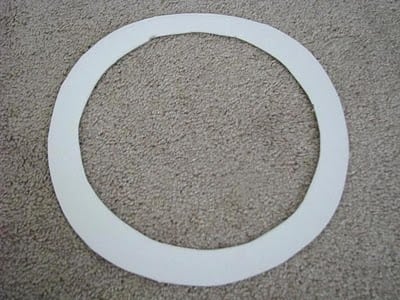
Cut out a 10" ring for your wreath base using thin cardboard.
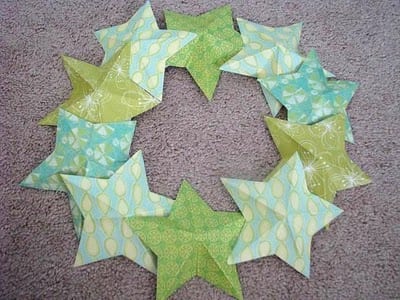
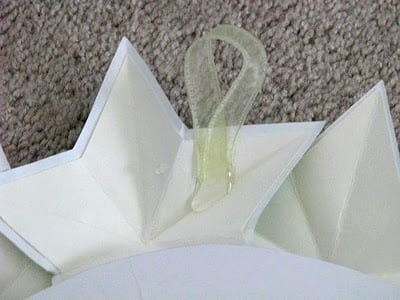
Hot glue the stars to the ring and eachother. Since they stick out, you can't glue them flat, so just apply a small amount of glue to the points where the stars overlap eachother. Don't skimp on the glue.
Attach a ribbon for hanging.


Mom Taxi Julie says
I made two of these for Christmas last year
http://justmejuliejulie.blogspot.com/2010/12/copy-cat-christmas-star-wreath.html
http://justmejuliejulie.blogspot.com/2010/12/another-star-wreath-and-biggest-loser.html
They are fun to make!
Cheryl says
Your fan club can't help but grow! I had to try it, too! You do such a great job with everything... great ideas, photos,instructions! Thank you!
I wasn't sure it would work without a cutting machine, but you were right, it did! I still like yours better though:
http://crackofdawncrafts.blogspot.com/2011/07/independence-day-fun-collection-of-four.html
Leah says
I made your wreath the other day. Just thought you may want to see:
http://thewhitakerswindow.blogspot.com/2011/06/summer-decor.html
thanks for posting this, I LOVE it. I will probabyl make this again in the future - soooo easy!! thanks again.
Stephanie C. says
This is seriously adorable!!
Chris says
I love how the folding makes the stars pop. Such a simple, striking wreath.
Mandy Coffey says
you're featured today!www.smallfineprint.com
Jane says
Very nice! I love your color choices, but you are so right, the possibilities of this pattern are endless. Thanks for sharing!
Mandy Coffey says
Oh no way! I love it! And SO much cheaper than buying a foam wreath and a bunch felt! haha that seems to be the trend lately. Thanks for linking this up at Fine Finds Friday! I'm going to feature it soon, i'll let you know!
Chrissy Harris says
CUTE Wreath! Very Kid Friendly to make also - LOVE 🙂
Nancy Ward says
Hi!
Wanted you to know I posted a link to this tutorial today on my blog.
nancy Ward
PaperFriendly
http://www.nancywardcrafts.com
patti west says
So sweet! Love all of your blog projects. I'm a new follower. 🙂
La Familia Garcia says
Did you make your "Welcome" w/ the cricut???
Carmie, the Single Nester says
This looks great! I love your color choice.
Scrappy Gifts says
This is so cute! Love the colors!
I'd love if you linked this up to my Scrappy Saturdays! http://www.scrappy-gifts.com/2010/06/19th-scrappy-saturdays.html
Cindy says
That is super cute!! Thanks for showing us how it is done.
~Cindy~