
Aaron and I had a lot of fun making this photo collage clock last week! It makes me smile every time I walk past it. Wouldn't this be a great gift for a grandparent? It's so easy to make, too!

First you'll need a clock base. What do I mean by a clock base? A wooden plaque (circle or square) that is about ½" thick. We found our base on clearance at Hobby Lobby. It was actually a clock, but was missing the hands. I bought a new clock kit for it and it worked like a charm. As an added bonus, it was pre-drilled. Don't worry though, a wooden plaque is easy to drill a hole in. So grab one, in any shape you'd like and you'll be good to go.
You'll also need a clock kit and a photo collage. A clock kit comes with a small motor with a place to put a battery and 2-3 clock hands. You can create a photo collage on Picmonkey and have it printed at Walmart or Costco. If you have a bunch of photos already printed out and would like to use those, you can make your own collage!
You'll also need a few basic supplies like a battery drill, sponge brush, scissors and mod podge.
Now that you have your supplies, let's get started on your DIY Photo Collage Clock!

DIY Photo Collage Clock
Equipment
- drill
Materials
- 1 thin wood plaque
- photo collage
- scissors
- mod podge
- sponge brush
- clock kit
Instructions
- Drill a hole in the center of your wood plaque the same width as the fitting from the clock kit.
- Using a photo editing program, create a photo collage and print it out.
- Trim the collage to fit the base using scissors.

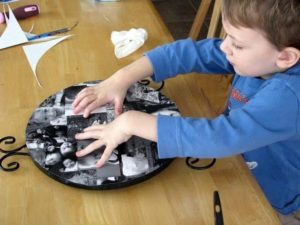
- Apply a layer of mod podge over the face of the wood plaque. Lay the collage on top and press to smooth.
- Poke a hole through the center of the collage where the clock kit will fit through.
- Attach clock kit according to package instructions.


Notes
3 More Personalized Gift Ideas:
Lead Me, Guide Me Handprint Canvas


Jackie P says
What a wonderful gift this would make!!!