Gluesticks Blog

menu icon
go to homepage
  • Summer
  • DIY
  • Recipes
  • About Me
  • Subscribe
    • Facebook
    • Instagram
    • Pinterest
  • subscribe
    search icon
    Homepage link
    • Summer
    • DIY
    • Recipes
    • About Me
    • Subscribe
    • Facebook
    • Instagram
    • Pinterest
  • ×
    Home

    Mrs Fields Chocolate Chip Cookie Recipe (Blue Ribbon)

    May 22, 2025 By Brandy 1 Comment

    Mrs. Fields chocolate chip cookies on cooling rack.

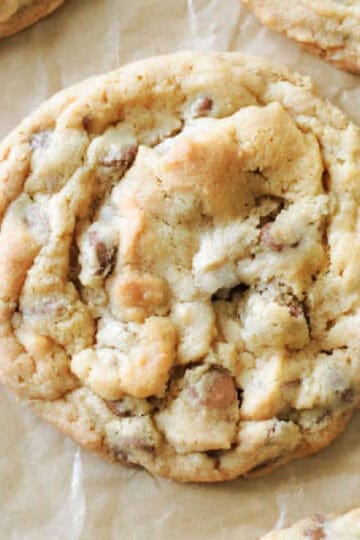
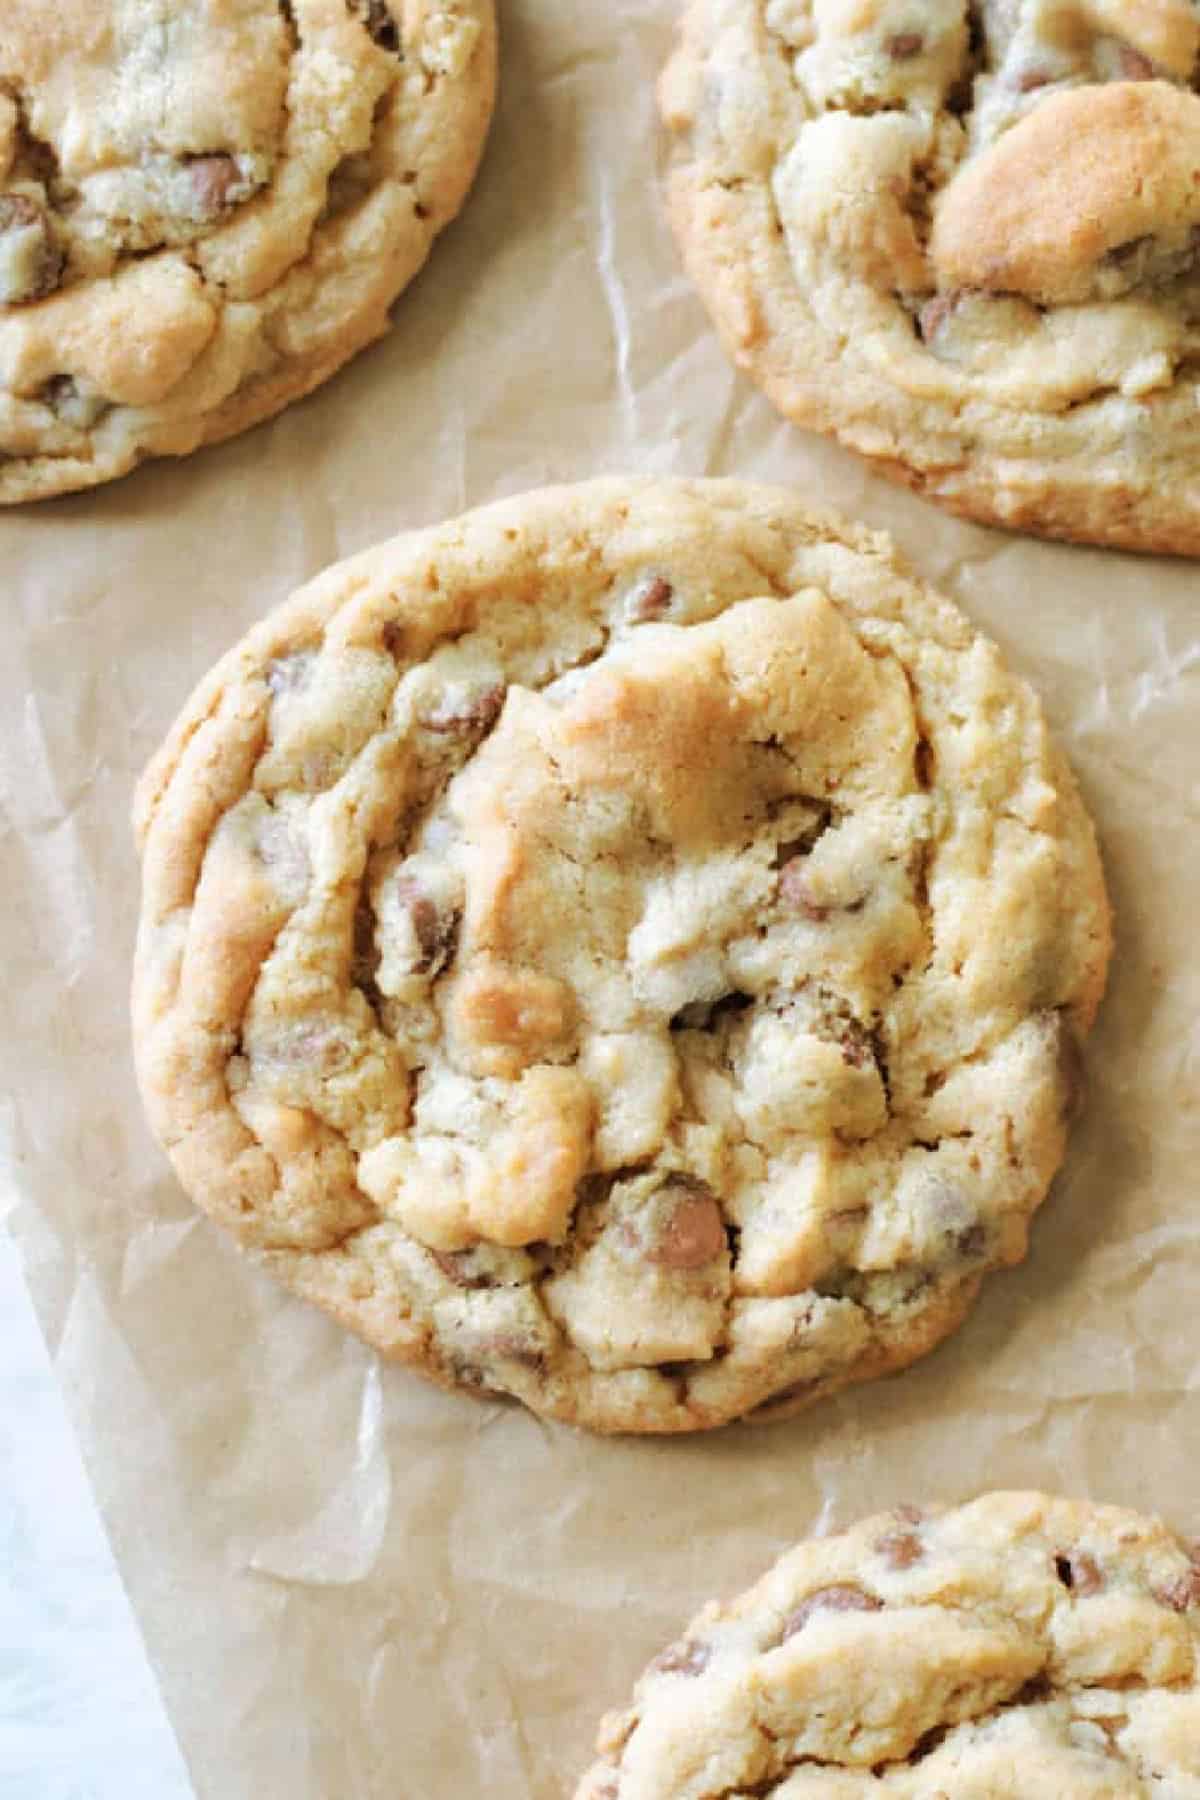
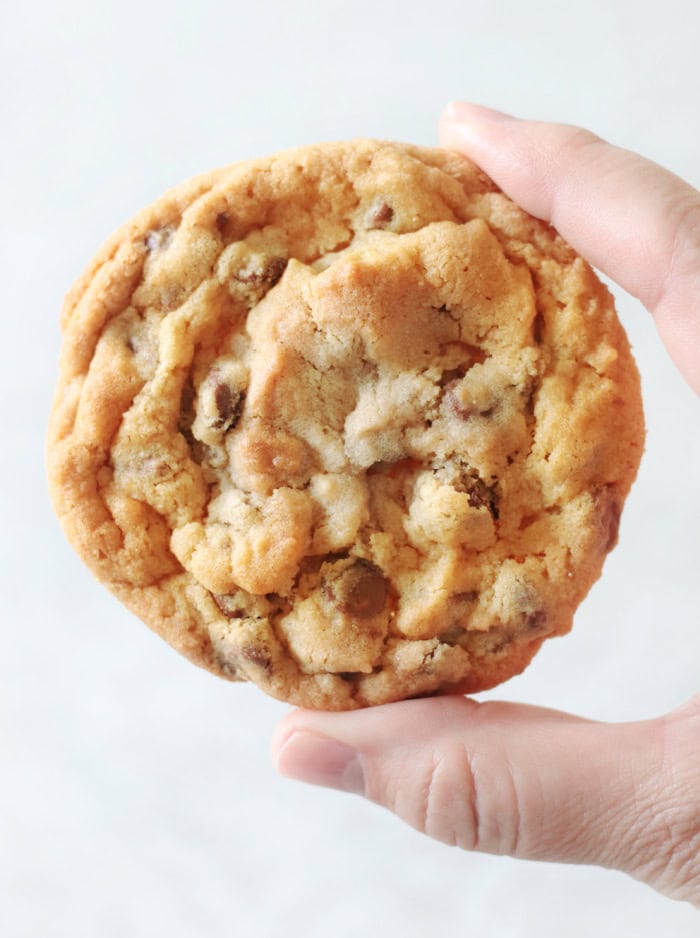
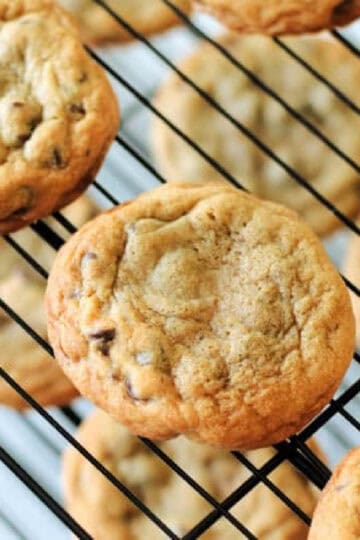
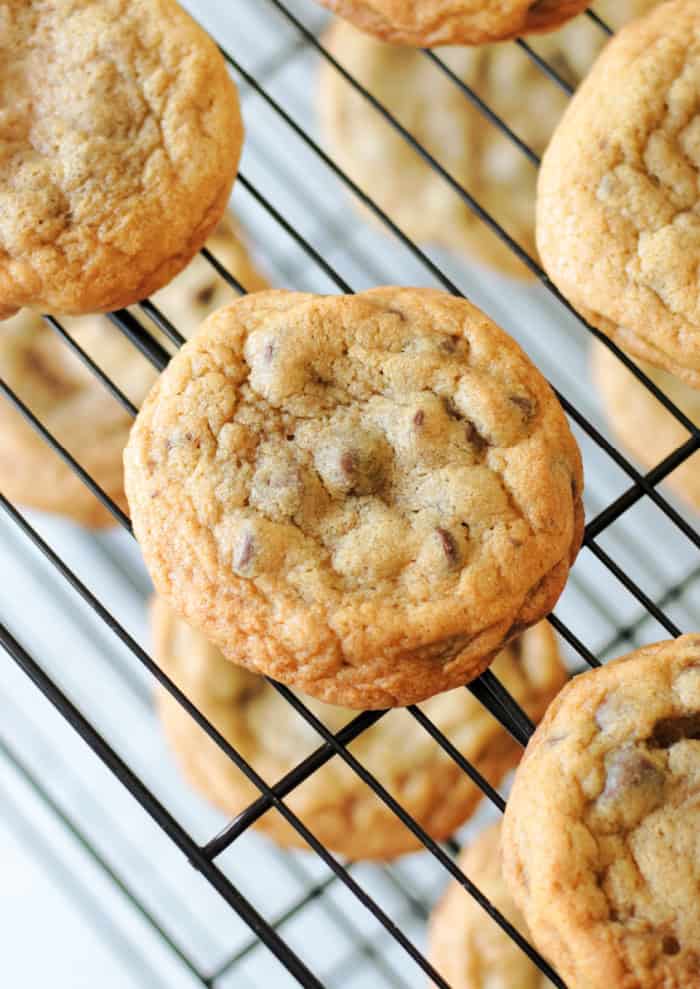
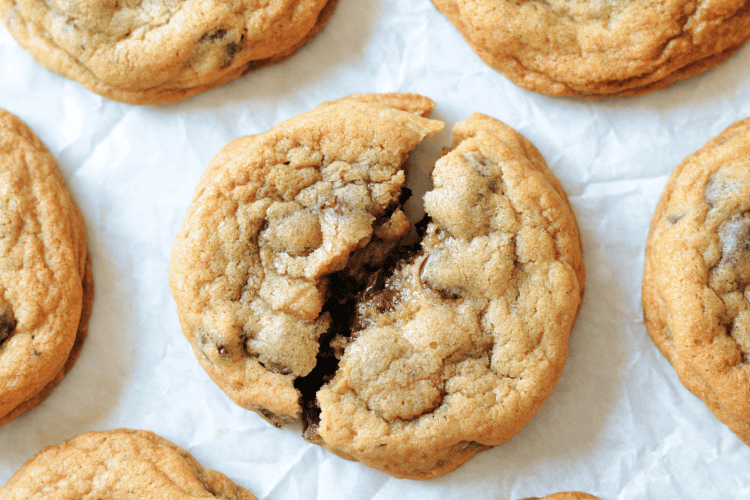
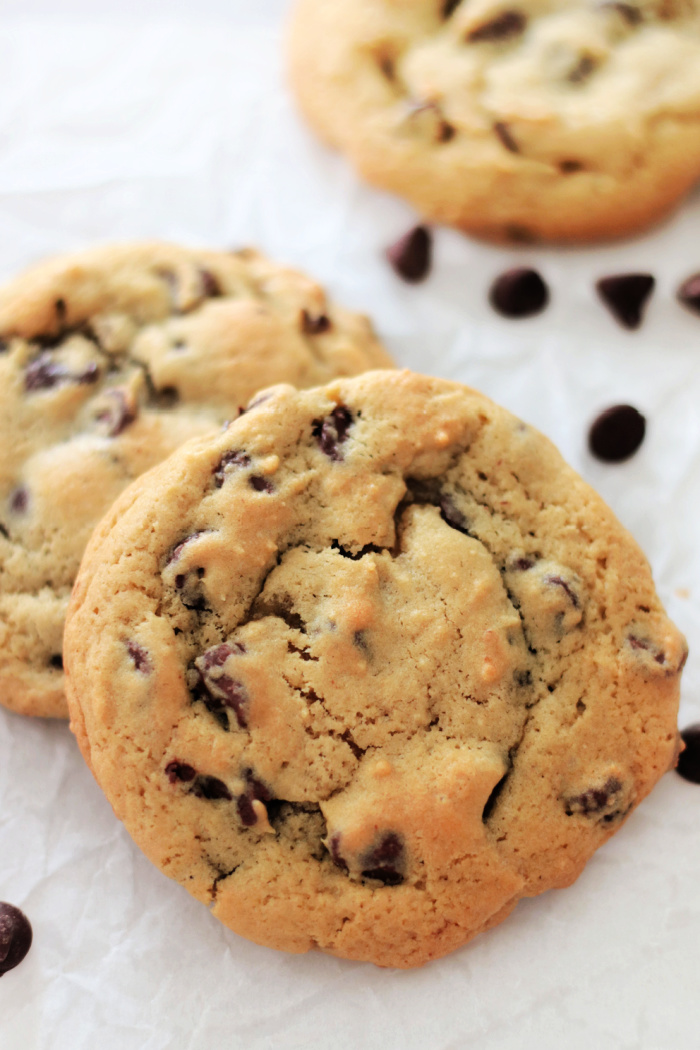
    Soft, gooey, and loaded with chocolate chips, Mrs. Fields Chocolate Chip Cookie recipe yields a blue ribbon-worthy treat!

    You might also like my giant collection of famous chocolate chip cookie recipes from Jacques Torres cookies to copycat Subway cookies and Chick-fil-A chocolate chunk cookies to Snoop Dogg Rolls Royce cookies!

    baked mrs fields cookies on wire rack

    Debbi Fields, the founder of Mrs. Fields, opened her first mall pop-up bakery shops in the 1980s. Unlike other popular cookies of the time (Chips Ahoy, Famous Amos), the cookies sold at Mrs. Fields' shops were soft, thick, and tasted homemade.

    The business has changed hands over the years, and the recipe has changed along with it. The cookies currently sold in Mrs. Fields' shops have an almost artificial taste, are slightly crumbly, and aren't what you'd expect from such a nostalgic brand.

    This Blue Ribbon cookie recipe, however, IS from Debbi Fields (Mrs. Fields) and was found in her 1990s cookie book.

    Why I Like This Recipe

    • Original recipe. This is the 1990s version, originally found in the Mrs. Fields cookie book. It is not to be confused with the urban legend Mrs. Fields cookies with ground oats and a grated Hershey bar. Many recipes claim to be the original Mrs. Fields chocolate chip cookie, but the most famous versions are nothing more than the urban legend Neiman Marcus cookie recipe. Side-by-side comparisons show that the story and the recipe are identical, and both are hoaxes.
    • Multiple sizes. I share her original baking time and temperature, along with my adaptations, so you can choose which to follow. I also give baking times and temps for the original smaller cookie, or my larger cookie.
    • Soft and gooey. These cookies are deliciously soft and gooey. A higher ratio of brown sugar to white sugar always yields a better chocolate chip cookie.
    [feast_advanced_jump_to]
    chocolate chip cookie broken in half

    Tips and Tricks

    I've made this recipe multiple times, following the directions to the letter. I've made them with both chilled and unchilled cookie dough. I also experimented with baking temperature and cookie size. The choice is yours! Make her original recipe or try my adaptation, shared below. Both are delicious, made with the exact same ingredients and measurements; the only changes are the 1-hour chill, the baking time, and the temperature. Both versions are shared below. Scroll to the end of the post for an easy-to-follow printable version!

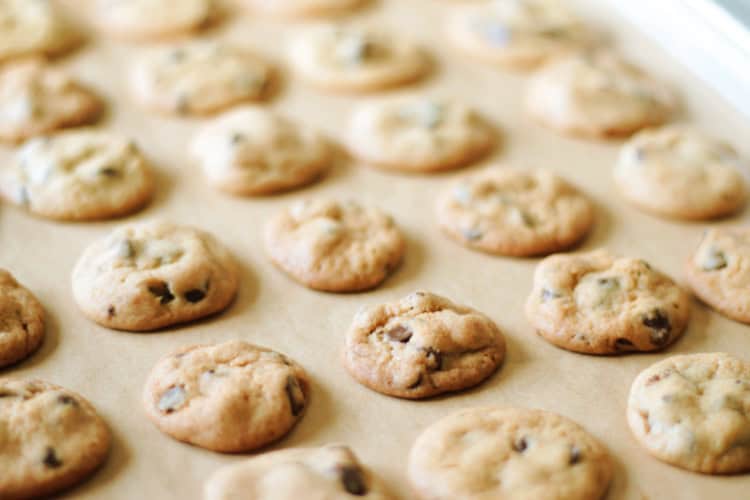
    • Original: Her recipe calls for rounded tablespoon-sized cookies, unchilled (says you can bake them chilled or unchilled), and baked at 300 degrees for 18-22 minutes. The result was soft and chewy cookies that were a little on the thinner side and small. They were delicious, but more on the cakey side vs thick or gooey. I did not see the benefit of baking them at 300 degrees for 20+ minutes, as they appeared to be done around the 15-16 minute mark. Had the dough been chilled, they would have been thicker. All in all, a delicious cookie.
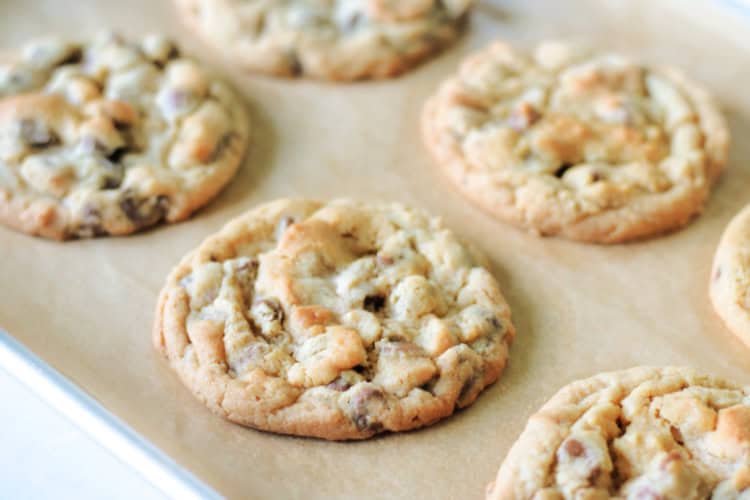
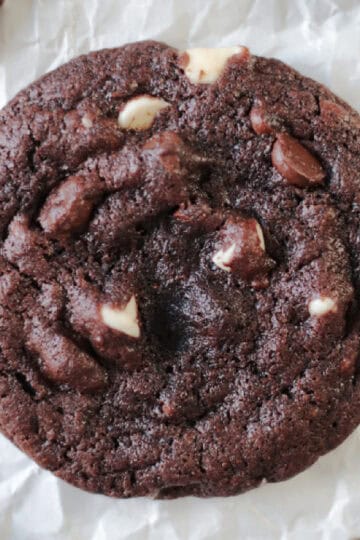
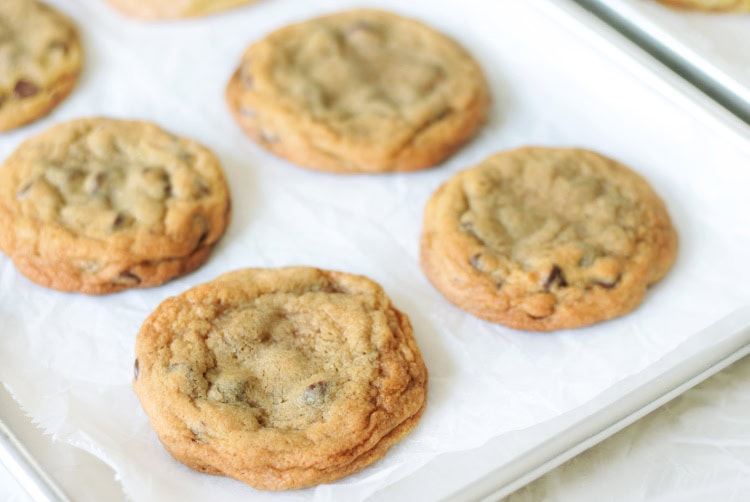
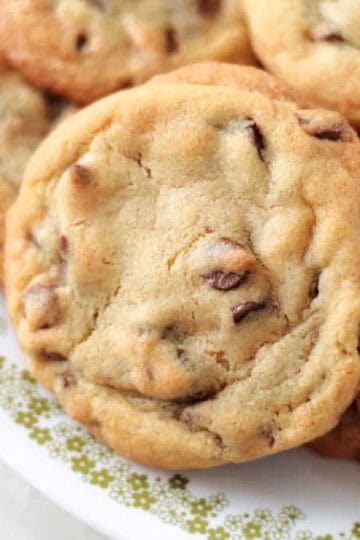
    • Brandy's adaptations : I made them two more times with the following adaptations. I made them larger (3 tablespoon-sized), chilled for an hour, then baked at 350 degrees for 13-14 minutes. The result was ABSOLUTE perfection. Soft, thick, and taste homemade just like the ones sold in her original bake shops. These are the ones shown in the photos here.

    Ingredients

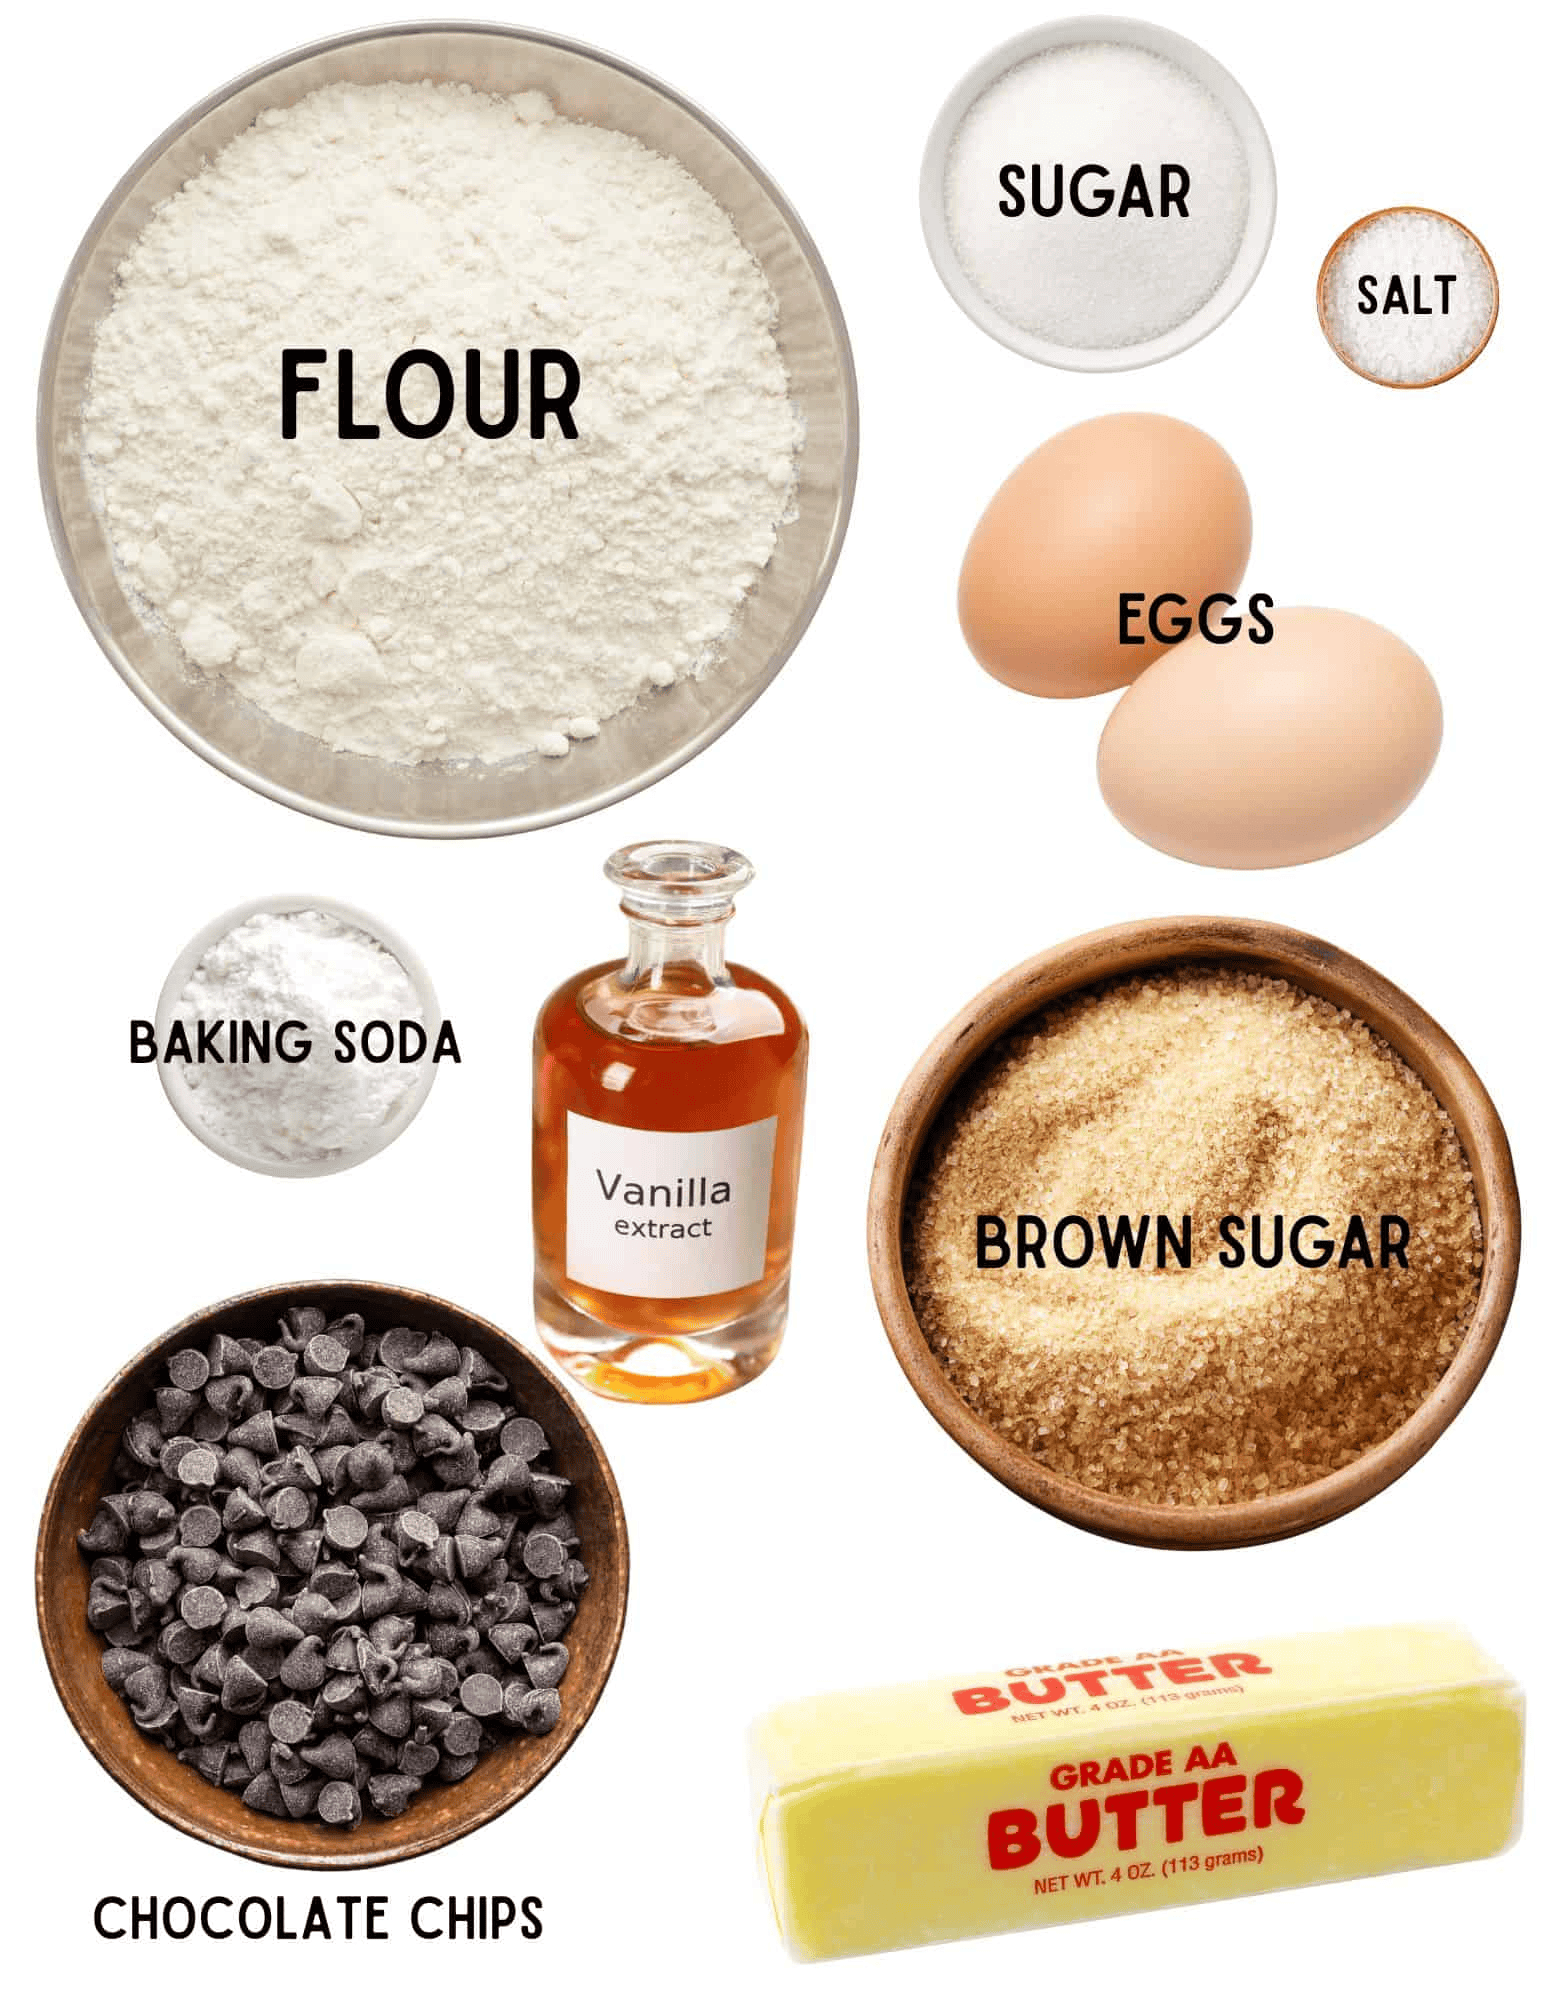
    • Flour: All-purpose is the gold standard for cookies. I always baked with all-purpose flour unless the recipe notes otherwise.
    • Baking soda and salt: for leavening and flavor.
    • Sugar: This recipe uses a combination of dark brown sugar and granulated sugar. A higher ratio of brown sugar to white sugar yields cookies with a softer texture.
    • Butter: This recipe uses salted butter, but you can use unsalted butter if you prefer.
    • Eggs: You'll need two large eggs, room temperature, for richness and flavor.
    • Vanilla Extract: A heavy two teaspoons, but as always, measure vanilla with your heart.
    • Chocolate chips: A 12-ounce bag or two cups of your favorite brand of semi-sweet chocolate chips.

    See the recipe card for full information on ingredients and quantities.

    How To Make Mrs. Fields Chocolate Chip Cookies

    Brandy's Version

    Metal mixing bowl with butter, sugars and egg mixed.

    Step 1: In a medium bowl, combine flour, soda, and salt. Mix well with a wire whisk. Set aside.

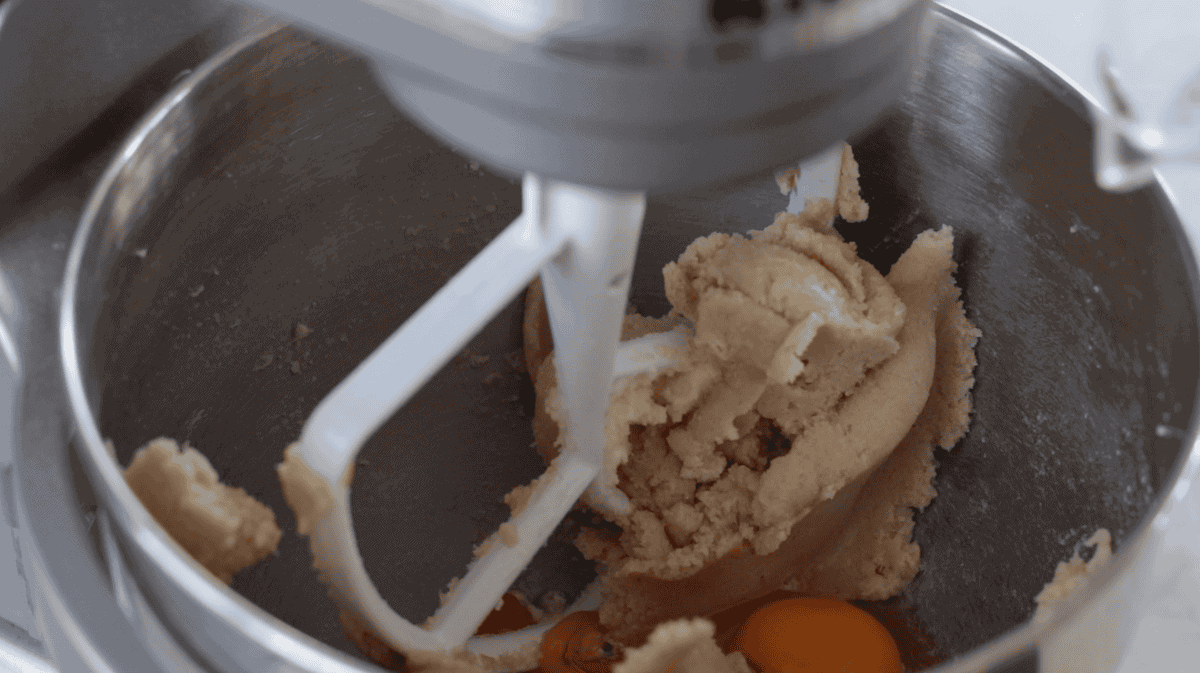
    Step 2: In a large bowl with an electric mixer, blend sugars at medium speed. Add butter and mix, scraping down the sides of the bowl.

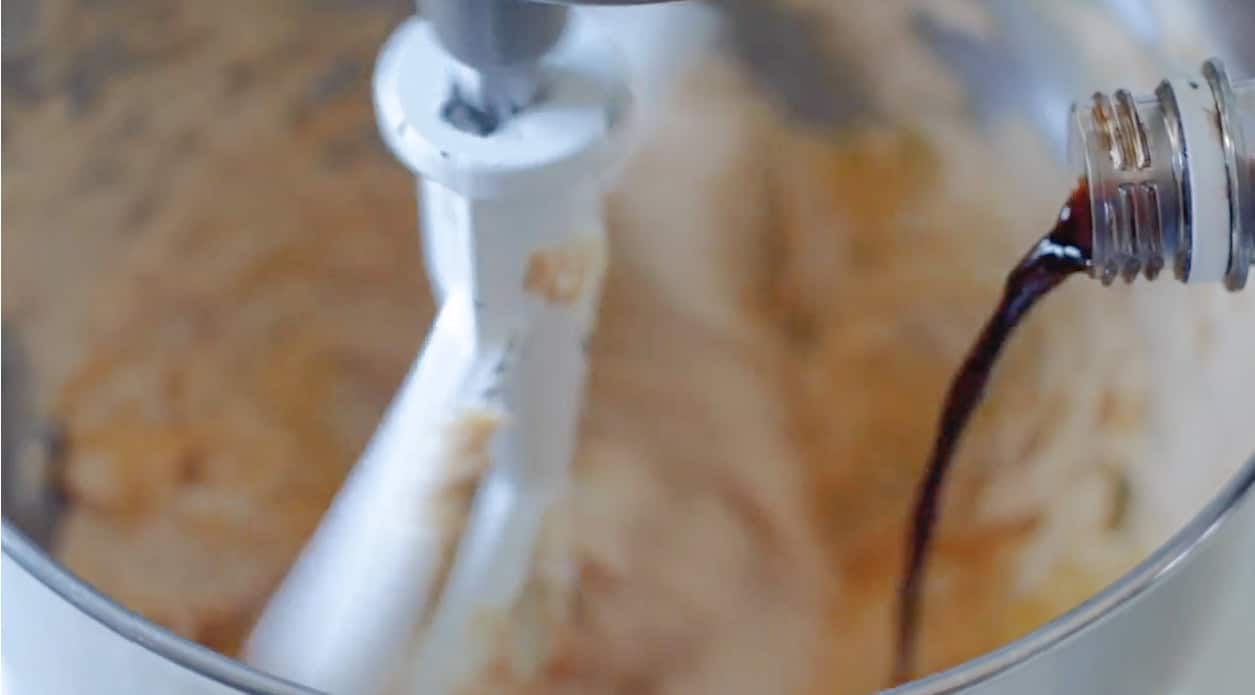
    Step 3: Add eggs and vanilla extract, and mix at medium speed until just blended.

    Metal mixing bowl with chocolate chip cookie dough.

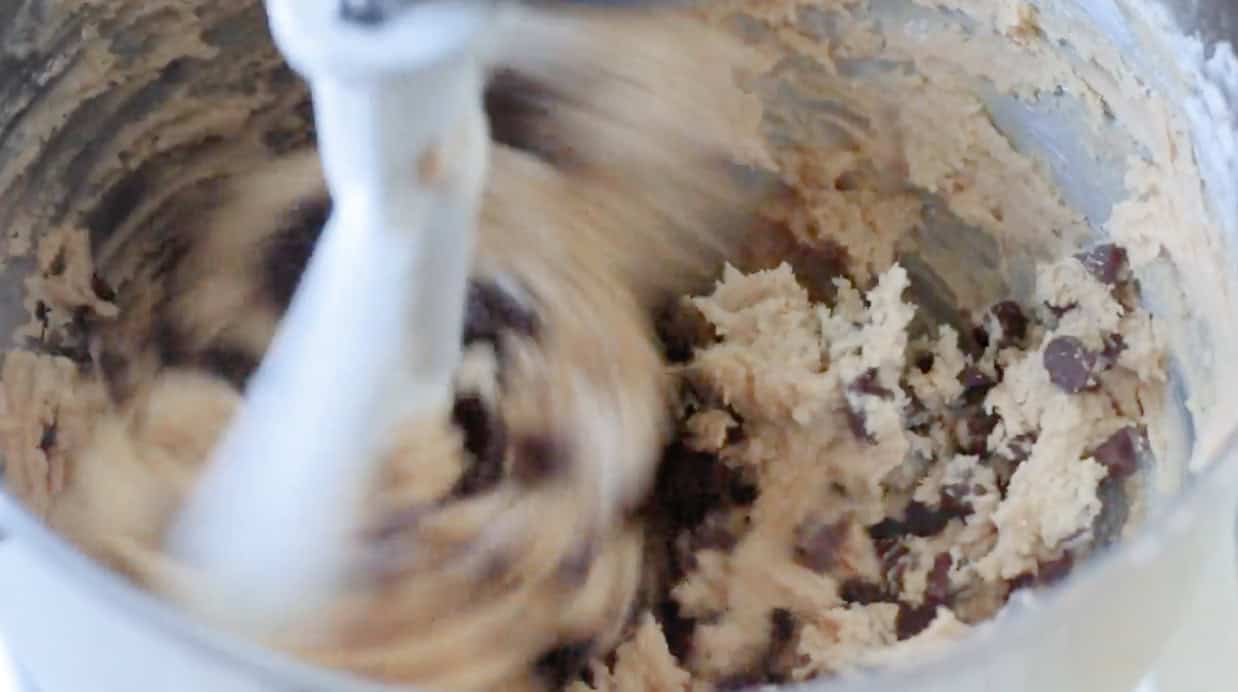
    Step 4: Add the flour mixture and chocolate chips, and blend at low speed until just mixed.

    tray of chilled cookie dough balls

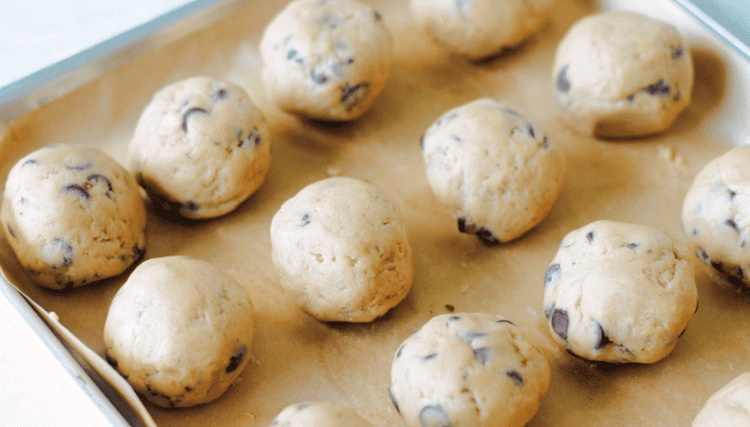
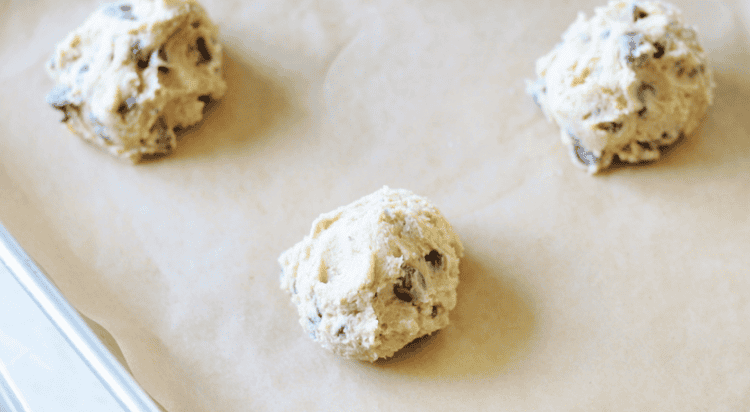
    Step 5: Scoop cookie dough using 3 Tbsp. scoop and onto a baking sheet lined with parchment paper.

    Step 6: Chill cookie dough balls for 1 hour.

    jumbo blue ribbon cookies on baking sheet with parchment paper

    Step 7: Preheat oven to 350 degrees. Place cookie dough balls on a baking sheet (4-6 cookies at a time), 2 " apart.

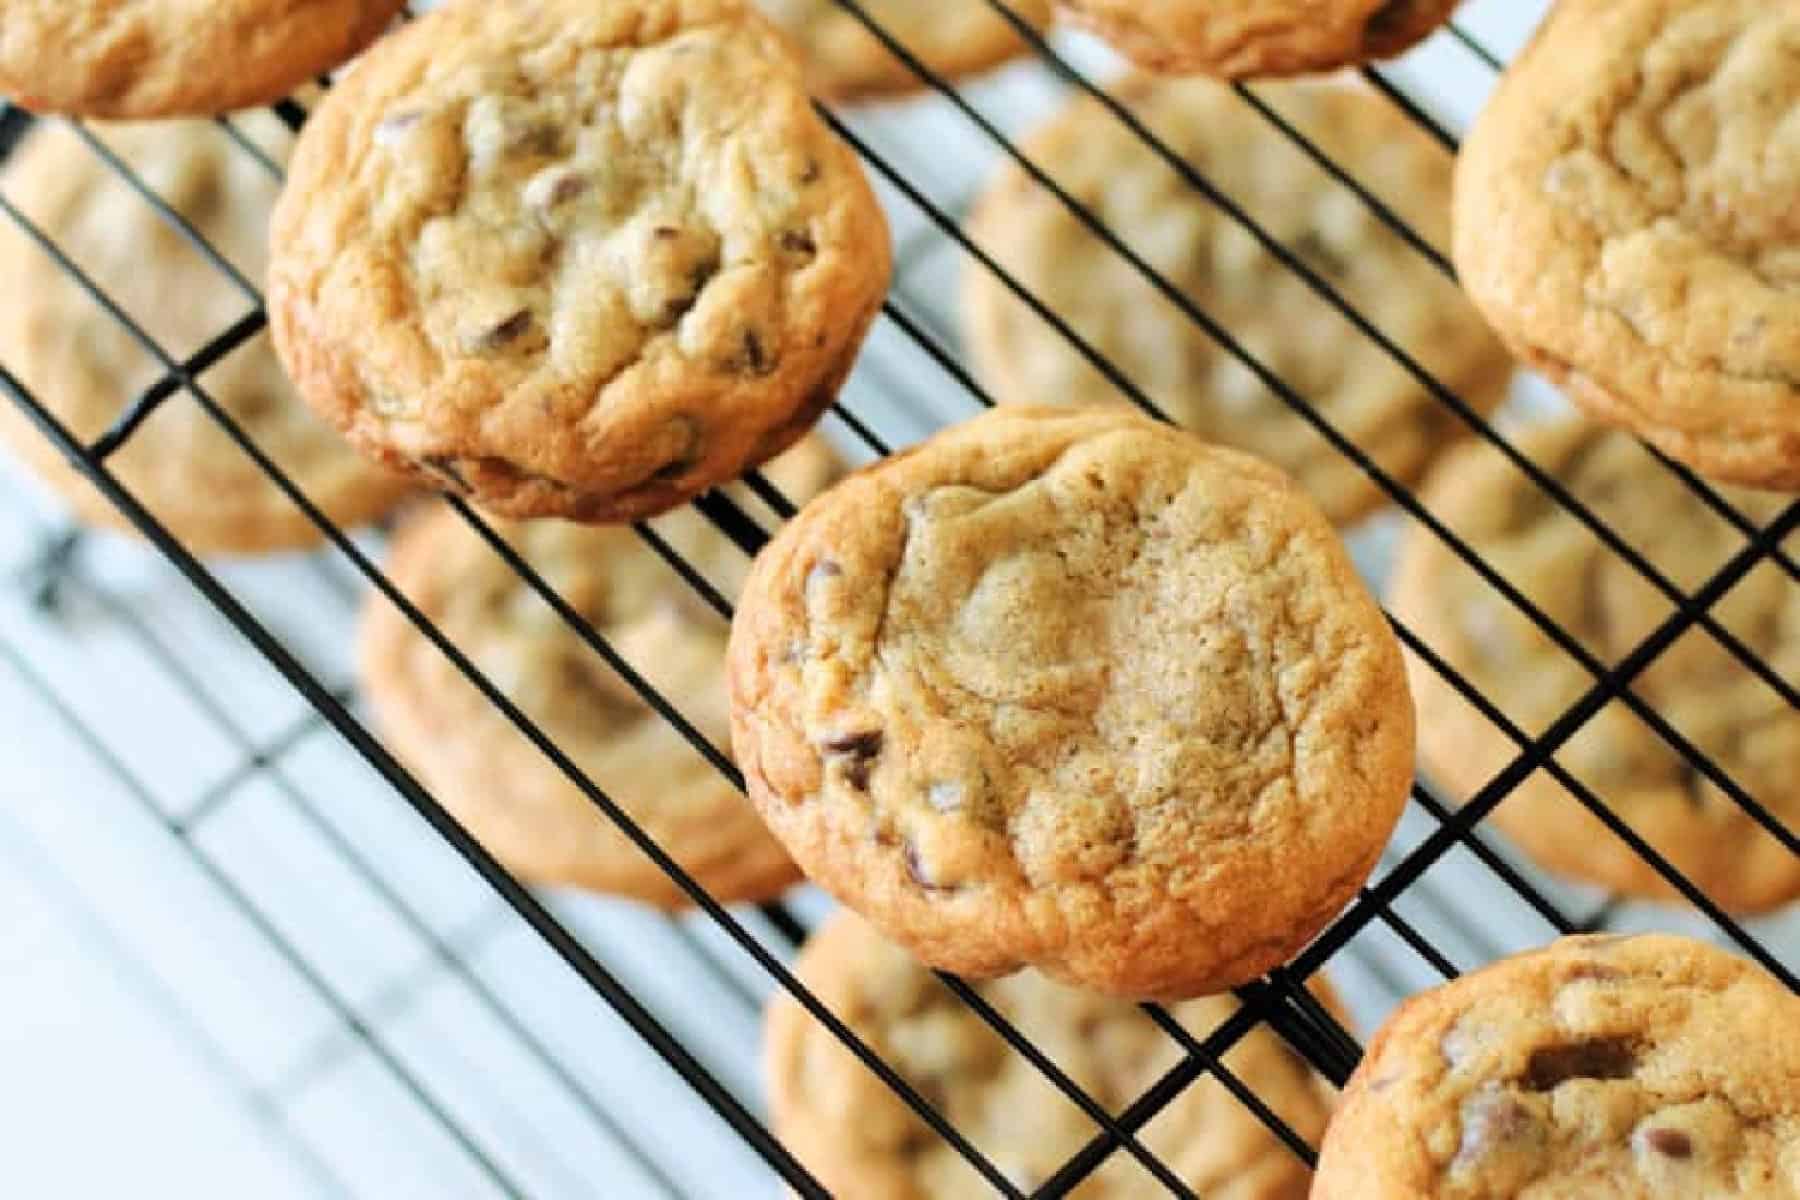
    Step 8: Bake for 14 minutes or until golden brown. Let cookies cool for 5 minutes, then transfer cookies to a baking rack or cool surface.

    Original Version

    Source

    • Preheat oven to 300 degrees.
    • In a medium bowl, combine flour, soda, and salt. Mix well with a wire whisk. Set aside.
    • In a large bowl with an electric mixer, blend sugars at medium speed. Add butter and mix, scraping down the sides of the bowl.
    • Add eggs and vanilla extract, and mix at medium speed until just blended.
    • Add the flour mixture and chocolate chips, and blend at low speed until just mixed.
    • Drop the dough by rounded tablespoons onto an ungreased cookie sheet, 2 inches apart.
    • Bake low and slow for 18-22 minutes or until golden brown. Transfer cookies immediately to a baking rack or cool surface.

    Mrs. Fields Chocolate Chip Cookies FAQs

    What makes Mrs Fields cookies so soft and chewy?

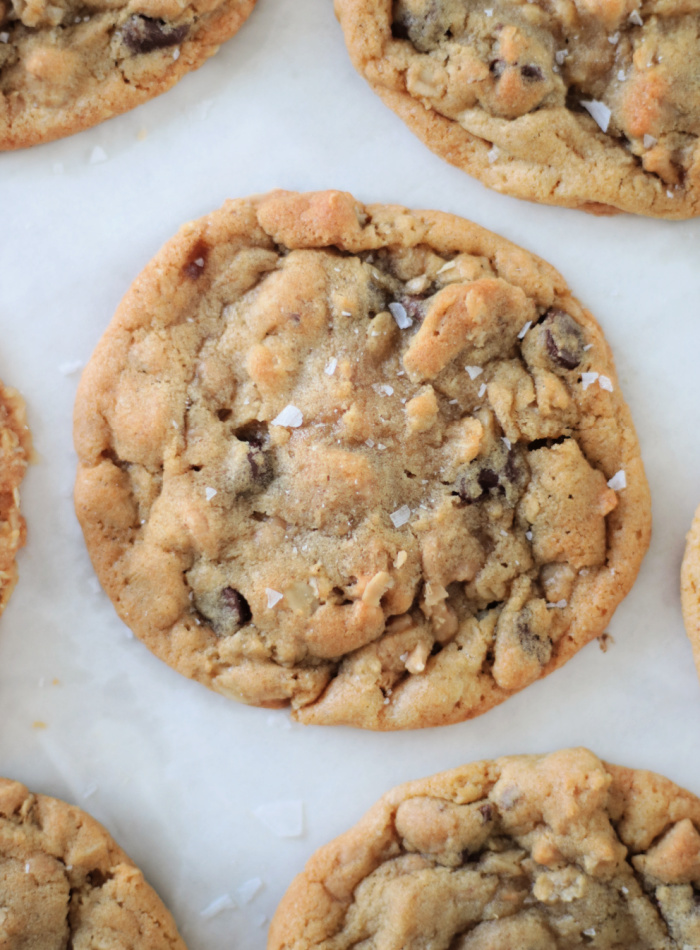
    Mrs Fields cookies are soft and chewy thanks to a higher brown sugar ratio, slightly underbaking the cookies, and using real butter for moisture and rich flavor.

    Can I make Mrs Fields chocolate chip cookies at home?

    Yes, this copycat Mrs Fields chocolate chip cookie recipe uses simple pantry ingredients to recreate the same soft, bakery-style cookies at home.

    Is the Mrs. Fields cookie recipe the same as the Neiman Marcus cookie recipe?

    Both the Neiman Marcus recipe and the Mrs. Fields cookie recipes that circulated in the 80's are urban legends and hoaxes. Neiman Marcus and Mrs. Fields have both come out with real recipes that vary quite a bit from the ones that called for ground oats and a Hershey bar. While that's a yummy recipe, it can't be credited to either company.

    Why do my Mrs. Fields chocolate chip cookies turn out flat?

    Mrs Fields chocolate chip cookies can turn out flat if the butter is too warm, the dough isn’t chilled, or there isn’t enough flour. For best results, use room temperature butter and chill the dough briefly before baking to help the cookies hold their shape.

    Mrs. Fields chocolate chip cookies on cooling rack.

    More Famous Cookie Recipes To Make

    • baking sheet with parchment paper and batch of copycat famous amos chocolate chip cookies
      Copycat Famous Amos Chocolate Chip Cookies (Crispy!)
    • subway cookies on parchment paper
      Copycat Subway Chocolate Chip Cookies
    • two jumbo chocolate chip cookies
      Disney's Grand Floridian Chocolate Chip Cookies
    • Toll House chocolate chip cookies on white plate.
      *Almost* Toll House Chocolate Chip Cookies

    MADE THIS RECIPE AND LOVED IT? 💛 Please leave a STAR rating and COMMENT below! Post it to Facebook or Pinterest to easily share with friends!

    cookies on wire cooling rack
    Print Pin
    5 from 1 vote

    Mrs. Fields Blue Ribbon Cookie Recipe

    Mrs. Fields Blue Ribbon Chocolate Chip Cookies are a classic, decades-old recipe for bakery-style cookies that are soft, gooey, and loaded with chocolate chips! This version is an adaptation. The original directions are shared in the notes section.
    Course Dessert
    Cuisine American
    Prep Time 10 minutes minutes
    Cook Time 14 minutes minutes
    chill 1 hour hour
    Total Time 1 hour hour 24 minutes minutes
    Servings 20 large cookies
    Calories 306kcal
    Author Brandy Nelson

    Ingredients

    • 2 ½ cups all-purpose flour
    • ½ teaspoon baking soda
    • ¼ teaspoon salt
    • 1 cup packed dark brown sugar
    • ½ cup granulated sugar
    • 1 cup salted butter 2 sticks
    • 2 large eggs
    • 2 teaspoons vanilla extract
    • 12 ounces semi-sweet chocolate chips 2 cups

    Instructions

    • In a medium bowl, combine flour, soda, and salt. Mix well with a wire whisk. Set aside.
    • In a large bowl with an electric mixer, blend sugars at medium speed. Add butter and mix, scraping down the sides of the bowl.
    • Add eggs and vanilla extract, and mix at medium speed until just blended.
    • Add the flour mixture and chocolate chips, and blend at low speed until just mixed.
    • Scoop cookie dough using 3 Tbsp. sized scoop onto a baking sheet, lined with parchment paper.
    • Chill cookie dough balls for 1 hour.
    • Preheat oven to 350 degrees.
    • Place cookie dough balls on a baking sheet (4-6 cookies at a time), 2" apart.
    • Bake for 14 minutes or until golden brown. Let cookies cool for 5 minutes, then transfer cookies to a baking rack or cool surface.
    • Store cooled cookies in an airtight container for up to 3 days.

    Video

    Notes

    HOW TO MAKE MRS. FIELDS COOKIES--ORIGINAL
    Preheat oven to 300 degrees.
    In a medium bowl, combine flour, soda, and salt. Mix well with a wire whisk. Set aside.
    In a large bowl with an electric mixer, blend sugars at medium speed. Add butter and mix, scraping down the sides of the bowl.
    Add eggs and vanilla extract, and mix at medium speed until just blended.
    Add the flour mixture and chocolate chips, and blend at low speed until just mixed.
    Drop the dough by rounded tablespoons onto an ungreased cookie sheet, 2 inches apart.
    Bake low and slow for 18-22 minutes or until golden brown. Transfer cookies immediately to a baking rack or cool surface.
    Brandy's version makes 20 cookies.
    Mrs. Fields' version makes 36+ cookies.

    Nutrition

    Calories: 306kcal | Carbohydrates: 37g | Protein: 3g | Fat: 16g | Saturated Fat: 10g | Polyunsaturated Fat: 1g | Monounsaturated Fat: 5g | Trans Fat: 0.4g | Cholesterol: 44mg | Sodium: 142mg | Potassium: 138mg | Fiber: 2g | Sugar: 22g | Vitamin A: 319IU | Calcium: 28mg | Iron: 2mg

    YW Camp Tuck In Treats Printables

    May 19, 2025 By Brandy Leave a Comment

    Bin of tuck in treats attached to printable tags.

    YW camp tuck in treats printables! From popcorn to lip balm and flavored water to pens, these little gifts are the perfect way to end the day. 6 free tags to choose from, and includes color as well as black and white printable options.

    You might also like my giant collection of YW camp craft ideas.

    basket of pillow treats

    At YW camp, the leaders often give the girls a little gift after the evening devotional. Since it's before bed, we refer to them as pillow treats or tuck in treats. They are inexpensive gifts, often items that can be used at camp. Ex: sleep masks, lip gloss, hand sanitizer, candy, scrunchies.

    I'm the Stake Young Women's president in my church. This means that I work with the youth leaders and young women in my area and am in charge of planning summer camps and conferences for them to attend! I created these "Camp Hair Don't Care" gifts for the Stake YW Presidency to pass out at camp. Making printables is fun for me, honestly, it's therapeutic. So I sat down and created 5 more tags to share with other leaders!

    Why I Like These Printables

    • Coordinated set. All 6 tags coordinate in color and design, so they are perfect to use at camp all week. There are enough to have a different one every day!
    • Small and inexpensive. Each tag can be used on a variety of items; all are inexpensive and small, making them perfect for pillow or mailbox treats!
    • Color and black and white options. You'll find printables for both color and black-and-white tags, so if you are using a church copier, you're good to go!

    What Others Are Saying

    The clips were a huge hit at camp this year. Thank you for the cute printable!---Emily on FB

    Our stake used all 6 tags for mail box treats. Thank you, they look cute in black and white too. Loved that option. ---Katie on FB

    [feast_advanced_jump_to]
    scrunchie, chapstick, popcorn, mints, pen, hair clip and water flavoring all with tags

    Tips and Tricks

    • Multiple printing options. I'll share each of the 6 tags I created below, along with how I put them together with a treat. There are multiple ideas for items to use with each tag.
      • Here is the download to print all 6 YW tuck in treat tags in color.
      • Here is the download to print all 6 YW tuck in treat tags in black and white.
    • Cardstock. You can use copy paper, but I find that white cardstock is the best option for a sturdy tag.
    • Glue dots. I love using glue dots, and they make assembling the "Camp Hair Don't Care" tags a breeze!

    6 Young Women Tuck In Treat Tags

    digital copy of each printable in collage

    1. Don't Worry Be Chappy Tags

    printable chapstick gift cards with chapstick

    My daughter walked into the room while I was working on these, and I said, “Is the phrase ‘Don’t worry, be chappy‘ too cheesy?” But I already knew the answer to my question because I couldn’t even say it out loud without laughing. It’s SO cheesy, but I love it. And who doesn’t love Chapstick? Lipsmacker will forever be my favorite brand. I used glue dots to attach the lip balm to the cards.

    Click HERE to download Chapstick Tags

    2. You Make Camp Sweet Tags

    two summer camp printable tags with drink packets

    You could attach the tag to a bottle of Gatorade, Prime, or an energy drink. For a super affordable option, slide a flavored water packet into the tag like I did! I cut a slit in the card using a X-acto knife, then slid the packet into it.

    Click HERE to download Flavored Water Tags

    3. We Were MINT To Be Friends Tags

    hand holding printable tag with tic tacs on it

    I actually used this same phrase to make a cute little handout for this YW Compliment Activity. We did it in our ward twice, and it was always a big hit. I made a camp-themed version to use in mailboxes or as pillow treats. These are MINI containers of Tic Tacs, but you can use individual wrapped Lifesavers or even an Andes Mint! I used glue dots to attach the mints to the card.

    Click HERE to download Mint Tags

    4. Camp Hair Don't Care Tags

    a scrunchie and a hair clip with cardstock tags attached

    The scrunchies were $.22 each, and the hair clips were $.53 each. Because the scrunchies were much more affordable, I used a larger ratio of them. I used glue dots to join the ends of the tag. Once attached to the hair accessories, the tags are double-sided, so they look cute from both sides.

    Click HERE to download scrunchie and hair clip tags

    5. Popping In To Say Goodnight Tags

    skinny pop popcorn with pillow treat tags on i

    These tags are cut out, folded in half, and attached to the top of a small popcorn bag. You can use staples or glue dots.

    Click HERE to download popcorn tags

    6. Today's Moments Are Tomorrow's Memories---Write Them Down Tags

    two journaling handouts with pens slid into slots

    You could attach these tags to a pen, pencil, notebook, or journal! We made these fun, beadable pens at camp (shown in the photo above on the left) at camp last year. You could make these for your girls, or use one of my FAVORITE pens (shown in the photo above on the right). They write like butter.

    I used a hobby knife (X-acto knife) to slice a slit in the top and bottom of the card, then slid the pen inside. You could also use a hole punch and ribbon to tie the tag onto the pen or notebook.

    Click HERE to download pen tags

    More Young Women Printables

    • general conference highlights handout on top of copy of ensign magazine
      Young Women General Conference Handout (Free Printable)
    • two pairs of nordic christmas socks
      Young Women Christmas Sock Printable Tags
    • Variety of colored shrinky dink key chains.
      YW Camp Shrinky Dink Keychains
    • mini nail polish printable
      Nail Polish Birthday Tags (Printable)

    MADE THIS CRAFT AND LOVED IT? 💛 Please leave a STAR rating and COMMENT below! Post it to Facebook or Pinterest to easily share with friends!

    Summer Camp Flavored Water Printable Tags

    May 19, 2025 By Brandy Leave a Comment

    two summer camp printable tags with drink packets

    These flavored water printable tags are perfect for summer camps! Slide a flavored water packet into the slot. Cute and inexpensive! This post contains affiliate links.

    Check out all of my Young Women's camp pillow treat ideas here!

    hand holding flavored water gift tag

    YW Camp Flavored Water Printable Tags

    I made these printable tags to attach to use with flavored water packets for YW camp (LDS Young Women Camp). It’s an annual camp that our church does every summer for teenage girls ages 12-18. In the evenings, we typically give each young woman a “pillow treat”, which is a small handout with a sweet message. I made these with that purpose in mind, but they’d be perfect to give out at any summer camp. Are your kids going to Vacation Bible School? Day camp? Band camp? There are so many fun uses for these tags.

    two summer camp printable tags with drink packets

    You could attach the tag to a bottle of Gatorade, Prime, or an energy drink. For a super affordable option, slide a flavored water packet into the tag like I did!

    sheet of drink printable tags with two drink mix packets

    Printable Flavored Water Handout

    The tags print 4 to a page. I recommend printing them on cardstock paper. Simply print, cut, then use an X-acto knife or hobby knife to cut a slit to slide the drink mix into.

    gift tag with slot cut into it for flavored water

    You could also use a hole punch and ribbon to attach to a bottle of Gatorade, etc.

    Click HERE to download the FREE tags!

    4 Crafts To Make At Summer Camp!

    1. Morse Code Bracelets: These stretchy Morse code bracelets are easy to make and fun to customize! Made from seed beads and stretchy cord. Make a stack to wear today!
    2. YW Camp Shrinky Dink Key Chains: Colorful and cute, these YW camp shrinky dink key chains are easy to make! There are four sheets of camp and young women-themed designs to choose from!
    3. Mystery Leather Bracelets: Mystery braid leather bracelets are an easy craft for youth summer camp crafts. They come together quickly and are fun to customize.
    4. Stamped Metal Rings: These easy hand-stamped rings are fun to customize and are made out of aluminum, so they are easy to stamp! Fun to make with teens!

    "Don't Worry Be Chappy" Chapstick Printable Tags

    May 19, 2025 By Brandy Leave a Comment

    printable chapstick gift cards with chapstick

    "Don't Worry, Be Chappy!" A silly phrase to brighten someone's day. These Chapstick printable tags make the perfect little gifts! This post contains affiliate links.

    Check out all of my printable tags and gift ideas here!

    chapstick attached to printable card

    Printable Chapstick Gift Tags

    I made these printable tags to attach to tubes of lip balm (chapstick) for Young Women's camp. It’s an annual camp that our church does every summer for teenage girls ages 12-18. In the evenings, we typically give each young woman a “pillow treat”, which is a small handout with a sweet message. I made these with that purpose in mind, but they’d be perfect to give out for any occasion. I'd imagine that it would make a teacher smile to see one of these left on her desk 🙂

    printable chapstick gift cards with chapstick

    My daughter walked into the room while I was working on these, and I said, "Is the phrase 'Don't worry, be chappy' too cheesy?" But I already knew the answer to my question because I couldn't even say it out loud without laughing. It's SO cheesy, but I love it. And who doesn't love Chapstick? LipSmacker will forever be my favorite brand. sheet of chapstick printable tags with scissors and 3 tubes of lip balm

    Printable Lip Gloss Tags

    The tags print 6 to a page, so they are perfect to make for a group! I used glue dots to attach the lip balm to the cards.

    CLICK HERE to download the FREE printable!

    chapstick attached to printable card

    3 More Printable Tags You'll Like

    "We were MINT to be friends" printable tags (add to gum, mints, etc.)

    "Treat Yo'self" printable tags (add to any kind of sweet---I used boxes of mug cake mix)

    "Thank you for the SWEET ride" printable tags (for bus drivers, add to any sort of sweet treat!)

    Journaling Handout (Easy Gift Idea)

    May 19, 2025 By Brandy Leave a Comment

    This journaling handout is easy to attach to a pen for a quick and easy gift! Perfect for LDS YW camp handouts. This post contains affiliate links.

    To see all of my YW Camp pillow treat ideas, click here!

    Journaling Handout Gift Idea

    I made these printable tags to attach to pens or small notebooks for YW camp (LDS Young Women Camp). It's an annual camp that our church does every summer for teenage girls ages 12-18. In the evenings, we typically give each young woman a "pillow treat", which is a small handout. I made these with that purpose in mind, but they'd be perfect to give out during Sunday lessons, or as a gift any time of year!

    two journaling handouts with pens slid into slots

    "Today's MOMENTS are tomorrow's MEMORIES". A simple reminder to write down the things we want to look back on in the future. You could attach these tags to a pen, pencil, notebook, or journal! We made these fun, beadable pens at camp (shown in the photo above on the left) at camp last year. You could make these for your girls, or use one of my FAVORITE pens (shown in the photo above on the right). They write like butter.

    two printable journaling cards with beaded pen

    Each printable prints 6 to a page. I recommend printing them on cardstock. 

    slot cut into the top of printable card

    I used a hobby knife (X-acto knife) to slice a slit in the top and bottom of the card, then slid the pen inside. You could also use a hole punch and ribbon to tie the tag onto the pen or notebook.

    journaling handout with pen slid into slots

    Click here to download a copy of my Journaling Printable!

    5 More YW Camp Crafts To Make!

    Morse Code Bracelets

    YW Camp Shrinky Dink Key Chains

    Mystery Leather Bracelets

    Stamped Metal Rings

    Water Candles

    Beadable Pen Tutorial (Easy Gift Idea!)

    May 19, 2025 By Brandy Leave a Comment

    variety of beadable pens with silicone beads

    A quick and easy beadable pen tutorial. These take minutes to make and are fun to customize! A great gift or summer camp craft!

    You might also like our birthday money box gift idea, shrinky dink key chains, 10-minute scrunchies, or mini rainbow macrame key chains! 

    Watch our step by step video!

    Beadable Pens

    These beadable pens are adorable and super easy to make! I'm the craft coordinator for our church summer camp and was looking for one more craft to add to last year's lineup. My friend showed me the beadable pens that she made for the teachers that she worked with, and I knew the girls at camp would love them too. They ended up being a huge hit with both the girls and leaders! 

    variety of beadable pens with silicone beads

    I've made them with my kids as gifts for their teachers, and even gave a beadable pen kit to my niece for her birthday.

    The pens twist into two pieces and are strung with beads. You can use all kinds of beads, but I prefer silicone. It can be a little overwhelming with all of the options! I used a variety of solid silicone beads and picked out some fun focal beads. Feel free to add other embellishments like tassels, rhinestone beads, or charms.

    bowl of silicone focal beads for beadable pens

    5 More Camp Crafts To Make

    1. Leather Mystery Braid Bracelets
    2. Easy Hand Stamped Rings
    3. Painted Sticker Rocks
    4. Washer Necklaces 
    5. Beaded Prayer Bracelets

    plastic organizer with pen blanks and silicone beads

    Beadable Pen Supplies

    • Pens: These ones come with pen bags, which are great for giving them as a gift.
    • Flat beads
    • Round beads
    • Focal beads

    Beadable Pen Tutorial

    orange and pink beadable pens without beads

    Step 1: Unscrew the top of each pen shaft (the colorful cap).

    pineapple focal bead on beadable pen

    Step 2: String the beads onto the shaft. I recommend only using one large focal bead. The shaft isn't very big, so you'll only be able to fit a few beads on it.

    colorful beadable pens in jar

    Step 3: Screw the base back onto the shaft.

    The pens come with ink refills, which is great because the ink reservoirs are very small. You can package the pen with a refill when you gift these.

    Click here for all of my teen craft projects!

    Snoop Dogg's Rolls Royce Cookies

    May 16, 2025 By Brandy 21 Comments

    Snoop Dogg cookies on parchment paper.

    Snoop Dogg's Rolls Royce cookies are a must-try! Delicate, buttery soft chocolate chip peanut butter cookies that are rich and delicious!

    You might also like Martha Stewart Fired Me Cookies, Mama Kelce's cookies, copycat Chick-fil-a chocolate chunk cookies, or copycat Subway chocolate chip cookies!

    Snoop Dogg cookies on parchment paper.

    I love trying new cookie recipes, so when I stumbled across a copy of Snoop Dogg's cookie recipe from Good Morning America, I had to make a batch! Originally shared in his "From Crook to Cook" cookbook, Snoop's recipe has made its rounds on the web with rave reviews.

    Anytime I review a recipe, I make it using the exact ingredients and measurements. That way, I can truly review the cookie the way it's intended, then I share my notes and things I'd change if making them again. As a baker, I was skeptical of the low amount of flour compared to butter and peanut butter. You can see my notes at the end of the post.

    Why I Like This Recipe

    • Easy to make cookies of various sizes. I baked some of Snoop's cookies in the recommended size (tablespoon scoop), as well as jumbo-sized cookies (3 tablespoon scoop), and included baking times for both.
    • Rich flavor. I thought these cookies were absolutely delicious. A fantastic chocolate chip peanut butter cookie that was just as soft on day 2.
    • Simple ingredients. I used generic ingredients, and my cookies were delicious. You don't need to buy expensive butter or fancy chocolate chips.

    What Others Are Saying

    These cookies are so good. I made them gluten free with 1:1 flour and added caramel bits per my son's request. They are so chewy and full of flavor!---Janice

    I made these and added a bag of semi sweet chocolate chunks, a ½ cup of mini chips and 3 crushed up Butterfinger bars. So good and so easy!---Pamela

    Used mini chocolate chips. Husband gave 2 thumbs up. Yummy! ---Marsha on Pinterest

    [feast_advanced_jump_to]

    Tips and Tricks

    1. Best baking sheets for cookies. I only bake on light colored baking sheets. My favorite are these aluminum half sheet pans that you can buy on Amazon (Sam’s Club also sells a similar one). The light colored pans bake much more evenly than dark pans.
    2. Reshaping cookies tip. If your cookies aren't completely round after baking, you can quickly reshape them using a spatula or a large round cookie cutter right after they come out of the oven.
    3. Cooling rack tip. This was shared by a reader! "I thought I would share a tip for removing cookies to a rack to cool. I use a rimless baking sheet lined with parchment. After letting the cookies sit for 5 minutes I slide the parchment paper and cookies onto the coing rack. So much easier than trying to remove them one by one!"---Renee

    Ingredients

    Bowls of sugar, brown sugar, flour, chocolate chips, salt and baking soda, container of peanut butter, butter, eggs and bottle of vanilla.
    • Butter: The recipe didn't specify salted or unsalted. I use salted butter exclusively for baking, so that's what I used.
    • Peanut butter: creamy
    • Brown sugar and white sugar: a 50/50 blend.
    • Egg: for richness and texture.
    • Vanilla extract
    • All-purpose flour: Some celebrity recipes call for a blend of cake flour or bread flour (Jacques Torres cookies and Mama Kelce's cookies), but I like that these stick with one type of flour.
    • Baking soda and salt
    • Semisweet chocolate chips

    See the recipe card for full information on ingredients and quantities.

    How To Make Snoop Dogg's Cookie Recipe

    Mixing bowl with peanut butter, sugars and butter.

    Step 1: Combine butter, brown sugar, sugar, and peanut butter and mix until smooth using an electric mixer.

    Vanilla being poured into Kitchenaid stand mixer.

    Step 2: Add egg and vanilla.

    Chocolate chips mixed into cookie dough.

    Step 3: Add dry ingredients. Stir in chocolate chips.

    Cookie scoop of cookie dough.

    Step 4: Scoop onto parchment-paper lined baking sheets.

    balls of cookie dough on baking sheet with parchment paper

    Step 5: Bake the cookies according to the guide below.

    For Small Cookies: Scoop cookie dough using a heaping tablespoon (about 1 ½ tablespoons) onto baking sheets, 2" apart. Bake for 8-10 minutes.

    For Jumbo Cookies: Scoop cookie dough using a large cookie scoop (3 tablespoons) onto baking sheets, 2" apart. Bake for 11-12 minutes.

    chocolate chip peanut butter cookies on baking sheet with parchment paper

    Step 6: Remove the cookies from the oven and let them cool on the sheets for 5 minutes. Carefully transfer the cookies to a wire rack to cool completely.

    Store the cookies at room temperature in an airtight container for up to 3 days.

    Makes 36 small cookies or 18 jumbo cookies.

    Brandy's Notes

    • These cookies are soft, with a crisp outer edge. They literally melt in your mouth! The only downside is that I'd consider them a delicate cookie---but that isn't a deal breaker at all. Just something to be aware of if you want a cookie that you can stack in a cookie jar. This is due to the high butter and low flour content.
    • I let one batch cool for 5 minutes before transferring to a cooling rack, and allowed the second batch to cool completely on the baking sheet. I don't see any reason to transfer the cookies to a cooling rack for this recipe. The cookies that cooled on the baking sheets were just fine, and I didn't risk them breaking by moving them while still warm.
    • If your cookies aren't completely round after baking, you can quickly reshape them using a spatula or a large round cookie cutter right after they come out of the oven.

    Cookie FAQs

    What are the best baking sheets for cookies?

    I prefer to bake on light-colored baking sheets. If you use dark metal sheets you’ll need to watch closely to make sure that the cookies don’t brown too quickly.

    What is the best butter for baking?

    There are a lot of different thoughts and opinions on butter. I've used a generic brand of butter from either Walmart or Sam's Club for the past 20+ years. Why? Because it's affordable and yields fantastic results. Use whatever butter fits your budget. That isn't to say that a better quality butter wouldn't give my cookies a richer flavor, but for as much baking as I do, it isn't worth the additional cost.

    Do I need to chill the dough for Snoop Dogg cookies?

    No chilling is required for this recipe. For chocolate chip cookie recipes, chilling isn't usually needed for texture, but it can enhance the flavor of the cookie which is why it is often an optional step.

    Hand holding snoop dogg chocolate chip peanut butter cookie.

    More Famous Cookie Recipes To Make

    • White bowl of lemon cookies.
      Copycat Maggiano's Lemon Cookies
    • Mrs. Fields chocolate chip cookies on cooling rack.
      Mrs Fields Chocolate Chip Cookie Recipe (Blue Ribbon)
    • baked cookies on parchment paper
      Copycat Crumbl Mom's Cookies
    • Copycat Subway double chocolate chips cookies on parchment paper.
      Copycat Subway Double Chocolate Chip Cookies

    MADE THIS RECIPE AND LOVED IT? 💛 Please leave a STAR rating and COMMENT below! Post it to Facebook or Pinterest to easily share with friends!

    Snoop Dogg cookies on parchment paper.
    Print Pin
    4.78 from 9 votes

    Snoop Dogg's Rolls Royce Cookies

    Snoop Dogg's Rolls Royce cookies are a must-try! Delicate, buttery soft chocolate chip peanut butter cookies that are rich and delicious!
    (Here is the original recipe; the one below is rewritten with my adaptations)
    Course Dessert
    Cuisine American
    Prep Time 15 minutes minutes
    Cook Time 12 minutes minutes
    Total Time 27 minutes minutes
    Servings 36 cookies
    Calories 166kcal
    Author Brandy Nelson

    Ingredients

    • 1 cup 2 sticks butter, at room temperature
    • ½ cup creamy peanut butter
    • ½ cup packed light brown sugar
    • ½ cup granulated sugar
    • 1 large egg
    • 1 teaspoon pure vanilla extract
    • 1 ½ cups all-purpose flour
    • 1 teaspoon baking soda
    • ½ teaspoon salt
    • 2 cups semisweet chocolate chips

    Instructions

    • Preheat the oven to 375 degrees and line baking sheets with parchment paper.
    • Combine butter, brown sugar, sugar, and peanut butter and mix until smooth.
    • Add egg and vanilla.
    • Add dry ingredients.
    • Stir in chocolate chips.
    • For Small Cookies: Scoop cookie dough using a regular scoop (heaping tablespoon) onto baking sheets, 2" apart. Bake for 8-10 minutes.
    • For Jumbo Cookies: Scoop cookie dough using a large cookie scoop (3 tablespoons) onto baking sheets, 2" apart. Bake for 11-12 minutes.
    • Remove the cookies from the oven and let them cool on the sheets for 5 minutes. Transfer the cookies to a wire rack to cool completely.

    Video

    Notes

    Makes 36 small cookies or 18 jumbo cookies.
    Store the cookies at room temperature in an airtight container for up to 3 days.

    Nutrition

    Calories: 166kcal | Carbohydrates: 16g | Protein: 2g | Fat: 11g | Saturated Fat: 6g | Polyunsaturated Fat: 1g | Monounsaturated Fat: 3g | Trans Fat: 0.2g | Cholesterol: 14mg | Sodium: 121mg | Potassium: 88mg | Fiber: 1g | Sugar: 10g | Vitamin A: 163IU | Calcium: 13mg | Iron: 1mg

    Easy Metal Stamped Bracelets

    May 15, 2025 By Brandy Leave a Comment

    two metal stamped bracelts on table with marker and metal stamps

    These easy metal stamped bracelets are fun to customize and are made out of aluminum, so they are easy to stamp! These are fun for teens to make! This post contains affiliate links.

    You might also like our shrinky dink keychains, mystery leather bracelets, or Morse code beaded bracelets!

    Watch our step by step video!

    I’ve been the camp craft coordinator for my church for the past 5 years, and one craft that is requested year after year is metal stamping. Teens love making their own jewelry and accessories, and metal stamping is easy to do. We’ve made constellation-stamped necklaces, dog tag necklaces, rings, and keychains!

    two aluminum stamped bracelets on table

    EASY Metal STAMPED Bracelets

    There are so many ins and outs to stamping on metal. I’m not an expert, but I do know how to do it easily with a large group. I typically teach 20 girls at a time, 100 in total.

    • I don’t worry about using jigs when making them with a group. The girls don’t seem to have the patience for that anyway, but if I were making these for myself or as a gift, I’d probably use one.
    • I supply masking tape that they can use to hold their project in place or create a straight line to follow.
    • I always provide the girls with aluminum squares to practice on to keep mistakes to a minimum. These work great for testing out stamps.
    • Aluminum stamping blanks are inexpensive, so I make sure to have plenty of extras on hand.

    Whatever is left over goes back into my box for the next year! We have quite a collection of stamping blanks for charms, necklaces, keychains, bracelets, and rings!

    arm with stamped metal bracelet

    These bracelets are SO easy to make, and the girls absolutely loved them. It was cute seeing all of the cuff bracelets being worn during camp last year.

    enamel pen, stamping block, bracelet blank, bending tool, hammer, tape and metal stamps

    Metal STAMPED Bracelet SUPPLIES

    (Supplies are all linked below to Amazon.)

    Aluminum Bracelet Blanks: These come in all different thicknesses, colors, and lengths! I used 6" blanks. Some were ¼" wide and others ⅜".

    Metal Stamps

    Steel Bench Block and Hammer*

    Enamel Marker

    Bracelet Bending Tool

    *When I make stamped crafts with the girls at YW camp, I use mini polyethylene cutting boards from Ikea and 8-oz hammers from Harbor Freight. A great, affordable way to teach this class to a crowd. I typically teach 15-20 girls at a time, 100 in total. Purchasing 15 bench blocks and hammer kits isn’t cost-effective for a group setting, but if you are making these at home, I highly suggest using one, as the surface is ideal for stamping.

    How To Make Metal Stamped Bracelets

    process collage of metal stamps, bracelet blank being stamped and enamel pin

    Step 1: Select the stamp designs you'd like to use. The smaller the stamp, the easier it is to print.

    Step 2: Tape the bracelet blank to the stamping block using masking tape to hold in place.

    Step 3: Hit the metal stamp 1-2 times (preferably 1) to stamp the design into the bracelet.

    Step 4: Color over the stamped designs using an enamel pen. Let it stand 30 seconds.

    Step 5: Wipe the ink off using a paper towel.

    process collage of bracelet bent around bending tool

    Step 6: Bend the bracelet. This tool is super simple to use! Slide one end into the slot. Bend the bracelet blank over the curve. Flip over and place the other end into the slot. Bend the bracelet over the curve.

    two stamped bracelets and pile of metal stamps

    Click here for all of my teen craft projects!

    Easy Hand Stamped Rings Tutorial

    May 15, 2025 By Brandy Leave a Comment

    ring bowl with 3 rings inside and 2 sitting next to it

    These easy hand stamped rings are fun to customize and are made out of aluminum, so they are easy to stamp! Fun to make with teens! This post contains affiliate links.

    You might also like our stamped constellation necklaces, leather mystery bracelets, or wired headband tutorial!

    Watch our step by step video!

    I've been the camp craft coordinator for my church for the past 5 years, and one craft that is requested year after year is metal stamping. Teens love making their own jewelry and accessories, and metal stamping is easy to do. We've made constellation-stamped necklaces, bracelets, dog tag necklaces, and keychains. This year, we are adding rings!

    ring bowl with 3 rings inside and 2 sitting next to it

    Easy Stamped Rings

    There are so many ins and outs to stamping on metal. I'm not an expert, but I do know how to do it easily with a large group. I typically teach 20 girls at a time, 100 in total.

    • I don't worry about using jigs when making them with a group. The girls don't seem to have the patience for that anyway, but if I were making these for myself or as a gift, I'd probably use one.
    • I supply masking tape that they can use to hold their project in place or create a straight line to follow.
    • I always provide the girls with aluminum squares to practice on to keep mistakes to a minimum. These work great for testing out stamps.
    • Aluminum stamping blanks are inexpensive, so I make sure to have plenty of extras on hand.

    plastic organizer full of metal jewelry blanks for stamping

    Whatever is left over goes back into my box for the next year! We have quite a collection of stamping blanks for charms, necklaces, keychains, bracelets, and rings!

    easy hand stamped rings on table next to ring bending tool

    I had a lot of fun making these example rings for my group. They took minutes to make and turned out super cute!

    hand wearing 2 stamped rings

    I'm wearing a 2 ¼" ring blank, which can be tightened or stretched to fit all of my fingers, and a 3" spiral ring blank.

    Easy Hand Stamped Rings SuppLies

    (Supplies are all linked below to Amazon and Michael's)

    Ring Blanks (aluminum is easiest to stamp on)

    • 2" Blanks (ring size 4-6)
    • 2 ¼" Blanks  (ring size 7-9)
    • 3" Blanks (ring size 8-10 or spiral rings)

    Metal Stamps

    Steel Bench Block and Hammer*

    Enamel Marker

    Ring Bending Tool

    *When I make stamped crafts with the girls at YW camp, I use mini polyethylene cutting boards from Ikea and 8-oz hammers from Harbor Freight. A great, affordable way to teach this class to a crowd. I typically teach 15-20 girls at a time, 100 in total. Purchasing 15 bench blocks and hammer kits isn't cost-effective for a group setting, but if you are making these at home, I highly suggest using one, as the surface is ideal for stamping.

    How To Make Stamped Rings

    process collage of ring stamps, hammer stamping ring blank, stamp marker and wiping finished ring with paper towel

    Step 1: Select the size of ring that you'd like to make. I use 2" and 2 ¼" inch ring blanks for regular rings and cuff rings, and the 3" ring blanks for spiral rings.

    Step 2: Tape the ring to the stamping block using masking tape to hold in place (optional).

    Step 3: Hit the metal stamp 1-2 times (preferably 1) to stamp the design into the ring.

    Step 4: Color over the stamped designs using an enamel pen. Let it stand 30 seconds.

    Step 5: Wipe the ink off using a paper towel.

    ring bending tool shaping aluminum stamped ring

    Step 6: Bend the rings.

    To make a regular ring: Bend the ring using the ring-bending tool (ring-bending pliers). You can start in the middle or on one end; it doesn't matter. As you crimp, the ring will take shape. To make it smaller, squeeze the ends together a bit. To make it bigger, pull the ends a bit.

    ring bending tool bending spiral ring

    To make a spiral ring: Start bending the ring as normal. When you get towards the end, instead of allowing the metal to overlap, pull it down so that it goes underneath the starting point.

    The rings are very forgiving, so if you don't know your exact size, you can generally make it work with the 2 ¼" ring blank (the medium one). You can resize the rings by gently pressing or pulling the ends together or apart. 

    • « Previous Page
    • 1
    • …
    • 5
    • 6
    • 7
    • 8
    • 9
    • …
    • 158
    • Next Page »

    Welcome!

    I'm Brandy! I love to create and share my ideas through easy-to-follow recipes and tutorials.

    More about me

    As an Amazon Associate, I make a small commission on qualifying purchases.

    sew with me kids sewing book
    My Book

    Love my family recipes and DIY projects? Add Gluesticks Blog as a Preferred Google Source, so you'll see more of my content in Google News and Search.

    Summer Posts

    • Cherry pie on prep mat.
      Best Cherry Pie Recipe
    • Bandanna Picnic Blanket Tutorial
    • diy tiki torch planter on black plant stand
      DIY Tiki Torch Planter (Table or Stand) + Video
    • slab pie on white plate
      Peach Slab Pie
    • toddler playing with dinosaur garden
      Dinosaur Garden For Kids (Fairy Garden) (Video)
    • water bottle sewing tutorial
      Color Block Fabric Water Bottle Holder Tutorial
    • strawberry pie with whipped cream on top.
      Fresh Strawberry Pie Recipe (Video)
    • slice of ice cream cake on spatula
      Oreo Ice Cream Sandwich Cake
    See more Summer →

    Latest Posts

    • Red white and punch in glass with ice.
      Red, White and Blue Layered Punch (Non-Alcoholic)
    • Stack of butterfinger cornflake bars.
      Cornflake Butterfinger Bars
    • Marshmallow scotcheroos on a plate.
      Marshmallow Scotcheroos
    • White plate with a slice of mixed berry pie.
      Mixed Berry Slab Pie (Raspberry, Blackberry & Blueberry)
    • Slice of strawberry rhubarb pie on plate with scoop of vanilla ice cream.
      Strawberry Rhubarb Slab Pie
    • Dot cakes in dessert cups.
      How To Make Viral Dot Cakes Using Cupcakes

    Footer

    ↑ Back to Top

    About

    • Privacy Policy
    • Accessibility Policy

    Newsletter

    • Sign Up! for emails and updates

    Contact

    • Contact

    As an Amazon Associate, I earn from qualifying purchases.

    Copyright © 2025 Gluesticks Blog

    Rate This Recipe

    Your vote:


    A rating is required
    A name is required
    An email is required