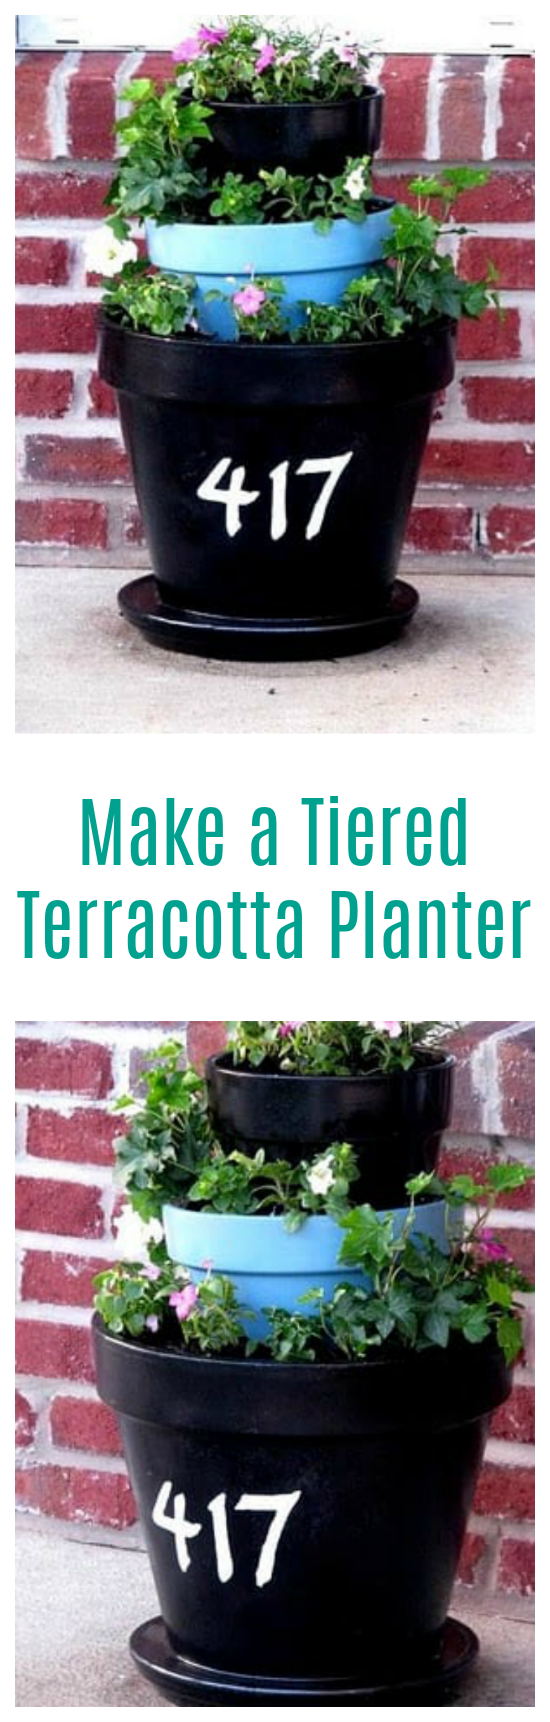
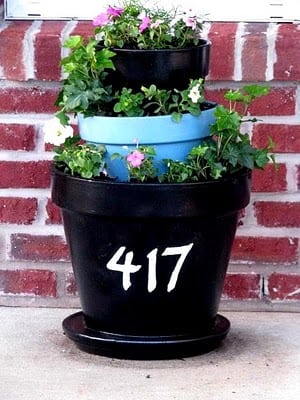
Gluesticks Blog

  • About
  • Sewing
    • My Book
    • Kids Sewing Projects
    • All Sewing Projects
  • Crafts
    • Kids Crafts
    • Paper Crafts
    • Free Printables
    • All Crafts
  • Holidays
    • Christmas
    • Halloween
    • Patriotic Holidays
    • Easter
    • St. Patrick’s Day
    • Valentine’s Day
    • Gift Ideas
      • Teacher Gifts
      • All Gift Ideas
    • Parties
  • Home
    • Home Decor Projects
    • Cleaning & Organizing
    • Gardening
    • Motherhood
  • Recipes
    • Kids in the Kitchen
    • Appetizer Recipes
    • Bread Recipes
    • Dessert Recipes
      • Cake Recipes
      • Cookie Recipes
      • All Dessert
    • Main Dish Recipes
    • Sides & Salads
    • Holiday Recipes
    • All Recipes

February 2, 2020 By Brandy 30 Comments

Home » Craft Tutorials

Tiered Terracotta Planter For Spring and Summer

Filed Under: Craft Tutorials, Gardening

Jump to Project
Stack inexpensive terracotta pots to create a beautiful tiered planter for spring! This tiered terracotta planter was easy to put together and makes a huge statement on any porch. 
If you like this floral arrangement for your porch, you’ll love our fairy tale fairy garden! 

terracotta planter for spring

I carefully watch at Lowe’s and Home Depot for their spring foliage. As soon as it makes an appearance I’m there, filling up my shopping cart! I am just thrilled with how this tiered terracotta planter turned out, and it has received so many comments from friends who stop by the house. This project was inspired by one from the talented Amy over at Positively Splendid.

tiered terracotta planter on porch

How to Make a Tiered Planter

I had some old pots that I spray painted a couple of coats on. I also added a clear coat to seal them. Then I stacked them using bricks to raise each pot a bit.You could use vinyl, but I painted my address numbers right on the front. I made a stencil with contact paper and my cricut. After I painted the numbers, I gently peeled the contact paper away.

tiered terracotta planter with house numbers painted on front
I planted petunias, impatiens, asparagus fern, and ivy. Strawberries would thrive in a planter like this, too!

Let’s Make A Tiered Planter For Your Porch!

tiered terracotta planter on porch

Tiered Terracotta Planter

Stack inexpensive terracotta pots to create a beautiful tiered planter for spring! This terracotta planter was easy to put together and makes a huge statement on any porch. 
0 from 0 votes
Print Pin Rate
Prep Time: 10 minutes
Active Time: 1 hour
paint drying: 3 hours
Total Time: 4 hours 10 minutes
Yield: 1 planter
Cost: $20

Equipment

  • N/A

Materials

  • 3 terracotta pots varying sizes
  • spray paint
  • clear spray paint
  • bricks
  • potting soil
  • flowers

Instructions

  • You do not need to paint your pots, but if you'd like to add a bit of color apply two coats of spray paint to each pot and allow to dry completely.
  • Apply a coat of clear spray paint to the pots.
  • Starting with the largest pot, place a few bricks in the bottom of the pot.
  • Place the medium sized pot on top of the layer of cans.
  • Repeat with more cans inside the medium pot.
  • Place smalles pot on layer of cans.
  • Fill pots with potting soil and plants.

More Gardening Projects You’ll Love!

Tea Cup Fairy Garden

Eggshell Seed Starters

Popsicle Stick Garden Markers

This post is a refresh of one originally shared in 2010.

Print Friendly, PDF & Email

About Brandy

Welcome! I'm Brandy, mother to 5 darling kiddos and a cute black lab named Toby. My husband is in the Coast Guard so we've lived all over the place, turning each house into a home. I love baking, sewing, making cute things with my kids, and sharing what I've learned with all of you!

Previous Post: « Fabric Scripture Tote with Drawstring Tutorial
Next Post: Decorative Baby Wash Cloths Sewing Tutorial »

Reader Interactions

Comments

  1. Amy @ Positively Splendid says

    May 26, 2010 at 1:46 am

    Brandy, this turned out absolutely amazing! I love your color scheme, and how the street number really pops against the black! I am so glad you enjoyed the tutorial, and thanks so much for sharing the link, too. 🙂

    Reply
  2. Jennie says

    May 26, 2010 at 1:52 am

    This is so cute! I wonder if my LONG address would fit? Love it!

    Jennie @ Cinnaberry Suite

    Reply
  3. Debbie says

    May 26, 2010 at 2:12 am

    Too cute, and I love the color scheme!

    Reply
  4. Amy Kinser says

    May 26, 2010 at 3:09 am

    These turned out great. I also love this time of year and love having flowers blooming.

    Good job!

    Partying with you tonight. Stop by for a visit.

    Reply
  5. Laurie says

    May 26, 2010 at 4:07 am

    I love your tiered planter, esp. how you used contrasting colors! I love flowers, too, and I’ve done a couple posts on them lately. I’d love for you to come see my hydrangeas at:
    http://sceneofthegrime.blogspot.com/2010/05/hydrangea-love.html
    and my roses at:
    http://sceneofthegrime.blogspot.com/2010/05/blog-photography-amateur-hints-for.html
    I’d love for you to visit me at sceneofthegrime.blogspot.com!
    ♥Laurie

    Reply
  6. Andrea says

    May 26, 2010 at 2:16 pm

    Your planter looks great!!! I really want to make one of these!! I’ve never heard of Asparagus fern? Gonna have to look that one up. I think your other plants will be just fine! Impatiens don’t like much sun though, they will bloom the best in shade!
    You should post a pic when your planter fills out a bit 🙂

    Reply
  7. Atticmag says

    May 26, 2010 at 5:00 pm

    I’ve never thought of tiered planters but yours looks great and should really flourish as the summer goes on. Lovely. Jane F

    Reply
  8. Kimberly says

    May 26, 2010 at 5:25 pm

    I think those are great choices, and it looks wonderful!

    Reply
  9. CraftyBrit says

    May 26, 2010 at 6:11 pm

    Hi there, your blog is wonderful! Thanks for stopping by mine, I seriously have to see your wall decal you’re working on when it’s finished! I might be more excited than you 🙂 I love these ideas, in fact this pot is perfect for my house without numbers on it! I have to do this! Such a small world of LDS memebers and Coasties too!

    Reply
  10. Maryann @ Domestically-Speaking says

    May 27, 2010 at 4:13 am

    What a cool idea!

    Reply
  11. Sachiko says

    May 27, 2010 at 7:29 am

    This is such a cute idea, I love it! I am start thinking about other color combinations as well. Thank you for linking to my party!

    Reply
  12. ificould says

    May 27, 2010 at 3:56 pm

    Oh, we love how yours turned out! We made one too – we’ll have to update our blog with the photos.

    Just letting you know we gave you an award over on our blog: http://ificould-ificould.blogspot.com/2010/05/wow-award.html

    Reply
  13. Becca says

    May 27, 2010 at 5:08 pm

    So pretty! I would love to make something like this!
    -Becca @ The Bee Zoo

    Reply
  14. Life in Rehab says

    May 27, 2010 at 5:17 pm

    This is the third time I’ve seen this project, but you used my favorite color combination, which REALLY sets it apart. I guess I’m going to have to give in and make one now!

    Reply
  15. Laura says

    May 27, 2010 at 11:23 pm

    What a cute idea! I love the pop of blue.

    Laura @ along for the ride
    p.s. I have a blog party on Saturdays and I’d love it if you linked up!

    Reply
  16. LaKeta says

    May 28, 2010 at 2:37 am

    Oh….this is next on my to do list! I saw this on Positively Splendid as well and am dying to make one for my home:) You did a terrific job…love the black and turquoise together….I adore asparagus fern…nice choice!

    Reply
  17. StepThruCrazy says

    May 29, 2010 at 5:07 am

    I love the colors you chose! So pretty!

    Reply
  18. Hoosier Homemade says

    May 29, 2010 at 12:10 pm

    Your planter turned out great! I look forward to seeing a picture later on in the summer after the plants have grown.
    My DH is a landscaper, so if you have any questions, I’m happy to answer them 😉
    Thanks for sharing!
    ~Liz

    Reply
  19. Katie says

    May 31, 2010 at 3:21 am

    I really love this, especially with the house number!

    Reply
  20. Life in Rehab says

    May 31, 2010 at 7:19 pm

    I made this and I’m blogging it tomorrow, giving you credit of course! Pop by and see how I did.

    Reply
  21. Ott, A. says

    June 1, 2010 at 11:18 pm

    Just stopping by from Tip Junkie. those pots look great. I blogged about my flower pots a week or two ago. Happy Gardening!

    Reply
  22. Sharon says

    June 2, 2010 at 3:31 am

    Hi, I’m stopping by from It’s so Very Cheri. I love your planter! I made one similar, but “tipsy style”. Yours is very dignified! I’m gonna have to make one for the front porch with my house number!
    Thanks for the inspiration!
    [email protected]
    When you have a minute, you can see my planter here:
    http://keeninspirations.blogspot.com/2010/05/tipsy-pot-planter.html

    Reply
  23. Stephanie Lynn says

    June 3, 2010 at 1:25 pm

    This is my favorite time of year too! Your planter is fabulous. I just love the tierd look – great colors too! Thanks so much for joining The Sunday Showcase Party. I greatly appreciate it! Hope you are enjoying your week! ~ Stephanie Lynn

    Reply
  24. creativejewishmom.com says

    June 3, 2010 at 8:35 pm

    Hi Brandy, I linked your project up on my linking party as the comments weren’t working for me to ask you to drop by….hope that’s okay, I’m going to feature this in Sunday, and hope you’ll drop by to share something too! all the best1

    Reply
  25. Stacey @ Fun to Craft says

    June 4, 2010 at 1:35 am

    What a cute idea Brandy!! I love this. I am featuring it as part of the Look at me Party. Come by and snag a featured button…thanks for linking up!!

    Reply
  26. Southern Fried Gal says

    June 4, 2010 at 2:30 am

    Cute! I like how you mixed up the colors. The flowers really pop off the black!

    This would be a great addition to my Garden Party – stop over to join the linky fun!

    Have a blessed weekend!

    Reply
  27. Andy Porter says

    June 9, 2010 at 4:20 am

    I’m really diggin the teared look! Nice!!

    Reply
  28. Fonville Farm says

    June 20, 2010 at 9:51 pm

    I’m going to have to make me some of these! They are soooo cute!
    Robin

    Reply
  29. Its A Blog Party says

    June 22, 2010 at 9:11 pm

    It turned out so great!
    Thanks for linking up!
    ~Liz

    Reply
  30. Cassie @ Primitive & Proper says

    May 26, 2011 at 5:15 pm

    beautiful- love the variation on the color of the middle pot.

    Reply

Leave a Reply Cancel reply

Your email address will not be published. Required fields are marked *

Recipe Rating


This site uses Akismet to reduce spam. Learn how your comment data is processed.

Primary Sidebar

About the Author

Welcome! I'm Brandy, mother to 5 darling kiddos and a cute black lab named Toby. My husband is in the Coast Guard so we've lived all over the place, turning each house into a home. I love baking, sewing, making cute things with my kids, and sharing what I've learned with all of you! Learn More About The Author

My Sewing Book for Kids!

kids sewing book cover

Snowman Hot Chocolate Bombs!

hand holding snowman hot chocolate bombs over mug

Pop Tart Gingerbread House!

pop tart house with candy and frosting

Hot Chocolate Bombs!

hot chocolate bomb next to white mug of hot chocolate

Affiliate Link Disclosure

As an Amazon Associate I earn from qualifying purchases.

Let’s Connect!

If you make one of my projects, I’d love to see it! Tag me @gluesticksblog #gluesticksblog

Bonus Guide

  • Home
  • Website Accessibility
  • My Book
  • Privacy Policy

gluesticksblog

Brandy Nelson | Gluesticks
I don’t decorate for Valentine’s Day (still re I don’t decorate for Valentine’s Day (still recovering from Christmas 😂), but I always have holiday candy on hand! This year I filled the jar with petite sour hearts after hearing how amazing they are from @triedandtruemoms. They were right, we are all fans over here! Maybe more places will stock them now that they are in such demand. I ordered mine from @candynationusa (don’t waste your time looking on Amazon. They are charging twice as much for less candy).
These are the real deal, and are easy to make usin These are the real deal, and are easy to make using a cake mix and marshmallow fluff! We may have made them two days in a row after giving quite a few away to friends. 🙌🏻 Recipe is on the blog!
Nothing to see here. 😂 Actually, there’s al Nothing to see here. 😂 

Actually, there’s always something to see. These birds are hilarious. #nelsonsbackyardchickens #step2 @thestep2company
This kid knows a good thing when he sees it. Anyti This kid knows a good thing when he sees it. Anytime my camera and tripod go up, he’s right there waiting. Today we made our favorite green smoothie. It’s all about balance—-just kidding. We all know that’s a lie. I have like 10 healthy recipes on my site and 800 breads and desserts. 😂

Tip: when buying produce, buy extra to freeze. I buy an extra pineapple, an extra package of grapes, an extra bunch of bananas and an extra bag of spinach and freeze them for smoothies. I slice everything up and freeze it on baking sheets then bag it up. It makes it easy to grab a handful to toss into a blender. You can freeze entire bags of spinach too and add a handful to smoothies. I always blend my spinach and water first then add the rest of the fruit. No little spinach chunks in the smoothie that way. 🙌🏻 
#greensmoothie
Well, that’s a first. #nelsonsbackyardchickens Well, that’s a first. #nelsonsbackyardchickens
Chickens are just a gateway to other farm animals. Chickens are just a gateway to other farm animals. We think we’d like a cow, and by “we” I mean Mac and I. Derrick is definitely not on board. 😂
NYE tradition. My oldest came home from work and w NYE tradition. My oldest came home from work and was starving. He saw that we were having fondue and decided to eat a sandwich first. 😂 Fondue is for grazers for sure!
This cutie is working on a hat for her big brother This cutie is working on a hat for her big brother for Christmas. We love this little set of round knitting looms. A great project to work on during Christmas break. She’s making herself a pink one after Christmas. We bought several colors of bulky yarn at Walmart for $2.97 each. Each skein makes 1 hat. Linked in stories. ❤️
.
.
.
#knittingloom #homemadechristmas #cozychristmas #christmaseve #betsyandlace #craftykids #thatsdarling #kidsunplugged @betsyandlace
Tomorrow is all about gingerbread cookies for Sant Tomorrow is all about gingerbread cookies for Santa (although the Santa who comes to our house prefers sugar cookies. He can share these with Mrs. Claus). Ruby has them all picked out—-gingerbread boys, gingerbread girls, and ninja-bread cookies. Should be fun. Had to go out and get more molasses and it wasn’t easy to find! Everyone else must be making gingerbread, too!
More on Instagram
  • Facebook
  • Instagram
  • Pinterest
  • Twitter
  • YouTube

Copyright © 2021 Log in