Gluesticks Blog

menu icon
go to homepage
  • Summer
  • DIY
  • Recipes
  • About Me
  • Subscribe
    • Facebook
    • Instagram
    • Pinterest
  • subscribe
    search icon
    Homepage link
    • Summer
    • DIY
    • Recipes
    • About Me
    • Subscribe
    • Facebook
    • Instagram
    • Pinterest
  • ×
    Home

    French Bread Pizza 3 Ways: Buffalo, BBQ, or Pepperoni

    June 24, 2014 By Brandy 2 Comments

    French bread pizza

    served with a green salad is a great weeknight dinner! Make pepperoni, buffalo chicken or BBQ chicken with our recipes! This post brought to you by KRAFT Natural Shredded Cheese and Safeway.

    3 French bread pizzas

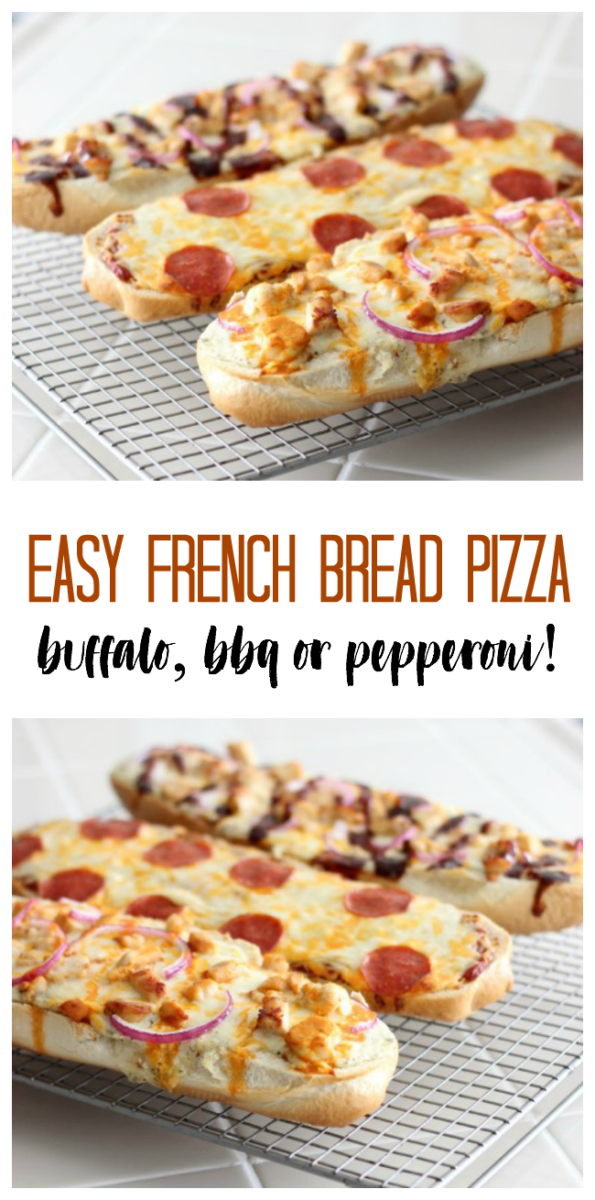
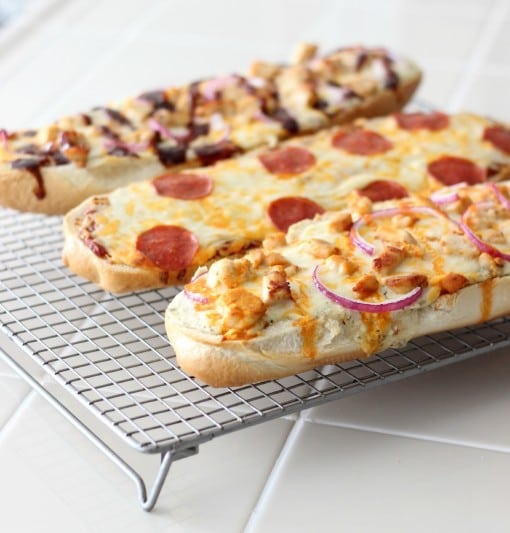
    One of my kids' favorite dinners is pizza. These French bread pizzas are a great weeknight meal because they take just minutes to prepare and bake up! They are also very fun to customize. Today I'm sharing how to make French Bread Pizza, 3 different ways! Chicken BBQ, Pepperoni, and Buffalo Chicken.

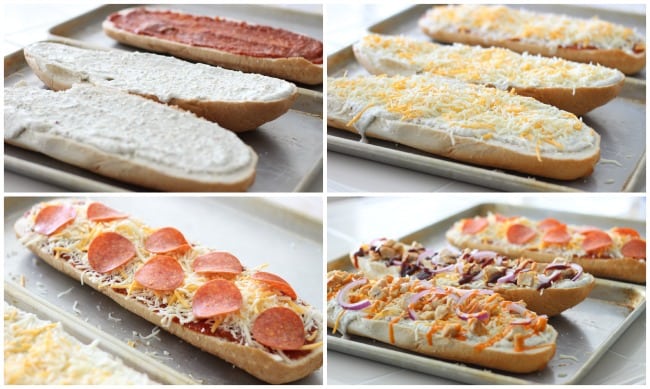
    Each variation uses a half of a French bread loaf. Slice your full loaves in half and add spread your pizza sauce. Add toppings, drizzle with the flavoring sauce and bake at 375 degrees until hot and bubbly!

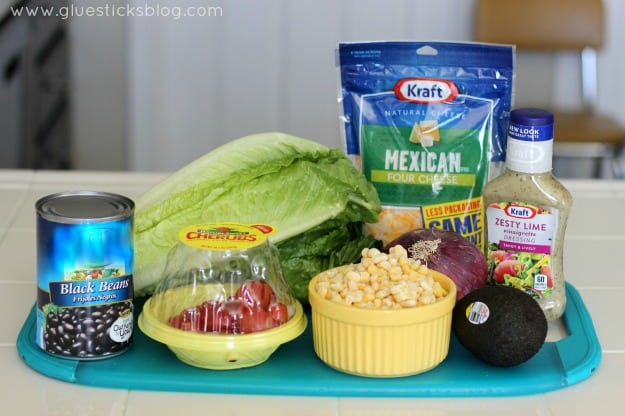
    Here are the ingredients you'll need to make each variation of French Bread Pizza

    French bread pizza unbaked on pans


    Chicken BBQ French Bread Pizza

    1 c. cooked chicken

    ½ c. KRAFT pizza shredded cheese

    ½ c. ranch dressing

    red onion, sliced

    bbq sauce


    Pepperoni French Bread Pizza

    ½ c. pizza sauce

    ½ c. KRAFT pizza shredded cheese

    sliced pepperoni


    Buffalo Chicken French Bread Pizza

    1 c. cooked chicken

    ½ c. KRAFT pizza shredded cheese

    ½ c. ranch dressing

    red onion, sliced

    buffalo wing sauce

    French bread pizzas on cooling rack

    You might also like...

    slices of stroganoff French bread

    Stroganoff Loaf

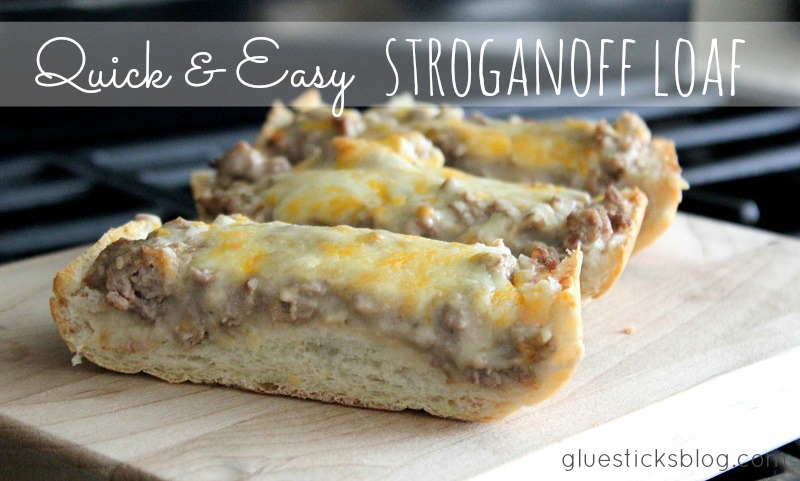
    One of our favorite weeknight dinners! Stroganoff loaf is super kid-friendly. Ground turkey or beef in a delicious sauce is spread over French bread then covered cheese. Baked in an oven until golden and bubbly and that's it! So easy and so yummy.

    plate of chicken chow mein

    Easy Chicken Chow Mein

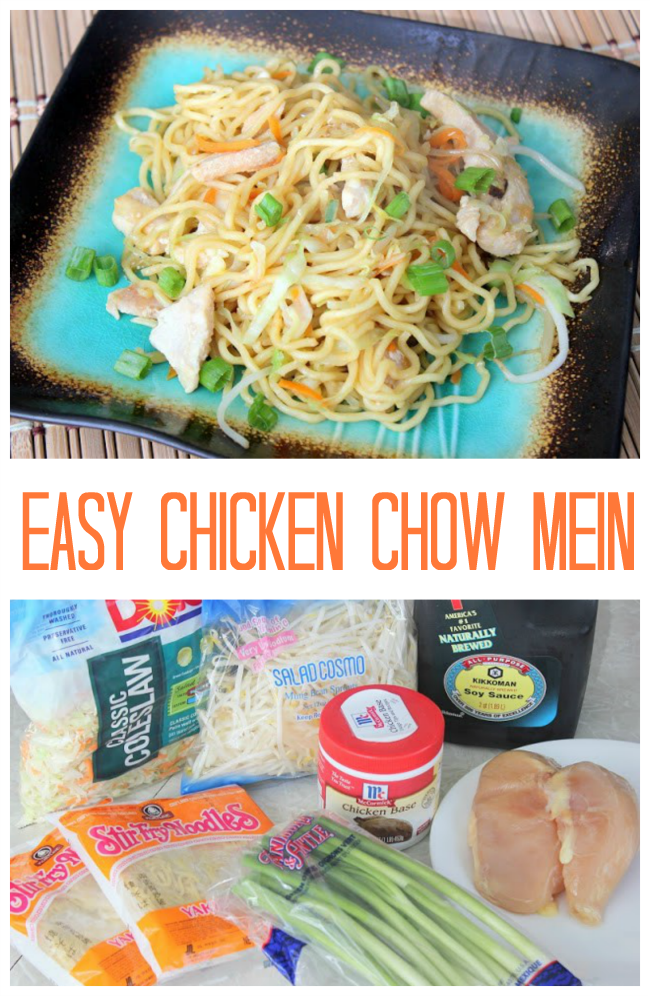
    A quick and easy way to make chow main. These fresh stir-fry noodles found in the refrigerator section are fantastic! Add fresh veggies and sauteed chicken breasts.

    bowl of asian noodles

    Asian Noodle Bowls

    These Asian inspired noodle bowls pack a punch of flavor. Ginger, garlic, onions and seasoned chicken. Absolutely delicious for a healthy lunch or dinner.

    Here are 99 more easy dinner ideas for busy families!

    "null"

    Elsa and Anna Apron Tutorial {FROZEN}

    June 23, 2014 By Brandy 4 Comments

    two little girls wearing Elsa and Anna aprons

    Duck® Brand Shelf Liner Tote Bag

    June 17, 2014 By Brandy 2 Comments


    tote made from shelf liner paper

    Summer is here and swim lessons are starting next week! The kids are so excited! I made a new tote to store towels and sunscreen for the pool.

    And here's the kicker...the entire bag is made out of shelf liner! I bet you didn't realize that shelf liner was so versatile. It's water proof, durable, flexible and MACHINE WASHABLE. Perfect for so many projects.

    Would you like to make a new tote to take to the pool, to the lake or on a picnic? Let's get started!

    roll of shelf liner


    Shelf Liner Tote

    (1"h x14"w x5d")

    gluesticksblog.com

    1 roll Shelf Liner, white (Smooth Top)

    1 roll Shelf Liner, contrasting color (Smooth Top)

    thread


    shelf liner cut into tote pieces

     Cut your liner pieces. You will need 2 large (11x15") rectangles, 2 small (5x15" rectangles) and 2 strap pieces (3x40").

    Sewing with Shelf Liner

    Sewing with shelf liner is different than sewing with fabric because...well, it isn't fabric! It has a grip bottom, perfect for keeping it in place, but not perfect for a sewing machine. I covered my feed dogs with tape to create a smooth surface. You can also lower your feed dogs. I also added tape to the bottom of my pressure foot.

    Also, DO NOT iron the shelf liner. Just fold it or press down firmly to flatten seams, etc.


    sewing machine stitching tote handle


    sewing machine stitching side of tote

    Even after adding the tape, you will still have to pull that fabric through the machine, especially when you are sewing sections that have grip surfaces on top and bottom.  Just pin your work surface and give it a tug and you'll be fine!

    Now let's make the straps!

    hand folding shelf liner to make a handle

    Fold your strap in thirds (1") each. Just fold over the left side, then the right side. Stitch close to the edge. Repeate for the next strap.

    Now let's work on adding those straps and creating the front and back to your bag!

    shelf liner sewn into tote bag

    Lay one small rectangle on top of one large rectangle (right sides facing eachother). Pin one side of a strap 3" from the outer edge and through the two rectangles. Pin the other side of that same strap 3" from the other edge and through the two rectangles. The strap will be sandwiched inside the rectangles. (photo 1 above)

    Stitch across, catching both strap edges in the seam. Open. fold seam towards the top and top stitch across top of the seam and the straps as well. (photo 2 above)

    Now sew your straps flat against the bag front. Start at the bottom and top stitch to the top of the bag and down the other side of the strap. (photo 3 above)

    Repeat with the other 2 rectangles and other strap to create the back piece of the tote. (photo 4 above)

    Sew front piece of tote to back piece by lining them up, edges matching, and right sides together. Stitch sides and bottom.

    You can stop here and flip your tote right side out and be done, or you can box the bottom corners so that your tote has a flat bottom.

    Here is how to box your bottom corners!

    bottom corners of tote bag

    Fold one bottom corner flat into a triangle, with the seam running along the bottom. (photo 1 above)

    Measure 2" from the tip of the triangle and pin. Stitch along the pin line. (photo 2 above)

    Trim close to seam. (photo 3 above)

    Repeat for other side.

    Flip right side out. (photo 4 above is showing the bag upside down so that you can see the boxed corners)

    If that didn't make any sense at all, here is a video that I found for ya!

    Flip that bag right side out and you are done!

     
    I just love how this tote turned out and it is so durable! I loaded it up with 3 small towels, sunscreen and snacks and it held up perfectly!

    Father's Day Candy Gram Gift Idea

    June 13, 2014 By Brandy 1 Comment

    Here's a fun Father's Day candy gram that the kids will love putting together for Dad! A quick and easy gift idea that is as fun to read as it is to eat!

    Does your dad like rootbeer? Here's a Father's Day rootbeer sampler that my might love!

    Father's Day candy gram

    Father's Day Candy Gram!

    Here is a really quick post on the candy gram we made dad for Father's Day this year! It was so quick to put together and the first time the kids had ever seen one. They thought it was pretty much awesome. And why wouldn't they? It's made out of candy! I used a permanent markers and added letters or crossed out letters on the candy packaging to make it fit.

    Candy Gram Shopping List:

    • Poster Board
    • Mr. Good Bar
    • Smarties
    • Whoppers
    • 100 Grand
    • Butterfinger
    • Whatchamacallit
    • Milk Duds
    • Rolos
    • Snickers
    • Mounds
    • Almond Joy
    • EXTRA gum
    • Hot Tamales
    • Sugar Babies

    Instructions

    Hot glue the candy bars onto the poster board, leaving enough space to add the candy gram phrase. You can use our phrase or come up with your own! Use a permanent marker to add the phrase.

    Father's Day Candy Gram Phrase

    Hi Mr. Goodbar! You are a Smartie. We wanted to give you a Whopping 100 Grand for Father's Day, but it slipped through our Butterfingers and fell down the Whatchamacallit. We are Milk Duds! Rolover and Snicker if you want to, but we wish you Mounds of Almond Joy because you are an Extra Hot Tamale. Love, Your Sugar Babies.

    You might also like...

    bbq sauce gift idea for dad

    Personalized Gifts for Dad

    A collection of personalized gift ideas for Dad! Snack mixes, photo gifts, soda pop gift ideas, homemade BBQ sauce and more!

    kids making bbq sauce

    Homemade BBQ Sauce Father's Day Gift

    Make Dad an assortment of homemade BBQ sauces using this basic BBQ sauce recipe. Add liquid smoke, honey, or steak seasoning to create different varieties of BBQ sauce then package them up in Mason Jars!

    white platter decorated with paint markers

    Personalized Grill Platter for Dad

    Create a personalized gift with oil based Sharpie pens! Decorate porcelain platters, bowls, or mugs for a one of a kind Father’s Day gift this year! We made a darling grill platter and baked it in the oven to set the paint. Make sure to hand wash it to make it last!

    Here's another fun gift idea for Dad! A darling monster trail mix from Lil' Luna.

    Grilled Chopped Chicken Salad

    June 4, 2014 By Brandy Leave a Comment

    This post brought to you by KRAFT Natural Shredded Cheese and Safeway. All opinions are 100% mine.

    grilled chicken salad on a blue plate

    One of our absolute favorite meals is a simple grilled chopped chicken salad. We like using different marinades to season the chicken, but the over-all method is always the same. A variety of our favorite toppings all laid out for the kids and ourselves to layer into the perfect salad. I especially love salads like this in the summer. I hate heating up the kitchen and my husband loves to grill so it's a win-win situation!

    Today I am going to share the basic concept of our favorite chopped salad, using a zesty lime dressing for both the marinade and salad dressing. Nice and tangy and goes great with the avocado and beans for a delicious Mexican twist.


    salad ingredients on the counter

    Grilled Chopped Chicken Salad

    ⅔ cup KRAFT Zesty Lime Marinade, divided

    1 ½ lb. boneless skinless chicken breasts

    1 package (10 oz.) torn romaine lettuce

    ½ cup frozen corn, thawed

    1 avocado, chopped

    1 (15 oz) can black beans, rinsed

    ½ cup slivered red onions

    ½ cup KRAFT Mexican Style Finely Shredded Four Cheese


    chicken with bottled marinade


    Pour ⅓ cup of the dressing over chicken in a shallow dish. Turn to evenly coat both sides and refrigerate 30 minutes.

    grilled chicken

    Heat grill to medium heat. Remove chicken from marinade. Discard marinade. Grill chicken 6-8 min. each side (until 165 degrees) or until done.

    Meanwhile, combine dressing with all other ingredients, except cheese, in a large bowl. OR you can have all of your topping in separate bowls to allow everyone to create their own salad.

    When ready to serve, top with cheese.

    grilled chicken salad on a blue plate

    store aisle of cheese

    I picked up a couple of packets of cheese for my weekly dinner menu when I was at Safeway. As I went down the cheese aisle I quickly spotted the new redesigned packages of KRAFT cheese. The new stand up pouch makes scooping and pouring easier than ever. You still get the same amount of cheese, but less packaging.

    two packages of shredded cheese

    For more recipes go to kraftrecipe.com! Safeway Just For You

    "null""null"

    DIY Window Bags

    June 3, 2014 By Brandy 28 Comments

    These DIY Window Bags are so easy to make. They turn a basic white lunch bag into a darling gift bag in just a few minutes! You can use a template, trace the shape on your bag, and cut out your shape with scissors, but today I am going to show you how I used my Evolution machine to make mine. Either way works just fine!

    Supplies Needed for Bag:

    Paper Bags

    Evolution Machine

    Nesting Dies

    Sticky Thumb or packing tape

    Clear Cuttable Sheets or Celophane

    Supplies Needed for Closure and Embellishments:

    Brads

    Bakers Twine

    Envelope Wraps, labels or any other embellishments

    Place your die (cutting side up) inside your bag.

    Run through your evolution machine.

    Remove insert. You now have a window!

    To make these without an evolution machine, trace your shape onto the front of your bag. Gently poke a hole in the center of the traced shape and cut out with scissors.

    Use a piece of cellophane or clear plastic big enough to cover your opening. Secure it to the inside of your bag, covering the opening, using sticky thumb or a few pieces of packing tape.

    Fill your bag with treats or a gift. I used these for teacher's gifts. A Jamba Juice gift card and a Fresh Picked bottle of hand soap (in my favorite Bath and Body Works scents).

    You can stop there, but I added a fun closure and embellishments to my bag.

    To make a crazy 8 closure, fold the top of your bag down 1".

    Poke one brad the center of the 1" flap. Open the brad to flatten.  Place the second brad just below (about an inch) and open to flatten.

    Cut a small length (5") of bakers twine. Tie a knot at one end. Slip the twine under the top brad and loop in a crazy 8 fashion around the second brad and back to the first. Repeat a few times to close off bag. Trim excess twine.

    Add a label or any other embellishments you'd like! I love these envelope wraps and like using them for labels on bags too.

    Simple Hand Stitched Cards

    May 20, 2014 By Brandy 2 Comments

        Hand Stitched Greeting Cards collage


    Hand Stitched Cards

    Homemade cards are something I love to receive as gifts, but I don't always have time to make them myself. After I had a baby a friend gave me a stack of handmade "Thank You" cards as a gift. It was one of the most practical and appreciated gifts I have received! I loved them and was sad when I used the last one! I thought it would be fun to make some homemade cards to give as gifts too. My husband's grandmother has a birthday coming up and she always hand writes her letters to us. I think she would appreciate some of these for her mailings.

    My kids always did pin-push letters in preschool and kindergarten. They'd come home with worksheets and instead of tracing the letters, they'd use a push pin and poke small holes around the perimeter. It was a great hand-eye coordination exercise for those little 5 year old hands. I used this technique to create designs that can be hand-stitched to add a fun detail and dimension to cards. 

    handstitched greeting card on table

    The design options for hand-stitched note cards are limitless. It just depends on how long you want to sit there and hand-stitch your card. I kept mine super simple. I printed out a few designs using Pic Monkey, so that I wouldn't have to free hand my designs.

    card pdf

    You are welcome to print out these and use them as well. Click here to download the free PDF Printable template.

    hand with a needle and string stitching cards

    To add a hand-stitched element to your handmade card, cut out the design or lettering you'd like to use. Make sure you have something to protect your table from poke marks. A foam mouse pad works great. I used a needle point canvas. Using a push pin, poke around the perimeter of your design. Using embroidery floss, or thin baker's twine, thread your needle and stitch in the holes you created with the push pin.

    Hand Stitched Note Cards on table

    If you'd like to hide the stitching on the back, you can line the inside of your handmade card with a piece of coordinating paper. Or even do your stitching a separate sheet of card stock and cut it out, and adhere it to the front of your card.

    stack of cards tied with string

    Wrap a set in string and it makes the perfect gift! What is your favorite way to add a little detail to your cards? Stickers, stamps, embossing?

    Quick and Easy Chinese Chicken Salad

    May 15, 2014 By Brandy 2 Comments

    Chinese chicken salad on plate

    Today I'm sharing one of my favorite go-to lunch items. I love salads and could them every day! Sadly, I'm the only one in my family who enjoys a variety of salads. This Quick and Easy Chinese Chicken Salad comes together so quickly and the recipe can be duplicated to feed a crowd. The key ingredient is the dressing, and it isn't homemade. I took a short cut and used a store bought variety that a friend shared with me. It is so much better than any homemade dressing I've made in the past.

    This salad has a great texture and crunch both from the toppings as well as the coleslaw base.

    Chinese chicken salad without dressing

    To make a quick Chinese chicken you will need:

    coleslaw mix (shredded cabbage and carrots)

    small handful of cilantro

    sesame sticks, toasted almonds and dried chow mein noodles (for crunch)

    cooked chicken

    dressing

    Chinese dressing

    The dressing is Girard's: Chinese Chicken Salad. I've found it at Walmart and Winco so I'm sure most grocery stores would have it in stock.

    cabbage on plate

    Start with a base of coleslaw mix (shredded cabbage and carrots). I usually have a bag of coleslaw mix in the refrigerator for this salad and to add to green salads.

    cabbage salad and chicken on plate

    Add some chicken. Leftover rotisserie chicken works great! Sprinkle with cilantro. I used a mix from Sam's Club one time that had cilantro in it and it was fantastic!

    fried wontons on salad

    Sprinkle with your favorite crunchy mix-ins. You can add these separately or find a bag of them mixed at the grocery store. I found my Asian Sesame Salad Accents in the salad dressing/condiments aisle at my local grocery store for a couple of bucks. I love it.

    pouring dressing on salad

    Lightly drizzle with dressing.

    Chinese Chicken Salad on plate

    And there you have it. Coleslaw mix keeps for awhile in the refrigerator, so with that and a bottle of dressing, you'll be set for quick lunches for a long time!

    This recipe is easy to adjust for a crowd. Just add ingredients to your liking, but don't add the dressing until right before serving. This keeps your salad nice and crunchy. Leftovers are great the next day, but will tend to get a bit soggy after that.

    bowl of pasta salad

    Another one of my favorite salads is my pasta salad. I make a  batch and have it for lunch for a week!

    What is your favorite go-to-lunch?

    Simple Preschool Craft: Fingerprint Poppies

    May 14, 2014 By Brandy Leave a Comment

    fingerprint poppies canvas

    My girls adore flowers. So much so that it is a constant battle to make sure they aren't picking any flowers they see when we are  in public! I told them that they can have any flowers laying on the ground when we go to garden nurseries and they think that is the best thing ever.

    little girl with orange poppy

    When we moved here to California they were so disappointed that they couldn't pick the beautiful orange poppies that grow everywhere like weeds (poppies are the state flower). So we planted some in our garden that we can pick. They are absolutely thriving and the girls are really enjoying them.

    toddler next to poppies in garden

    Today's little project was inspired by the beautiful poppies in the back yard.

    Simple Preschool Craft: Fingerprint Poppies

    cute little fingers

    kids paint

    small paint brush or q-tip,

    paper or canvas.

    little girl at art desk

    Our little Jack and Jill desk works perfectly for projects like this. I just pull a sheet of paper across and she is ready to get messy!

    little girl with thumb dipped in orange paint

    We started out by making the flowers. She loves getting her fingers right in there with the paint. Her thumbs worked great for stamping the poppy petals.

    paper plate with paint

    Once those were dry she used her index fingers to add the centers.

    toddler painting canvas

    She had fun using the brush to add the stems and greenery.

    fingerprint poppies on canvas

    Her first project for our family art wall is completed! I love how it turned out.

    For reference: I used a canvas that I sprayed painted. Blue construction paper (or white) would work perfectly, but I wanted  this to match the canvas paintings that the other kids have made over the years.

    Mod Podge Confetti Vase

    To keep up with all of the beautiful flowers that the girls collect, we made an easy mod podge confetti vase. You can find our tutorial here!


    • « Previous Page
    • 1
    • …
    • 132
    • 133
    • 134
    • 135
    • 136
    • …
    • 156
    • Next Page »

    Welcome!

    I'm Brandy! I love to create and share my ideas through easy-to-follow recipes and tutorials.

    More about me

    As an Amazon Associate, I make a small commission on qualifying purchases.

    sew with me kids sewing book
    My Book

    Summer Posts

    • mini s'mores pie on white plate
      Mini S'Mores Pies
    • loaf pan with ice cream sandwiches stacked inside
      M&M Ice Cream Sandwiches Recipe (Video)
    • soda bottle sprinkler
      $1 Soda Bottle Sprinkler For Summer Fun
    • hand dipping chip into cowboy caviar
      Easy Cowboy Caviar Recipe
    See more Summer →

    Latest Posts

    • To Die For Blueberry Muffins
    • slab pie on white plate
      Peach Slab Pie
    • baba bar on spatula
      Frosted Banana Nut Bars
    • tray of baked cookies on parchment paper
      Martha-Stewart-Fired-Me Cookies

    Footer

    ↑ Back to Top

    About

    • Privacy Policy
    • Accessibility Policy

    Newsletter

    • Sign Up! for emails and updates

    Contact

    • Contact

    As an Amazon Associate, I earn from qualifying purchases.

    Copyright © 2025 Gluesticks Blog