Gluesticks Blog

menu icon
go to homepage
  • Summer
  • DIY
  • Recipes
  • About Me
  • Subscribe
    • Facebook
    • Instagram
    • Pinterest
  • subscribe
    search icon
    Homepage link
    • Summer
    • DIY
    • Recipes
    • About Me
    • Subscribe
    • Facebook
    • Instagram
    • Pinterest
  • ×
    Home

    Lemon Mint Sugar Scrub

    November 11, 2010 By Brandy 47 Comments

    jar of sugar scrub with wooden spoon
     Here is a project that a friend shared with me. She found the link here at Under the Table and Dreaming. What a fun and easy project. I made a bunch for gifts this year.
    small mason jar filled with lemon scrub
    Now I need to make a jar for myself. It really does make your hands feel smooth. I get major winter hands,  so maybe this will help!
    2 ½ c. sugar
    1 c. extra virgin olive oil
     few drops of essential oil (I used mostly lemon and a drop of mint)
    Mix together and fill jars. I made a double batch and it filled 7 half pint jars.
    Use on dry hands to avoid contamination.

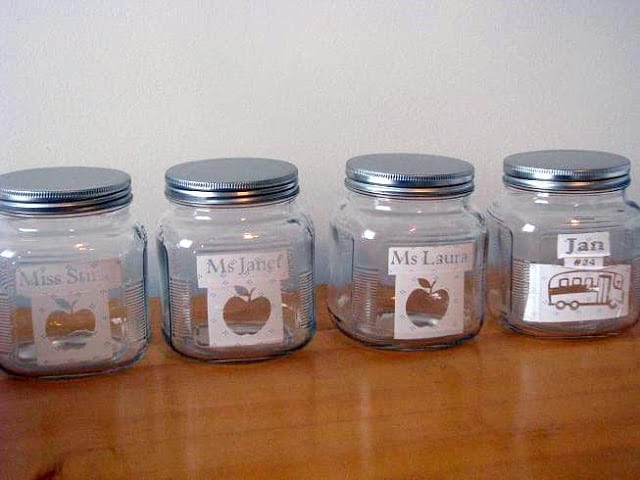
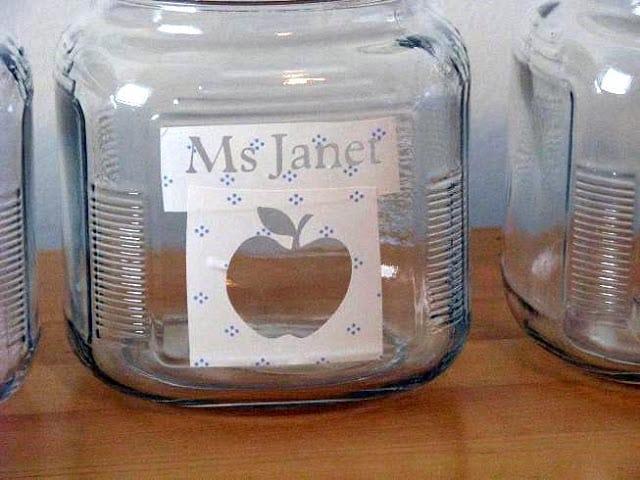
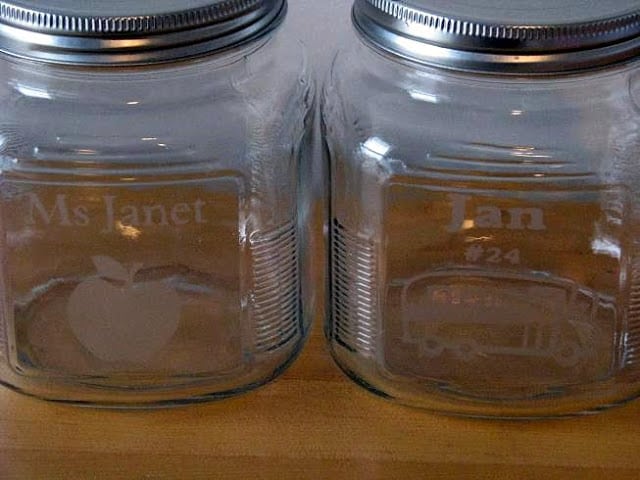
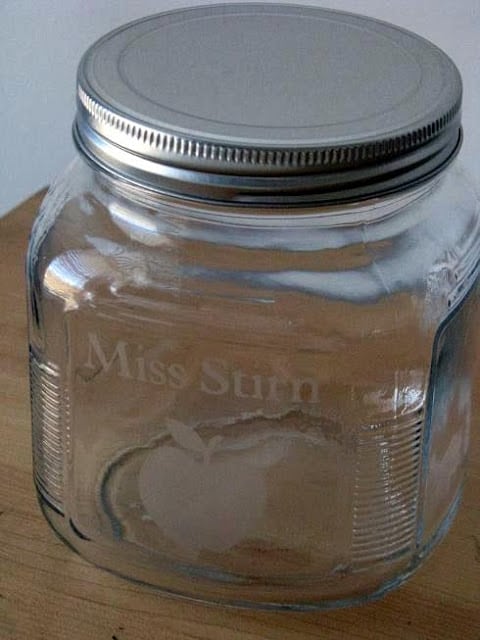
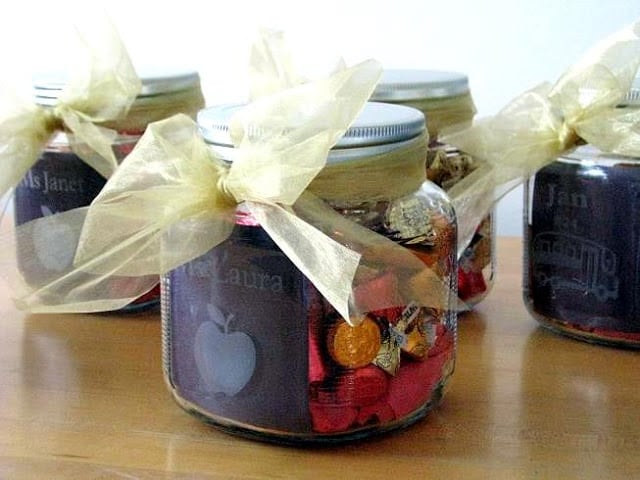
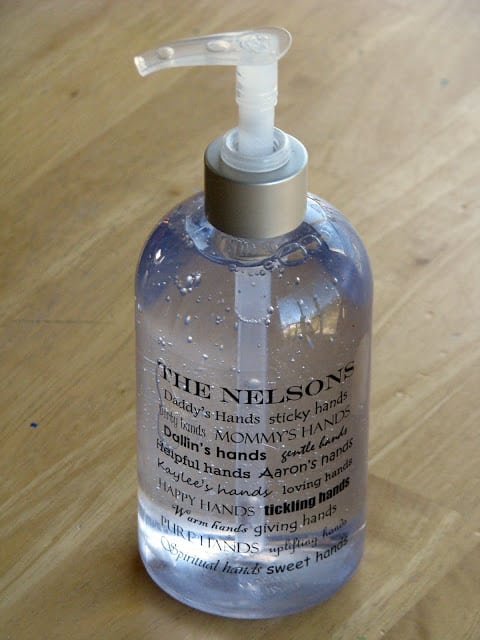
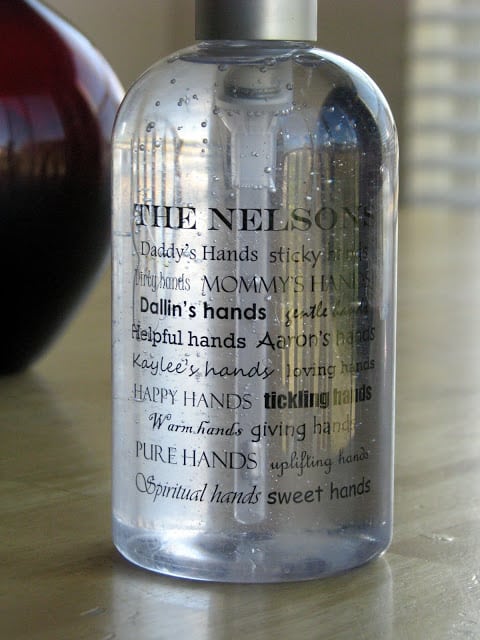
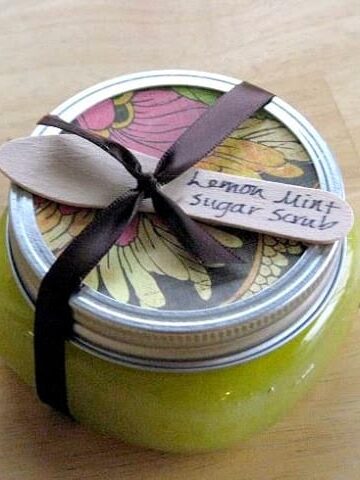
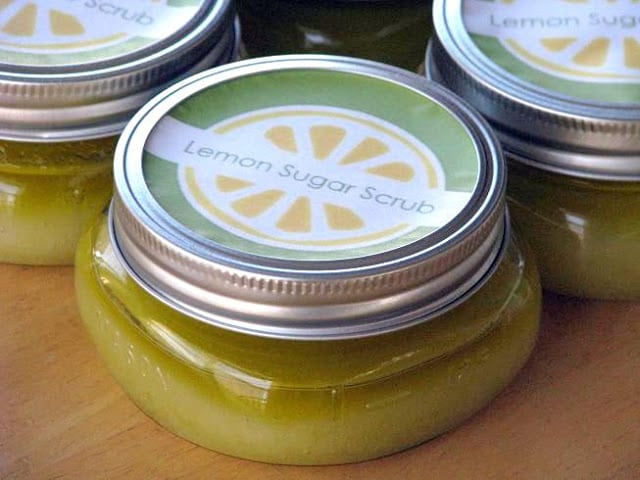
    I found the tags here. They were blank, so I used my paint program and added the names and labels.

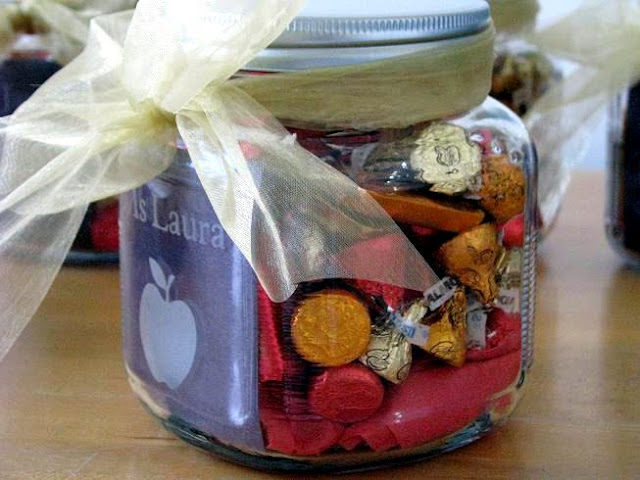
    (Lemon Mint pictured below with wooden craft spoons for applying.)

    jar of sugar scrub with wooden spoon
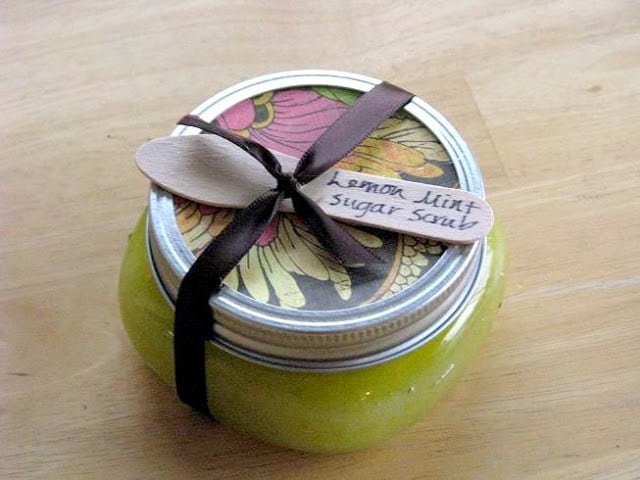
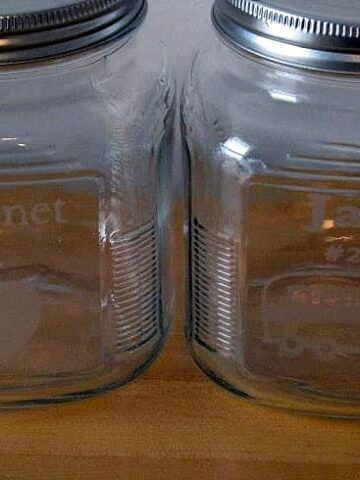
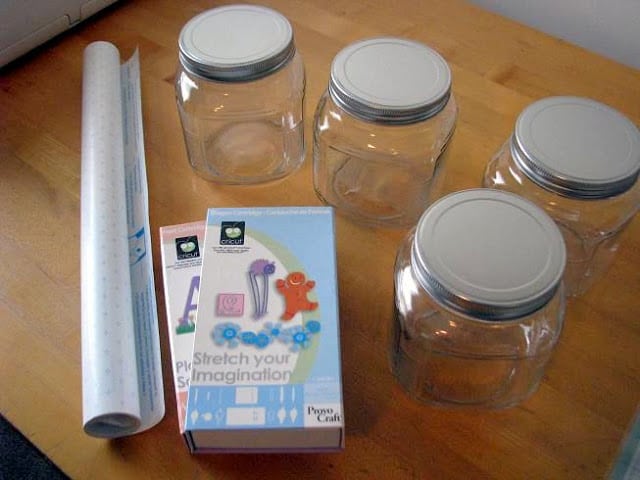
    The jars are little canning jars. I love this style. They are more pricey than the regular half pint canning jars, but for little gifts like these it is worth it. That being said, it was still only $4 for 4 jars. I found them at Walmart, but grocery stores sell them as well.

    Acid Etched Jars

    November 4, 2010 By Brandy 36 Comments

    two jars with acid etched designs on front
    Acid Etched Jars
    4 jars and a roll of contact paper on table

    (jars purchased at Walmart for $2.97/each)

    I remember making acid etched mirrors in high school and it was quite the labor intensive project. However, making acid etched projects with a cricut is so simple! The Young Women at our church recently did a Girl's Camp fundraiser and made acid etched plates to sell. They were a hit. My friend, Tanya, let me use a little bit of her acid etching to make a casserole dish for a wedding gift and these little jars. A little bit goes a long way. I hardly used anything and was able to make several fun gifts. Now I wish I had a bottle of my own so that I can make things for myself. Casserole dishes, jars....it's a bit addicting. I'll have to print out a 40% off coupon to Hobby Lobby and grab a bottle sometime.

    jars with contact paper stencil on front
    It is much cheaper to go to the Dollar Store or Walmart and buy shelf contact paper vs. buying a roll of white contact paper. It doesn't matter how it looks. You are just making your stencil from it. I used my cricut and cut out the letters and shapes, then placed them on my jars. Blade pressure was set to low. It can be a little tricky to make sure it goes on straight, but since the contact paper is reposition-able, you can do it over a few times until you get it right. Make sure there aren't any air bubbles and press it on tight. And make sure to leave a border of contact paper. You don't want your stencil to be too close to the edge of the paper. This allows enough room for you to apply your etching cream without it smearing or leaking over onto other areas of glass.
    jar with apple stencil from contact paper
     Generously apply the acid etching cream to the glass with a small paint brush. Covering the opening of your contact stencil entirely. I made one before and just brushed it on like I would paint. It didn't come out very solid, but very streaky. So pile it on there so that you can't see any glass through  it AT ALL.
    jar with acid etching cream over stencil
     Allow to sit for about 10 minutes (just follow the directions on your bottle) and then, using your brush, remove the excess cream and put it back into your bottle. You don't have to do this, but it sure makes the cream last longer. I was able to pretty much save all of it. Then run under water until rinsed completely. Take the contact paper off while running under the water and keep rinsing until you can't see or feel any of the grainy texture. Towel dry.
    jars with finished acid etched apple and bus designs
    These were hard to photograph, but turned out perfect.
    finished acid etched jar with apple design
    For jars, you etch on the FRONT so it goes left to right. No alterations needed. But if you would like to etch a glass plate that will be used for food or the bottom of a casserole dish, you can make a reversed stencil that will go on the BACK of the glass. To do this on your Cricut, use the "flip" feature. Then key in your lettering in reverse. For example, our name would go as follows:
    "FLIP" "NOSLEN" (for Nelson)
    Then you would apply your stencil to the back of the dish. This way, your dish will always have a smooth perfect finish on the front for serving and baking food on.
    acid etched jar filled with candy
    Now back to the jars...
    I went to Target and picked up a bunch of 50% off chocolate bags. Kisses, PB Cups, and mini candy bars. They were in fall colors, but for $1 bag, I couldn't beat that. I put a small piece of black construction paper behind the etching so that it stood out and didn't blend in with the candy. It also looks like a little chalkboard! Perfect for a teacher's gift!
    4 acid etched jars wrapped with ribbon
    large jar filled with chocolate candy
     This one is for my brother, who is getting married in December. I made this along with an etched casserole dish which I will post later in December when I finish everything for their wedding gift. It didn't photograph well, but it is a "K" with a fern/berry branch to the left. I love how it turned out!
    If you don't have a Cricut or a Silhouette, you can still do this. When I made my mirror in high school, I adhered  the contact paper to my mirror, transferred my images onto the contact paper using carbon paper (or you could just free hand), then cut out the contact paper using an exacto knife, taking out the centers and leaving the stencil.

    Super Mario Birthday Party

    September 19, 2010 By Brandy 6 Comments

    Mario cake with blue fondant
    2 tiered Mario cake
     Mario party ideas are few and far between! So I thought I'd post my ideas on here to share. All are original unless otherwise noted. The party was a HUGE success!
    There was a Yoshio egg smash. I found that idea online and then found a tutorial on how to make the eggs on You Tube!
    Yoshi cut out on side of shed
    Yoshi eggs in basket
    The kids popped balloons. Inside the balloons were clues helping them find Princess Peach who was being held captive in the basement by Bowser. The clues inside the balloons led them to cardstock coins hidden around the yard. Once they collected 8 of them (there were 8 kids) they used the last clue to find where she was hiding. When they found Peach, they also found their treat bags.
    kids popping balloons
    Every game was called a LEVEL. Level 1, Level 2, etc.
    They raced around the yard playing MARIO KART (riding the power wheels). My husband had them make foil helmets before racing, they looked HILARIOUS!
    child riding in power wheels monster truck
    There was a Mario Mix-Up game (totally last minute, I needed one more game the night before!). I printed out 3 8x10 pictures of Luigi, Mario, and Peach, laminated them and put sticky Velcro on the backs. Then cut them in half and mixed up the heads with the feet. The kids had to rearrange them as fast as they could. If they could do it in less than 30 seconds (everyone did it in under 15) they got a coin.
    Mario mix up matching game
    The kids received chocolate coins after EVERY game. They put them into brown lunch sacks that they had decorated at the beginning of the party.
    Mario cake with blue fondant
    child blowing out candle on cake
    And cake, of course cake. The cake decorations were ordered from E-bay, shipped from China for $12. I saw a photo of a similar cake and decided to give it a try. I used fondant instead of buttercream. It was totally a labor of love and time consuming but turned out perfect!
    Mario cut out on outdoor table
    I printed out all of the posters myself by doing an image search online and mounted them on poster board. I think I will do this in the future for parties for my kids. Yes, it uses a lot of ink, but it still cheaper than buying decorations!

    Personalized Soap/Sanitizer Bottle

    September 14, 2010 By Brandy 11 Comments

    clear soap in bottle with personalized front
    I LOVE The Idea Room. LOVE LOVE LOVE her blog. I went on there today to look for her embossed candle tutorial, and came across this in the craft section! I've seen these before, but didn't know how to make one. I thought it was a sticker or something on the front. I had everything I needed already on hand.
    Laser Jet printer
    Transparency (leftover from these)
    Clear Soap Bottle
    That's it! Our laser jet printer has issues right now. It prints a long black line down the front of each page. Usually we use our ink jet printer, but for this project it worked great since the area being printed was only 3"x4". If you don't have a laser printer, you can go to Kinkos and they'll print out your page on a transparency for usually under $1.
    personalized bottle of soap
    I added our names onto our bottle and love how it turned out. You can create your own template using a document program, or use the one that Amy has on her blog. Full instructions for making one of these can be found on her blog as well.
    I think I will make one of these for each of the boy's teachers this year to go with their Christmas gifts. The dollar store has little bottles of soap, so it's a practical, inexpensive and personal gift.

    Make a Super Cape Birthday Gift for a Girl or Boy!

    August 23, 2010 By Brandy 11 Comments

    black cape with pink ruffle
    Every child wants to feel super on their birthday! Make a super cape birthday gift for any boy or girl and be sure to include a few other goodies like their favorite candy, some silly string, and an awesome birthday card! This post contains affiliate links.collage with black and pink cape and gift ideas to go with cape

    This little cape was sent to my sweet little niece. A super big sister with a big heart and a infectious smile. I just love that girl! Normally, I send a gift card to my nieces and nephews, but I wanted to do a little more for her this year. If you don't have time to make a super cape you can definitely order one. I'll share both options!

    If you are looking for an entire collection of projects to make with kids check out my book! It has 60 step by step projects with hand stitching and machine stitching techniques!


    black cape with pink ruffle

    How to Make a Super Cape

    I've made capes for several little friends recently and the process is the same for boys or girls.
    Step 1: Cut a rectangle of cotton fabric (the length of their shoulder to knees) and trim it on an angle on the top corners so that it is slightly narrower on the top.
    Step 2: Hem around the edges by folding it over ¼", ironing it, then folding it over another ¼" and sewing all the way around.
    Step 3: Attach a piece of black elastic by stitching one end to each top corner and you have a basic cape!

    Personalize the Super Cape

    Monogram/Super Logo 
    1. Pin fabric to cape and zig zag around the edges to encase any raw edges.*
    2. Use felt for the applique and stitch close to the edge. Felt doesn't fray.
    3. Purchase iron-on letters or designs from your local craft store and attach them to the cape. Vinyl is a great option.
    *I kept the edges raw with the applique on this cape.
    Ruffle
    Here is a tutorial for how to make a ruffle 4 ways from I Heart Naptime.
    For this one I cut a two strips of fabric twice as wide as the cape, hemmed the bottom and side edges, then stacked them, and gathered the fabric by folding it over and pinning it every couple of inches.
    cape and candy and lip gloss on table

    Other Items to Include for a Super Cape Birthday Gift

    I also enclosed a few "necessities" for any super girl.

    Silly string (it had a fun super/spy aspect), lip gloss, and some sour gummy candies. Nothing extravagant and I hardly spent a thing. Other ideas of things to include might be a matching mask, sunglasses, or tiara.

    I had so much fun making this! I think every girl needs one of these...heck, I'd probably be more productive with my housework if I ran around in a cape too!

    Other Creative Gift Ideas for Boys and Girls

    Marvel Avengers Survival Kit

    Adventure Gifts for Boys

    Gifts that Kids Can Make For Each Other

    Gift Ideas for Teen and Tween Boys

    Creative Gift Ideas for Girls

    Don't Have Time to Make a Super Cape? No Problem!

    Here are a couple of fun options from Amazon. First up! A double sided 2-colored cape with mask. You can even stock up and buy a 6-pack of super hero capes (not personalized, but with super emblems already on them) and use them for birthday gifts all year long!  And last, but not least, a cute pink lightning cape for a little girl that comes with a mask.

    Quick Warm Blueberry Pancake Sauce

    July 17, 2010 By Brandy 8 Comments

    pancakes with blueberry sauce on plate
    pancakes with blueberry sauce on plate
    I love when blueberries go on sale! I buy a ton of little cartons and freeze them. Here is my favorite blueberry recipe. So quick and easy, you don't have to make it ahead of time. Just put it together while you are cooking your pancakes! It would be delicious on pound cake as well.
    We had breakfast for dinner tonight as requested by Aaron 🙂
    Quick Warm Blueberry Pancake Sauce
    from Family Fun
    2 ½ cups fresh or individually frozen blueberries (not in juice)
    ⅓ cup sugar
    ½ cup orange juice (apple juice works great too)
    1 tablespoon cornstarch
    2 teaspoons lemon juice
    Combine the blueberries, sugar, and ¼ cup of the orange juice in a medium-size saucepan. Warm the mixture over moderate heat, stirring it occasionally.
    While the berries heat, blend the cornstarch into the remaining orange juice, using the back of a spoon to dissolve any lumps.

    Increase the heat under the pan and bring the sauce to a boil. Stir the cornstarch mixture again and then stir it into the fruit. Cook the sauce at a low boil for 1 minute, stirring constantly.
    Remove the pan from the heat and stir in the lemon juice. Cool the sauce for 5 to 10 minutes before serving (it will thicken as it cools). Makes about 2 cups.

    Barn Star Paper Wreath Tutorial

    July 2, 2010 By Brandy 59 Comments

    paper star wreath hanging on black door

    Can you believe that this wreath is made out of paper?  I'll show you how to make you own 3-d barn stars to create a darling paper wreath for any holiday or occasion. EASY!

    Can you believe that this wreath is made out of paper?  I'll show you how to make you own 3-d barn stars to create a darling paper wreath for any holiday or occasion. EASY!

    Aaron and I made this fun cardstock wreath for our front door. Nice and bright with summer colors and easy to customize for any season. How cute would it be in red, white and blue for the 4th of July, or made with fun Christmas paper?

    child pushing start button on Cricut machine

    Here is how to make your own Barn Star Paper Wreath

    Using your scissors/cutting tool/machine, cut out 12 {5"} stars. The number of stars you will need can vary, but for a 10" wreath, 12 stars is a nice amount to start with. You can layer it more or less from there.

    {We use the Plantin Schoolbook cricut cartridge. We made them using the "roly poly" feature so that they would be wide. Sturdy cardstock works best for making these.}

    Now we'll show you how to make your stars 3-D!

    removing stars from cutting mat

    Below is one all ready to be scored. The white cardstock is under the bright paper.

    scoring paper star

    Score your star 5 times. Once for each point. Start at the point and score directly across to the center between the two bottom points. Rotate star and score again until each point has been scored.

    hand folding star on scored lines

    Fold each scored line and crease firmly.

    finished 3d paper star

    There is your 3-D star! Now finish up the rest of them and you'll be ready to assemble your paper wreath or use them for any number of fun little projects.

    cardboard cut into a circle wreath base

    Cut out a 10" ring for your wreath base using thin cardboard.

    paper stars arranged on wreath base

    Hot glue the stars to the ring and eachother. Since they stick out, you can't glue them flat, so just apply a small amount of glue to the points where the stars overlap eachother. Don't skimp on the glue.

    ribbon wreath hanger

    Attach a ribbon for hanging.

    paper wreath hanging on black front door

    That's it! Perfect for summer. I just love free projects! If you liked this paper wreath you might like...
    hydrangea wreath hanging on door
    Spring Hydrangea Wreath
    patriotic wreath on front door
    Patriotic Wreath Tutorial
    Be sure to check out my wreath tutorial pinterest board for even more ideas!

    Decorate and Jazz Up Flip Flops with These Creative Ideas

    June 24, 2010 By Brandy 18 Comments

    pink flip flop with fabric strips tied on

     Beads, charms, buttons, fabric or glitter. The ways to jazz up flip flops are endless! Here's a collection of creative ways to add a bit of flair to a pair of flip flops. Get the girls together and make some today!

    collage of different ways to decorate flip flops

    Kaylee LOVES flip flops. She is always wearing a pair of them...usually her own, but not always. I went to Target to get her another pair and they didn't have anymore in her size that were girlie colors. I love brown, so I went to the boy's section and got her a pair of brown ones and figured we jazz them up a bit.
    gluing beads to flip flops

    I cut the back strap off because she likes to put the flip flops on herself. The back strap just gets in her way.

    My friend, Lisa, gave me a bag of these fun little embellishments a few years ago. I'm not sure what they are called, but they are great! I've used them for cards, church handouts, a couple of scrapbooking pages, and I still have a TON left. They were perfect for these little flip flops.

    gluing beads to flip flops

    I covered the strap with some permanent bond glue. It takes about 8 hours to dry, but those little pretties are not going to come off. Ever. Then I randomly stuck the embellishments on and let them dry.

    beaded flip flops

    How easy is that? I think I need a pair for myself. My brown ones have seen better days. I don't know why I hang onto them so long, they are cheap!

    pair of finished flip flops on table

    Here are more ways to decorate flip flops!

    flip flops decorated with fabric scraps

    Fluffy Flip Flops

    Decorate flip flops with scrap fabric to make these fun and funky “Fluffy Flip Flopsâ€. A quick and easy summer camp project for girls and a great way to use up fabric scraps. Create patterns or tie the strips on randomly, the choice is yours!

    yellow flip flops with buttons


    Button Flip Flops from Buttons Galore and More

    Buttons are hand stitched on to flip flops for a fun and colorful addition! I love that they are stitched instead of glued. They'll definitely last longer this way!

    flip flops decorated with water balloons

    Water Balloon Flip Flops from a Mom's Take

    You can tie water balloons onto flip flops, who knew! So fun, waterproof, and colorful.

    flip flops decorated with tape

    Decorated Tape Flip Flops from Momtastic

    Decorate flip flops with washy or duct tape for a simple craft activity for teens and tweens.

    12 more ways to decorate flip flops from P&G Everyday!

    Faux flowers, thread, handkerchiefs, balloons, duct tape, glitter and more. 12 more ways to jazz up flip flops for the summer!

    Chocolate Cream Angel Food Cake (Fat Free!)

    June 8, 2010 By Brandy 15 Comments

    chocolate angel food cake on cake stand

    Chocolate + cake + fat-free = a guilt free Chocolate Cream Angel Food Cake.  Make it quick and easy with a cake mix and Cool Whip.

    You might also like my angel food berry trifle or my strawberry banana trifle dessert!

    chocolate angel food cake frosted

    Here is a decadent, guilt-free dessert. It's one of my favorites. Go ahead and enjoy a slice or two. I've been making this for a few years, and it is always a hit. My version is fat-free. If you don't feel like heating up the oven to bake an angel food cake, just use a store-bought one. Just as delicious. You can also get ambitious and make your own cake from scratch. Here is a recipe for homemade angel food cake from Sally's Baking Addiction.

    chocolate cream on rubber spatula

    The key is using fat-free whipped topping and an angel food cake. To make it even more delicious, go ahead and add fresh sliced strawberries or bananas. I like adding chocolate curls, which makes it a bit less guilt-free, but beautiful nonetheless.

    Chocolate Cream Angel Food Cake Printable Recipe

    Chocolate Cream Angel Food Cake

    chocolate angel food cake frosted

    Chocolate + cake + fat-free = a guilt free Chocolate Cream Angel Food Cake that will soon become a favorite.

    • 1 angel food cake (I made mine from a boxed mix)
    • 12 ounces fat free Cool Whip
    • ½ cup baking cocoa (SIFTED)
    1. Gently fold baking cocoa into Cool Whip until it is completely incorporated.
    2. Frost angel food cake with cream and keep refrigerated until ready to serve.

    Chocolate curls are optional and will of course make it less guilt-free, but they are just fun! Simply peel a Hershey's bar with a vegetable peeler. I think I only used ⅓ of a chocolate bar for the cake.

    How many people will this chocolate cream angel food recipe serve?

    You can easily get up to 12 slices from one angel food cake.

    What other recipes can you use the chocolate cream with?

    The chocolate cream itself is to die for. I sometimes use it when I make cream puffs, too! It is also a delicious frosting for regular cakes like this chocolate cream cake.

    Can you make angel food cake ahead of time?

    Yes, you can make the cake a day before. You can also frost it ahead of time and store it in the refrigerator overnight.

    More Dessert Recipes That You Will Want to Try!

    Ice Cream Sandwich Cake
    This ice cream sandwich cake is SO easy to make! Chocolate ice cream sandwiches stacked, frosted in whipped topping, and drizzled with hot fudge.
    Mini Cream Pie Cups
    A mini cream pie in a cup that comes together in just minutes! A layer of graham crackers, a layer of Greek yogurt, and whipped cream! Perfect for parties.
    Lemon Curd Hand Pies
    Delicious homemade lemon curd sandwiched between flaky pie crust. These lemon curd hand pies are the perfect combination of sweet and tangy!
    Buckeye Chocolate Peanut Butter Sheet Cake
    A classic Texas sheet cake spread with whipped peanut butter frosting and topped with mini buckeye candies. Chocolate peanut butter sheet cake is dessert perfection!

    • « Previous Page
    • 1
    • …
    • 154
    • 155
    • 156
    • 157
    • Next Page »

    Welcome!

    I'm Brandy! I love to create and share my ideas through easy-to-follow recipes and tutorials.

    More about me

    As an Amazon Associate, I make a small commission on qualifying purchases.

    sew with me kids sewing book
    My Book

    Summer Posts

    • Cherry pie on prep mat.
      Best Cherry Pie Recipe
    • Bandanna Picnic Blanket Tutorial
    • diy tiki torch planter on black plant stand
      DIY Tiki Torch Planter (Table or Stand) + Video
    • slab pie on white plate
      Peach Slab Pie
    • toddler playing with dinosaur garden
      Dinosaur Garden For Kids (Fairy Garden) (Video)
    • water bottle sewing tutorial
      Color Block Fabric Water Bottle Holder Tutorial
    • strawberry pie with whipped cream on top.
      Fresh Strawberry Pie Recipe (Video)
    • slice of ice cream cake on spatula
      Oreo Ice Cream Sandwich Cake
    See more Summer →

    Latest Posts

    • 3 walnut brownies stacked.
      Katharine Hepburn's Brownie Recipe
    • Arms with stacks of bandana bracelets on them.
      Easy DIY Bandana Bracelets
    • Stack of colorful bandana hair bows.
      How To Make Easy Bandana Hair Bows (No-Sew)
    • White candles decorated with wax candle pens.
      How to Decorate Candles with Wax Candle Pens
    • Slice of Chessmen banana pudding on a metal spatula.
      Chessmen Cookie Banana Pudding (Easy No Bake Recipe)
    • Chocolate cake coated in ganache and mini chocolate chips.
      Best Chocolate Pudding Bundt Cake

    Footer

    ↑ Back to Top

    About

    • Privacy Policy
    • Accessibility Policy

    Newsletter

    • Sign Up! for emails and updates

    Contact

    • Contact

    As an Amazon Associate, I earn from qualifying purchases.

    Copyright © 2025 Gluesticks Blog