Gluesticks Blog

menu icon
go to homepage
  • Summer
  • DIY
  • Recipes
  • About Me
  • Subscribe
    • Facebook
    • Instagram
    • Pinterest
  • subscribe
    search icon
    Homepage link
    • Summer
    • DIY
    • Recipes
    • About Me
    • Subscribe
    • Facebook
    • Instagram
    • Pinterest
  • ×
    Home

    Easy Drawstring Skirt with Contrasting Pockets

    August 14, 2014 By Brandy 1 Comment


    little girl wearing a backpack and holding a lunchbos

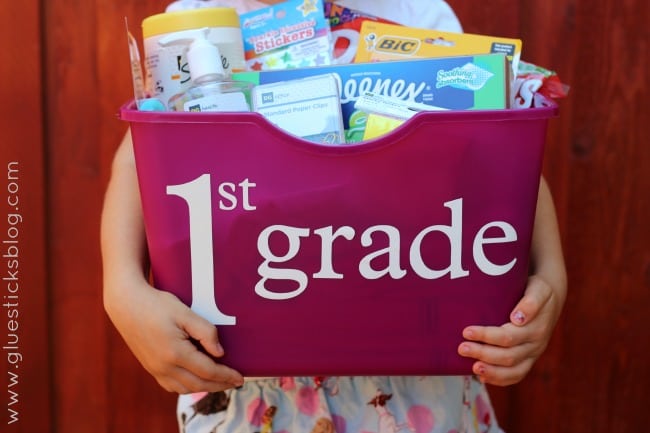
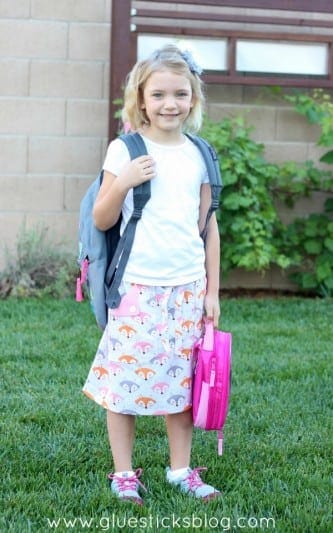
    Today is the first day of the first grade! And there are 3 Kaylees and a Keeley in Kaylee's class. Oh, that poor teacher!  I thought such a pretty little first grader deserved a pretty little skirt to wear on her first day in the big leagues.

    cloth skirt with foxes on the front

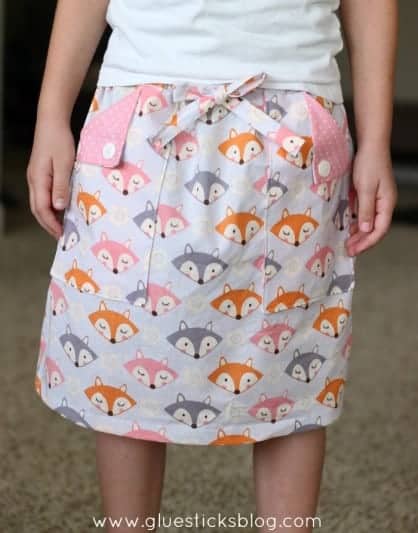
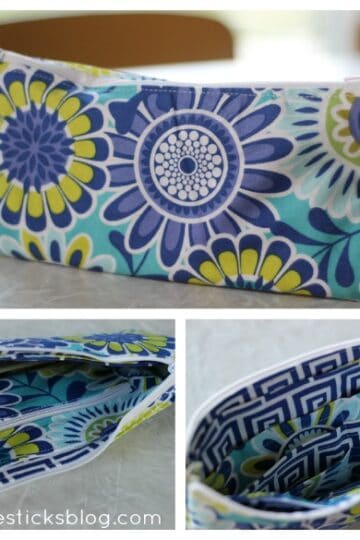
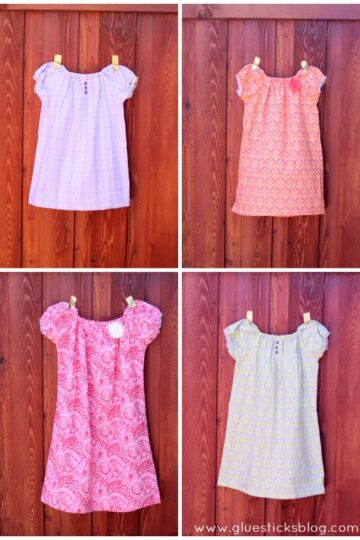
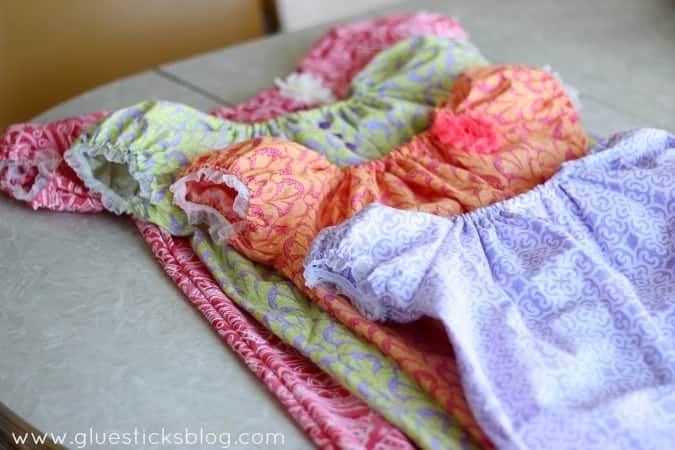
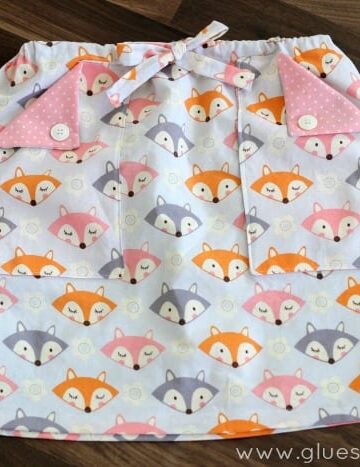
    It is the "Drawstring with Pockets" skirt from Melly Sews. A lovely tutorial, easy to follow and perfectly illustrated. Thanks, Melly!

    fox skirt

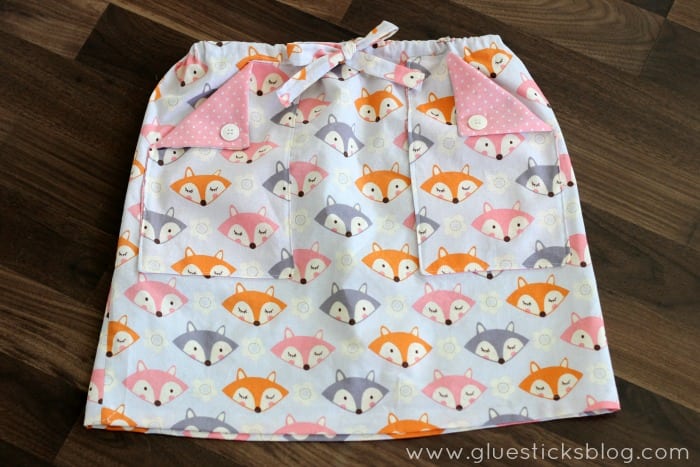
    An easy on draw-string skirt with contrasting fold down pockets. I especially love that detail. It was such an easy sew.

    4 kids on the first day of school

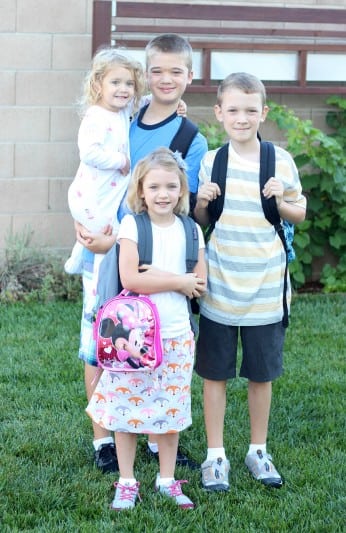
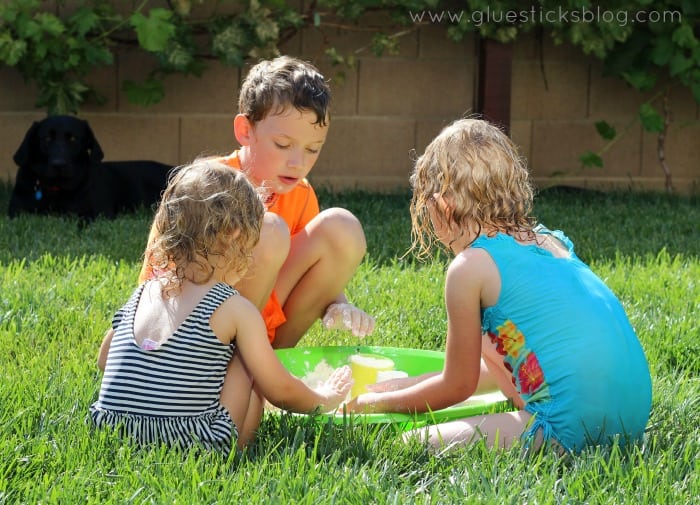
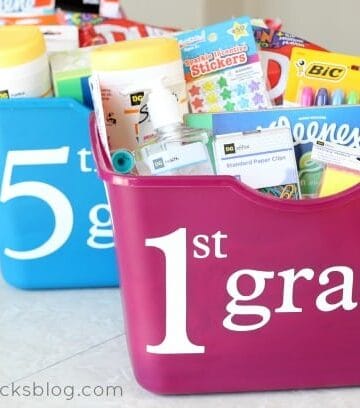
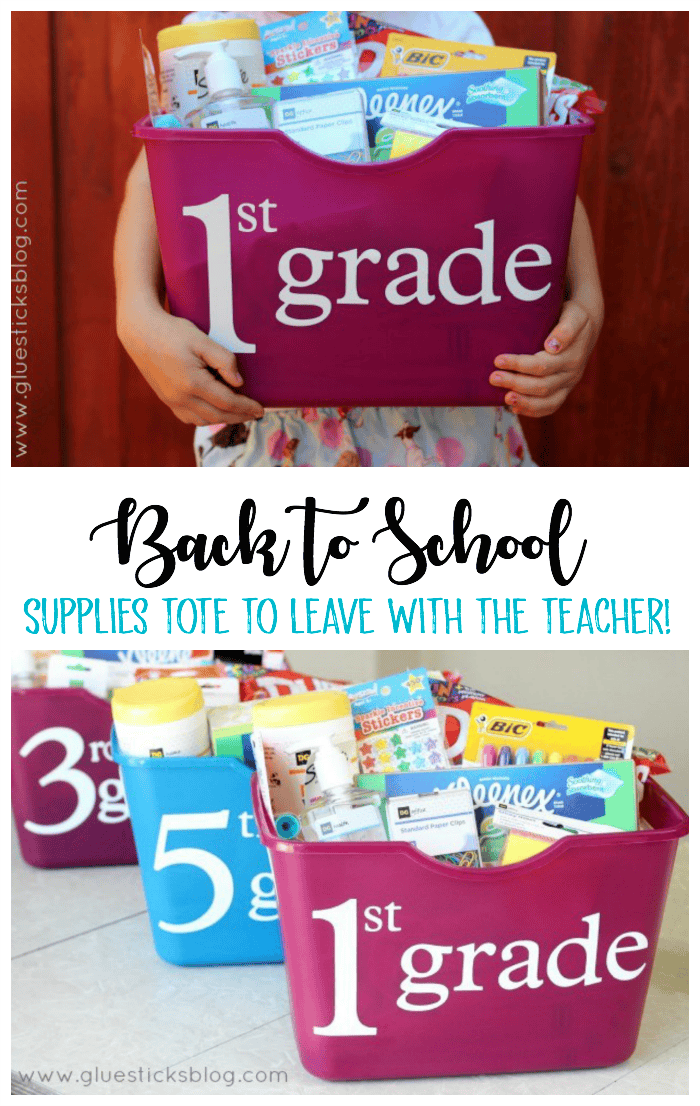
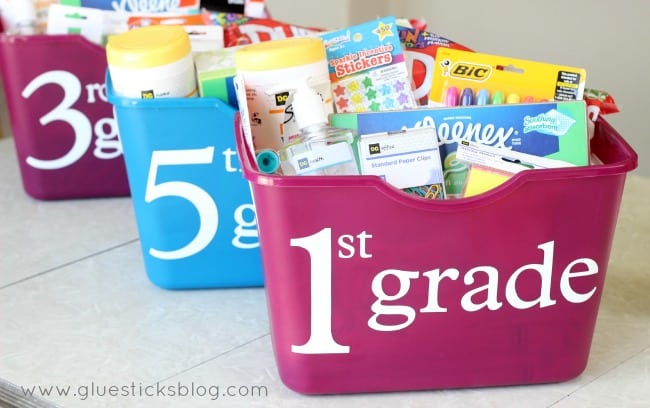
    First, 3rd and 5th grade! And one footed-jammie, bed-head toddler who I get to keep at home another three years! I love these guys so much!


    Game Night Marshmallow Popcorn Balls

    August 12, 2014 By Brandy 1 Comment

    “This shop is part of a social shopper marketing insight campaign with Pollinate Media Group® and EQtainment, but all my opinions are my own. #pmedia  #Qsracetothetop http://my-disclosur.es/OBsstVâ€marshmallow popcorn balls


    One of my favorite Family Night treats as a child were marshmallow popcorn balls. They were pretty much rice crispy treats made with popcorn, and I loved when my parents made them for us! I've continued making them for my own children and it has become a family favorite recipe. We are big popcorn fanatics here; hence the movie theater popcorn popper in our kitchen, ha!

    Make them ahead to pack in school lunches, for a party, or for a fun family game night! I made them last week for the kids to munch on while we tried out a new game!

    popcorn balls on baking sheet

    Game Night Popcorn Balls

    gluesticksblog.com

    ½ c. popcorn kernels

    5 c. mini marshmallows

    5 T. butter

    pinch of salt

    Pop your popcorn using whatever method you prefer. You can also use microwaved popcorn (about 2 bags). I prefer air popped popcorn. Set aside.

    In a sauce pan, comine butter, marshmallows, and salt on medium-low heat until smooth and melted. Stir constantly to prevent burning.

    Pour marshmallow sauce over popcorn and stir to coat evenly.

    Butter your hands a bit and pack into balls.

    Place balls on waxed paper until cool.

    Makes 10-12 (4") balls.

    Note: you can also press these into a buttered baking pan and cut into squares instead of rolling into balls.

    kids playing game

    Now set your popcorn balls on a platter and play a new or favorite family game! We played "Q's Race to the Top", one of the newest additions to our game closet. It is perfectly designed for kids 3+ as it challenges them physically and intellectually.

    Q is a monkey who, like most children, tends to unknowingly puts his needs above others. You learn all about Q and the dilemmas he faces in his life through the book that accompanies the game. In the end, Q decides that it might be time to become more aware of his surroundings and the feelings of others. The books ends as Q is pondering the day's events in his treehouse.

    The game helps children problem solve and think about what they would do/say if in the same situation. I LOVED the question and challenge cards and so did the kids.

    With questions like "When is it hard to tell the truth?" it creates great discussions for families while having a fun family game night.

    little girl playing game

    The kids also enjoyed the motor skill challenge questions. Here, Kaylee is demonstrating how to hop on one foot 20 times and then switching to the other foot.

    Qs Race to the Top board game

    "Q's Race to the Top"  was created by EQtainment. EQtainment helps kids practice emotional intelligence through fun and affordable games, storybooks, and videos.

    "Q's Race to the Top" is a BRAND NEW GAME! We were one of the first families to play it and I am so excited that is is being released this week for others to try as well. It is one game that all 4 of my children can play together. You can check out the Kickstart Campaign going on right now with EQtainment!

    Kermit the Frog Hand Puppet Pattern

    August 8, 2014 By Brandy 6 Comments

    Make a Kermit the Frog puppet with this easy hand puppet pattern! You an use it to create so many fun characters out of felt! A quick sewing project for beginners. This post contains affiliate links.

    two kermit the frog hand puppets

    Is it Kermit? Or is it the worlds number one criminal, Constantine? It's easy to get them confused which is how Kermit ends up behind bars in "Muppets Most Wanted"!

    kermit the frog and constantine

    Will Constantine get away with his nefarious scheme? Will Kermit escape in time to save the day?

    These little hand puppets are so easy to make and you can use this hand puppet pattern to make all different kinds. Try your hand at different animals, monsters or people! Today we are focusing on everyone's favorite frog and his doppelganger.

    two kermit the frog puppets


    I think all of the muppets are fun, and hilarious, and classic, but Kermit has always been my favorite.

    Hand Puppet Pattern: Kermit & Constantine


    felt cut into shapes to make frog puppet


    Supplies needed for this hand puppet pattern: bright green, red, and white felt, fabric paint, pins, sewing machine, needle/thread, scissors.

    You can print out your hand puppet pattern pieces here. Once your pieces are cut out, you will need to cut one of the green body pieces (the largest pattern pieces) in half. Then you will have the same pieces shown in the photo above.

    1 body

    2 small green pieces

    1 mouth

    1 tongue

    4 eyes

    sewing machine stitching frog puppet

    1. Center the red mouth piece on top of the body piece. Stitch in place.

    2. To sew a crease for the puppet, stitch across the center.

    3. Center the tongue piece below the center fold stitch. Sew into place.

    4. Fold over the flat edge on each smaller green piece and hem ¼".

    frog puppet sewn

    5. Once hemmed, the small green pieces will look like the photo above.

    6. Pin (right sides facing) one of the green pieces on top of the body/mouth piece.

    7. Repeat with remaining piece, lining it up with the edge of the body/mouth piece.

    8. Stitch around the unfinished edges. Turn right-side out. The photo above shows it right side out.

    adding eyes to frog puppet

    9. The photo above shows the other side.

    10. Take 2 eye pieces and stitch close to the edge, leaving a small opening to stuff. Fill with a small amount of polyester fiber fill. Stitch closed. Repeat for the other 2 eye pieces.

    11. Decide where you want your eyes to be and hand stitch into place, stitching through top piece of puppet.

    12. Create the pupils using fabric paint. Add a mole for Constantine. Let dry.

    felt kermit the frog hand puppet

    The kids think these little guys are awesome and since they are made from soft felt, it is easy to move the mouth around to make the same facial expressions Kermit makes when he is unsure or scared. So fun!

    You might also like...

    felt make up kit

    Felt Make Up

    felt flower box and little girl

    DIY Kids Flower Box

    Moon Sand Made With 2-Ingredients!

    July 31, 2014 By Brandy 1 Comment

    moon sand molded

    Moon sand is easy to mold and is made from 2 ingredients. Sometimes called kinetic sand it is easy to make and fun for kids!

    You might also like our homemade bubble solution, our gingerbread play dough recipe, or our gelatin birdseed feeders!

    moon sand

    Homemade Moon Sand

    There is still plenty of summer weather left and plenty of time for fun outdoor activities like this fun play sand! This is one of those activities you could easily do indoors if you have a nice big table and hard floors underneath since it can get messy. So keep it in mind for those cold winter months too. DIY moon sand! It's a dough, but it makes the absolute best sand castles and looks like sand!

    We spent our entire Saturday doing yard work and the kids and a great time playing in the wading pool. I decided to let them continue their outdoor fun by making a huge batch of this fun moldable play sand.

    DIY moon sand

    What is Moon Sand?

    It actually isn't sand at all. It's made from flour.  It looks like sand, but unlike sand, you can easily mold it into shapes without getting it wet. You can buy kinetic sand (check out our indoor kinetic sandbox) and it feels similar, but it is much cheaper to make your own.

    I store ours in gallon-sized ziploc bags when it is not being used. This snow saucer works as a great play space, but a tote works great too.

    Moldable Sand


    Mold it, stack it, squish it, it's a great sensory activity!

    Moon Sand Ingredients

    • 8 cups all-purpose flour
    • 1 c. oil (mineral oil, baby oil, vegetable oil)


    Moon Sand

    How To Make Moldable Sand

    Step 1: Add flour to a large bowl.

    Step 2: Pour oil into the bowl.

    Step 3: Mix oil and flour thoroughly. It won't seem like it's coming together at first, but squish it in your hands and you will see that it has blended perfectly.

    Once it's thoroughly mixed start playing! You can easily mold and shape it. If using beach sand molds, make sure that they are clean and dry so that the moon sand easily pops out of the molds.

    Is Moon Sand Messy?

    Moon sand is easy to clean up because it sticks to itself (unlike sand). Just don't let the puppy eat it or let the kids add water to it for sand castles. That is a mess....we've had both happen in the past!

    How To Store Moon Sand

    If stored in an airtight container or plastic bag it will last for a couple of months.

    What Kind of Oil Can You Use In Moon Sand?

    Baby oil is recommended, but you can use vegetable oil as well. We used baby oil and it worked great. It's inexpensive and can be found at most stores.

    Out with the Old, In with the New: Zippered Wallet

    July 18, 2014 By Brandy 3 Comments

    Wallet Tutorial

    So I made myself a new wallet...the night before our big Disneyland trip this summer. Because that's what kind of crafter I am, an impulse crafter. I bought the fabric a while ago and finally found a tutorial that I liked. I was going to put it off until the end of summer when things slowed down, but then I decided that I needed a new wallet and I needed it that night!

    Some may remember the wallet I made  four years ago. It is one of the most popular posts on Gluesticks!

    Old Wallet

    I made this wallet to match a purse that I made that year. This is the PERFECT wallet. There wasn't a single thing I didn't like about it, but it had become very worn and faded. The tutorial that I followed was fantastic too, but alas, the link no longer exists. I've found the photo of it on pinterest probably 100 times, but the links are all broken. I thought about trying to replicate it on my own, but the measurements are pretty exact and I didn't want to attempt it.  You can still get the tutorial to the darling matching handbag I shared in that post and I shared a link to another wallet I made a long time ago that is similar.

    What I loved about my old wallet was that it had an inside zipper for coins and an area for cards. Most tutorials only have card slots. I don't like having a separate coin purse and a wallet. I like a 2 in 1.

    Zippered Wallet Tutorial2

    The tutorial that I found last month has both, yay!

    It has two large inside pockets that are perfect for receipts and coupons. On the other side of the first pocket is the card slot area.

    New Zippered Wallet

    Flip it over and on the other side of the second inside pocket is the zippered area for coins.

    Zippered Wallet Tutorial

    The entire wallet has a zippered closure. I can also fit my phone inside of it and use it as a clutch if I want.

    The only thing I would do differently next time is extend the zipper across the entire top instead of having a small tab on the left. The tutorial had a 1 ½" tab on the side and I thought that would be too much so I shortened it to only ¾" to make more room, but I think I could have done away with it completely and it would have given me even more room when opening it. Other than that I followed it pretty close to the actual tutorial from Sew Knit Me.

    Hand Bag and Wallet Tutorial

    Links to my previous set can be found here. This bag is one of my all time favorite sewing projects! It turned out perfectly, was super functional and nice and big. I used it as a diaper bag as well.

    School Supplies Tote for Classroom Organization

    July 15, 2014 By Brandy 9 Comments

    Fill an inexpensive tote with school supplies that your child needs for the new school year! Label it with the grade level and give to the teacher as a way to organize the classroom and deliver school supplies at the same time! This post brought to you by Dollar General.

    tote with school stupples

    As much as I don't want to think about it, the summer is winding down and school will be starting before we know it. And with that comes back to school shopping!

    Every state does school supply lists differently. When we lived in Ohio, we'd pick up the class supply lists before school started and bring all of the necessary supplies the first day of school. They usually ran about $30 per child. We also paid $40 in fees per child for books, etc.

    When we moved to California I was very surprised to not have a single class list. They sent home classroom wish lists, but didn't require parents to purchase items.  I believe it is because of a law recently passed to that affect, but I know that this can place a burden on the teachers to make sure their budget covers absolutely everything.

    tote of school supplies for first grade

    So instead of going school shopping for the kids like I've been accustomed to in the past, we went classroom shopping.

    School Supplies Tote for Classroom Organization

    I put together a tote for each of the kid's classrooms filled with items that may be useful the first week of school. Things that have been on wish lists I've received in the past.

    tote of school supplies for first and fifth grade

    I was able to create 3 totes for about $50.

    Each tote included:

    Antibacterial Wipes,

    Kleenex

    Antibacterial gel

    Highlighters, markers or pens

    Dum Dums (just for fun!)

    Stickers

    Paper Clips

    Post It Notes

    Glue sticks

    Tote

    I used my cricut to cut out vinyl to label each tote with the grade that the kids will be in this year. I still plan on contributing to each teacher's classroom wish list, but I think we have a nice head start!

    little girl holding school supplies tote

    Can you think of anything I may have missed?

    Here's a great idea from 30 Handmade Days! School binders with printables! A fun way to document each school year!

    You might also like...

    back to school gift basket

    Teaching is a Messy Job Printable and Gift Idea

    hand sanitizer with printable tag

    "Call Me if You Need a Hand"


    Grilled Chicken & Bell Peppers

    July 14, 2014 By Brandy Leave a Comment

    chopped chicken and peppers on grill

    My absolute favorite way to enjoy belle peppers is on the grill. They are absolutely delicious! Here is one of our family's staple meals. Healthy, full of flavor and fresh taste, and easy to prepare!  Serve it along side potatoes or inside of a warm torilla with some avocado. You can even serve it over steamed rice.

    bell peppers and onions

    For this recipe you will need bell peppers in whatever variety you like best. You will also need onions, 1 ½ c. soy sauce, 3 chicken breasts and McCormick Smokey Mesquite seasoning (optional, but we think it adds great flavor to the chicken)

    marinated chicken and chopped peppers

    Chop you peppers and onions into small cubes. Cube your chicken and marinate in soy sauce for 20 minutes.

    seasoning chicken with spices

    Right before grilling add whatever spice you like on your chicken.

    grill pan on bbq grill

    If you don't own a grill pan, you should! They are great for grilling veggies perfectly. Heat your grill pan on the grill for 5 minutes or so before adding your peppers and chicken.

    chicken and peppers on grill

    Place ingredients on grill pan and distribute into a nice even layer. Close the lid and let sit for at least 5 minutes before rotating. You want a nice good seer to allow juices to distribute before turning or messing with it.

    chicken and peppers on grill

    Toss and close lid again. Check periodically to make sure peppers aren't blackening too much. When you chicken is done and juices run clear, pull everything off of the grill.

    This is a great dish for leftovers as it reheats really well!

    30 Minute Easy Peasant Dress Pattern

    July 3, 2014 By Brandy 6 Comments

    Make a dress from start to finish in 30 minutes! Sound too good to be true? It's not. I've made over a dozen dresses from this easy  peasant dress pattern. Modify it for nightgowns, costumes or even peasant t-shirts. Long, quarter or short sleeved.

    4 dresses hanging on a fence

    I CAN NOT wait for this weekend! We are going to Disneyland with my sister and her family. 4 adults, 8 kids, 5 days of pure family time. We rented a condo for both families to share that is just down the street to maximize our playtime together. With us out here in California and my sister's family in Missouri, we only get to see each other every couple of years.

    4 peasant dresses on table


    And so with all that we have been planned this summer, what better idea than to sew up a peasant dress?

    Actually, let's make that 4 peasant dresses, haha!

    I'm so glad I squeezed in a morning for sewing last week because I really wanted to spoil my nieces. These dresses are so easy to make. It's pretty much the only pattern I've been using for my girls. Definitely worth buying from Whimsy Couture and keeping in your stash. In less than 2 hours I had 4 darling peasant dresses. 2 for my girls and 2 for my nieces. It will be so fun to see them running around together and wearing these on Sunday!

    4 peasant pocket dresses for little girls

    Easy Peasant Dress Pattern: Peasant Dress from Whimsy Couture

    Fabrics: purchased from Walmart ($3-$4 yard!)

    kids sewing book
    For 60 more sewing projects, check out my sewing book for kids!

    You might also like...

    princess aprons for little girls

    FREE 8 in 1 Princess Apron Pattern

    Use our 8 in 1 princess apron pattern and tutorial to create any number of Disney princesses! Anna, Elsa, Ariel, Cinderella (2 versions!), Snow White, Belle, and Aurora. This easy to follow pattern and tutorial is free and the perfect gift for your little girl!

    double sided tissue holder

    Double Sided Tissue Holder

    A two-sided tissue holder pouch is perfect for cold and flu season. One side can hold a pack of tissues, the other side can hold a mini bottle of sanitizer and a lip gloss!

    Fresh Cherry Cookie Bars

    June 27, 2014 By Brandy 1 Comment


    These fresh cherry cookie bars are made with a cake mix cookie dough. Easy to work with, semi-homemade, and full of fresh cherry filling. You can certainly  use canned pie filling, but fresh pie filling is to die for and since we had a bucket of cherries to use up that is the route I took. Switch it up and use any seasonal fruit! My husband's favorite cake mix (actually the only one he will eat!) is cherry chip. So that's what I used, but yellow or white would work too.

    Fresh Cherry Cookie Bars

    Crust:

    1 box cake mix

    ½ c. softened butter

    2 eggs

    1 c. flour

    Filling: (can also substitute 2 cans cherry pie filling)

    4 c. fresh cherries, pitted

    ¼ c. water

    1 ½ T. lemon juice

    ⅓ c. sugar

    3 T. corn starch

    ¼ tsp. almond extract

    Icing:

    1 c. powdered sugar

    2 T. milk

    ¼ tsp. vanilla

    1 tsp. butter


    Mix all ingredients in a bowl until dough forms. Press ⅔ of the dough into an ungreased 9x13 baking pan, pressing evenly. Set remaining dough to the side.  Pierce dough in pan with a fork. Bake at 350 degrees for 10 minutes.

    Meanwhile, heat cherries and all of the filling ingredients in a medium sauce pan. Bring to a boil, while stirring. Reduce heat to low and simmer for 10 minutes, stirring frequently.

    Pour cherry filling over the crust.

    Roll out remaining dough ¼" thick and cut with cookie cutters (any shape!).

    Lay the cutouts on top of the filling in any pattern you'd like.  Bake at 350 degrees for 15-18 minutes or until cookie cutouts on top are set.

    To make the icing: melt the butter and mix with the rest of the ingredients until creamy. Add milk 1 tsp. at a time until you achieve desired consistency. Drizzle over warm cookie bars.

    Cool and cut into bars.

    Serve with a glass of cold milk. These would be amazing with peaches too. I love this time of year!

    • « Previous Page
    • 1
    • …
    • 131
    • 132
    • 133
    • 134
    • 135
    • …
    • 156
    • Next Page »

    Welcome!

    I'm Brandy! I love to create and share my ideas through easy-to-follow recipes and tutorials.

    More about me

    As an Amazon Associate, I make a small commission on qualifying purchases.

    sew with me kids sewing book
    My Book

    Summer Posts

    • mini s'mores pie on white plate
      Mini S'Mores Pies
    • loaf pan with ice cream sandwiches stacked inside
      M&M Ice Cream Sandwiches Recipe (Video)
    • soda bottle sprinkler
      $1 Soda Bottle Sprinkler For Summer Fun
    • hand dipping chip into cowboy caviar
      Easy Cowboy Caviar Recipe
    See more Summer →

    Latest Posts

    • To Die For Blueberry Muffins
    • slab pie on white plate
      Peach Slab Pie
    • baba bar on spatula
      Frosted Banana Nut Bars
    • tray of baked cookies on parchment paper
      Martha-Stewart-Fired-Me Cookies

    Footer

    ↑ Back to Top

    About

    • Privacy Policy
    • Accessibility Policy

    Newsletter

    • Sign Up! for emails and updates

    Contact

    • Contact

    As an Amazon Associate, I earn from qualifying purchases.

    Copyright © 2025 Gluesticks Blog